Revised: 6/2021
Positive Pay is described by
the banking industry as “A cash-management service employed to deter check
fraud.” Banks use positive pay to match the checks issued by a company
with the checks presented for payment. Any check considered to be
potentially fraudulent is sent back to the issuer for examination.
Steps
to Create a Positive Pay File
1. Select General Ledger Processing
2. Select Check Reconciliation
3. Select the Check Group
4. Under Export Reconciliation Information, select Active Export Option (Positive Pay)

5. A new view will show the options for creating a Positive Pay File

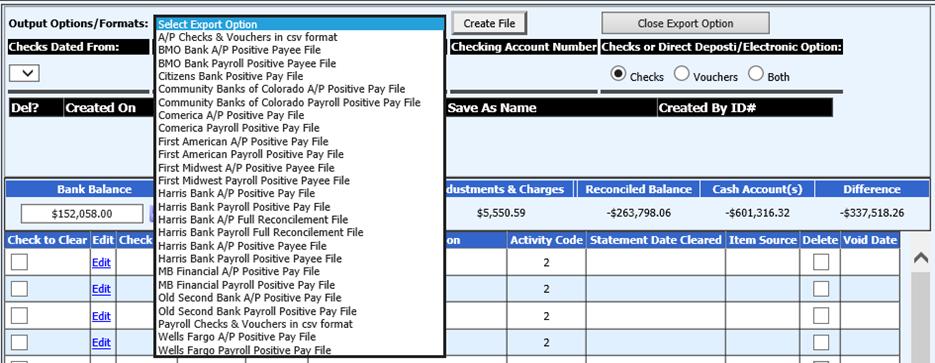
6. From the dropdown Output Options, select the Bank Layout for the Positive Pay file.
a. If your bank name is not in the list, select from one of the following default formats depending on the file creating.
i. A/P Checks & Vouchers in csv format
ii. Payroll Checks and Vouchers in csv format.

Note: If using a default format and your bank will not accept the file, contact SDS for assistance with setting up a custom format for your specific bank needs.
7. Verify the checkbox selections for “Include Header” and “Flip Payee Name”

•Include Header: The heading columns in file will be displayed in the file created.
•Flip Payee Name: The Vendor name will be reversed when the file is created.
•Only Un-Cleared: Select to include only “Un-cleared” checks.
8. Select the range for the check date and the check numbers (from and to) to be included in the file.
9. Select to include Checks, Vouchers, or Both
10. Enter in AP Bank Account #
11. Select Create File
12. When the File has been created, it will be displayed in the area below in the file specifications.

13. To save the file, right click on the file folder and select Save As. The File may be saved to a file name and location of your choice to upload to your bank
14. When completed with creating Positive Pay files, select “Close Export Option”