Revised: 4/2021
General Fund Data
1. Select Master File and Code Entry Options
2. Select Master File Vertical Data Entry and Changes
3. Entry Options: Budget Master (Basic Fields by ASN)
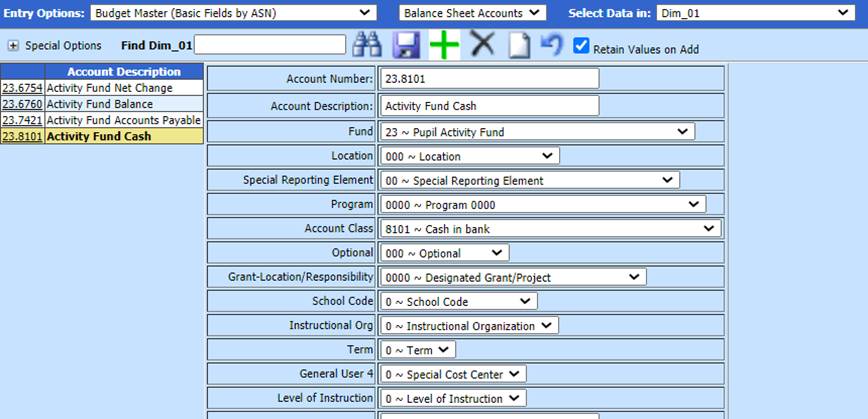
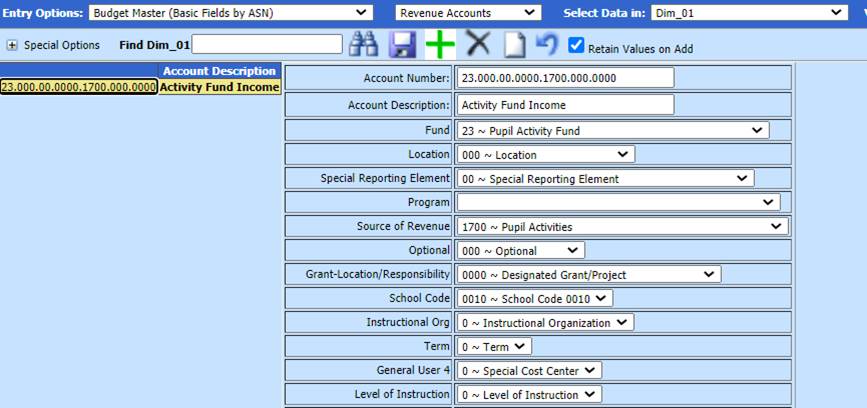
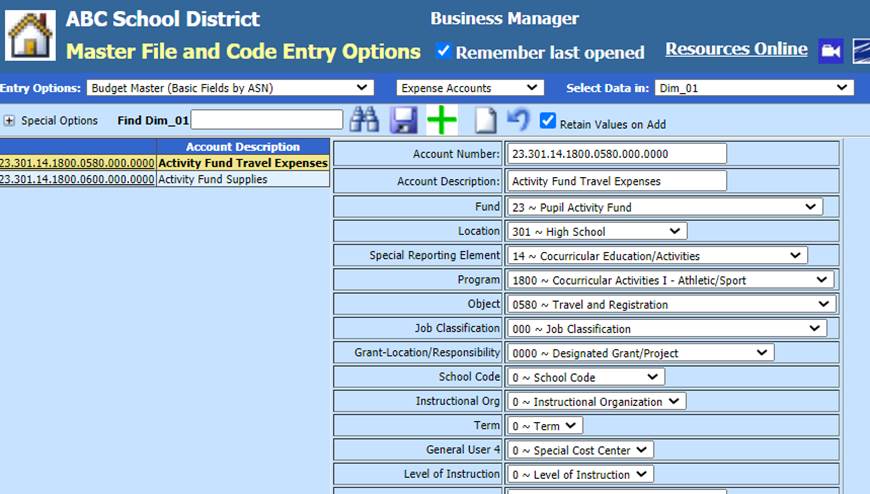
4. Setup/Verify Activity Accounts
a. Balance Sheet

b. Revenue Accounts
c. Expense Accounts
Student Activity Data
To activate the transfer process from Student Activity and General Fund Data:
1. Select Administrative Utilities
2. Select SDS Web Office Settings
3. Select Finance tab
a. Secondary Summary CR and DR posting – Activate: Change to “Y”

b. Select Save Changes

4. Logout and log back in
Assign Debit and Credit accounts from General Fund Data to Activity codes
1. Select Master File and Code Entry Options
2. Select Master File Vertical Data Entry and Changes
3. Entry Options: Budget Master (Due to Due from OT)
4. Select Activity Account
a. Update Account Number Dr: update with Revenue or Expense account setup in General Fund Data
b. Account Number Cr: update with Cash account setup in General Fund Data
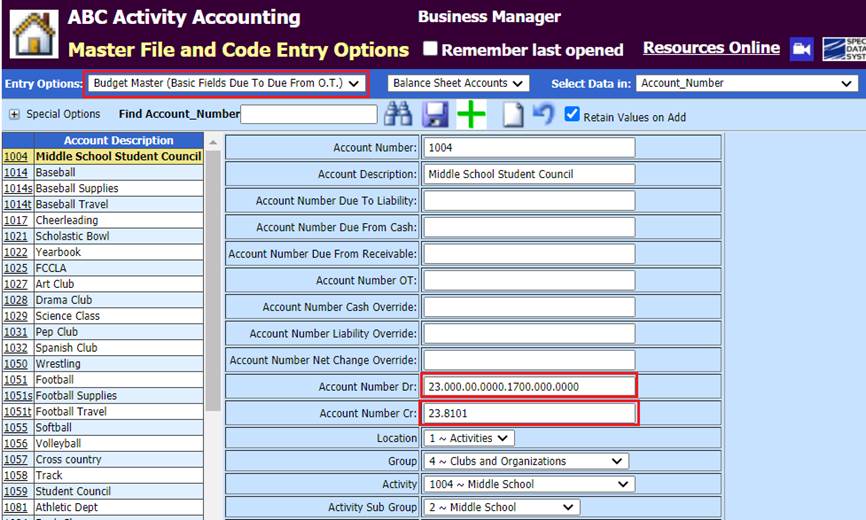
c. Select Save

Using multiple Activity accounts to track specific Expenses or Revenues
1. Select Master File and Code Entry Options
2. Select Master File Vertical Data Entry and Changes
3. Entry Options: Budget Master (Due to Due from OT)
4. Select Activity Account (i.e. 1014 – Baseball)
a. Update Account Number Dr: update with Revenue or Expense account setup in General Fund Data
b. Account Number Cr: update with Cash account setup in General Fund Data
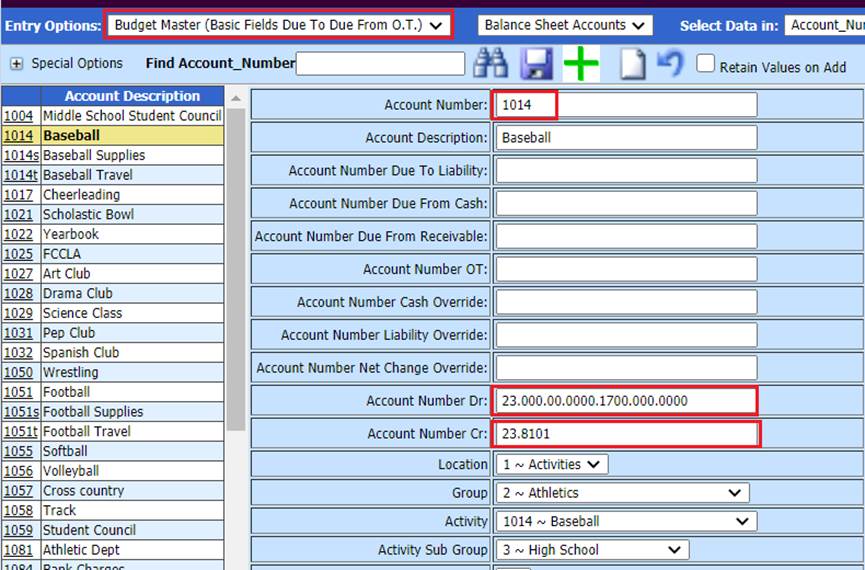
5. Select Save
6. Select or Add new sub account (i.e. 1014s – Baseball Supplies)
a. Account Number Net Change Override: update with main Activity code (i.e. 1014, this will post to Baseball main account)
b. Account Number Dr: update with Revenue or Expense account setup in General Fund Data
c. Account Number Cr: update with Cash account setup in General Fund Data
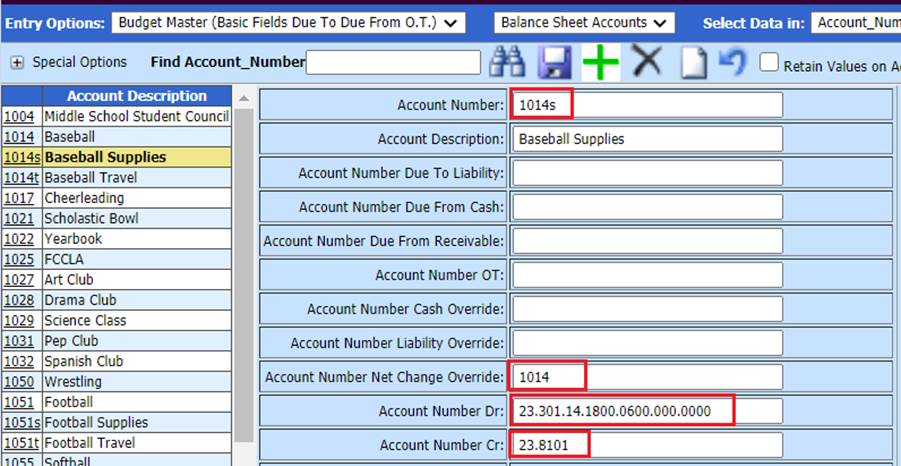
7. Select Save
8. Continue adding Activity Sub accounts, as needed
Accounts Payable, Cash Receipts and Journal Entries transfer to General Fund
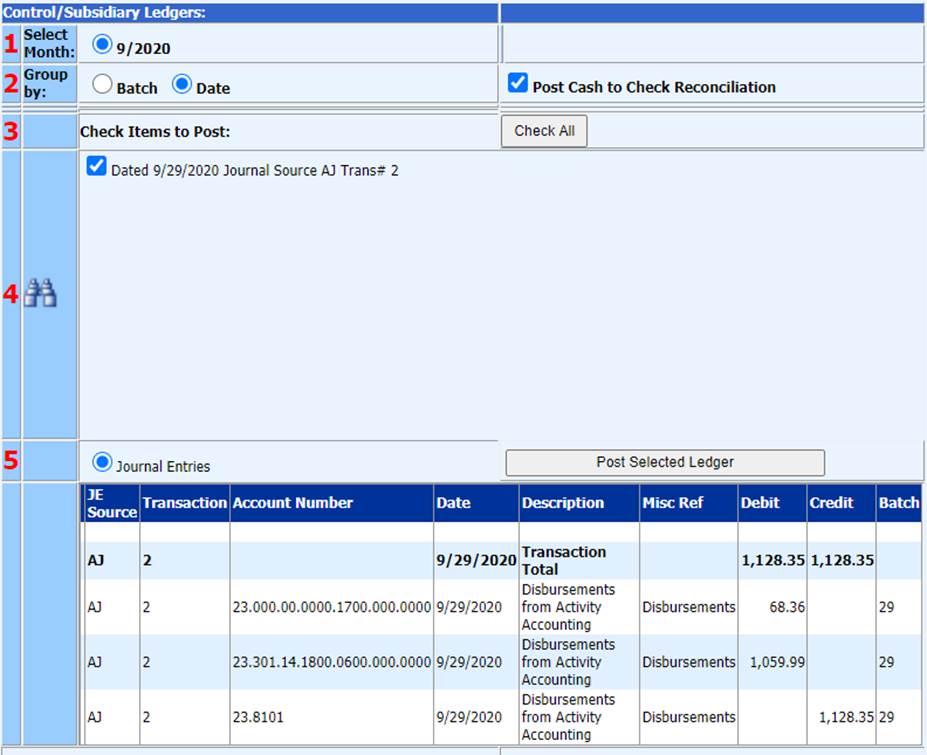
Follow normal processes for data entry of all transactions for Accounts Payable, Cash Receipts and Journal Entries. Upon posting entries permanent, this will create a journal entry within the General Fund data.
Accounts Payable, Cash Receipts, Journal Entries:
1. Enter and complete transaction entry
2. Make items Permanent
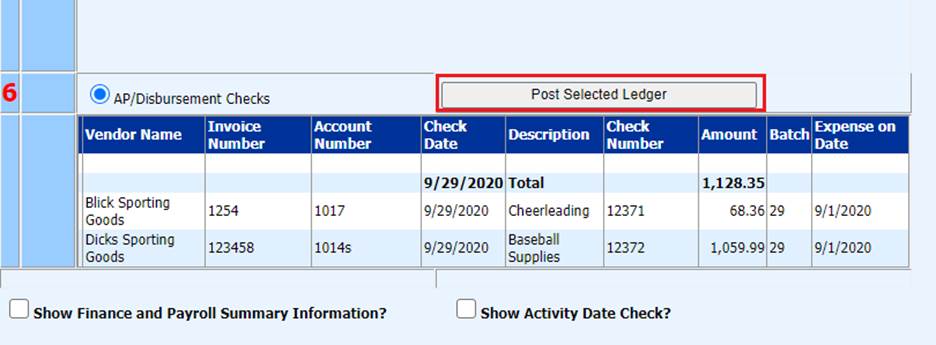
a. Upon Post Selected Ledger, the journal entry will be automatically posted in General Fund Data
3. Verify the transaction has been added from Activity Data.
4. Select General Fund Data
5. Select General Ledger Processing and Entry Options
6. Select Ledger Transaction Entry and Changes
a. Transactions: Select last transaction posted
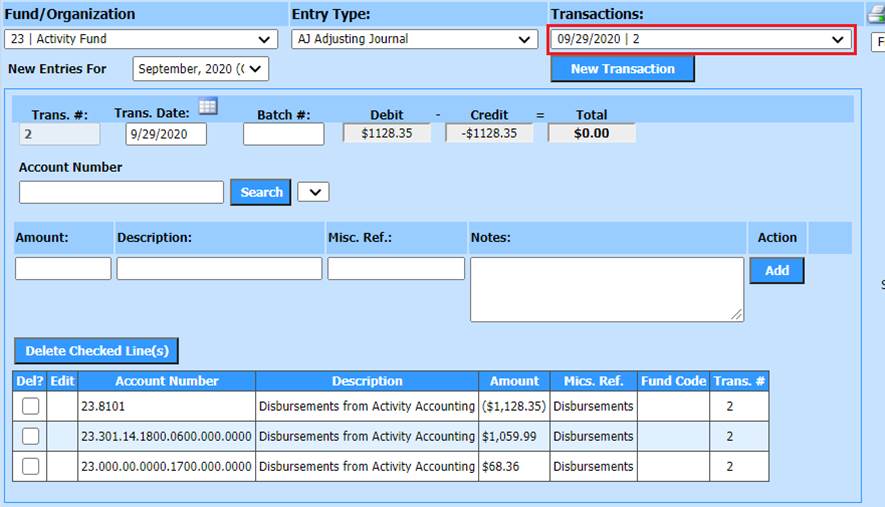
b. Preview/Print Financial Activity Report


7. Make New Transaction Permanent
