Revised: 6/2021
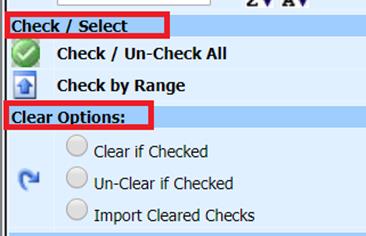
To clear checks, deposits or journal entries, the two options of “Check / Select” and “Clear Options” work together. There are a multiple options to clear items on the display screen.

Option 1: Clearing items one at a time
1. Place a check mark on the item(s) to be cleared by clicking on the box in the column “Check to Clear”.

2. After marking the items to clear, select
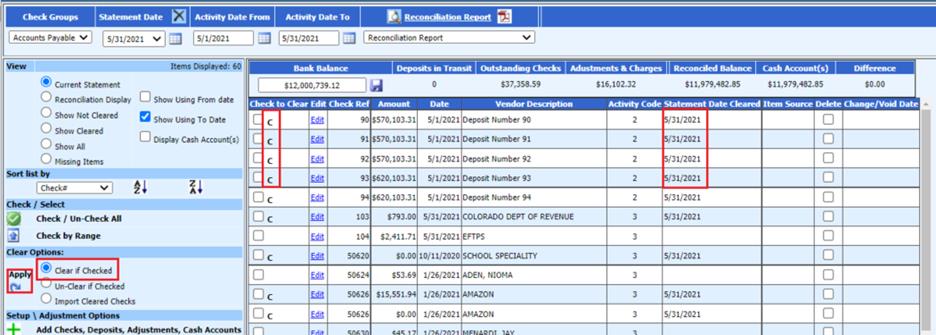
the “Clear if Checked” bullet and then select the apply arrow button  . This will place a “C” for cleared
next to the marked items. The system will also fill in the “Statement Date
Cleared” column with the date of the statement you are reconciling.

Option 2: Clearing items using the Check / Un-Check All
1. To clear all of the items in the check group, select the green check mark labeled “Check / Un-Check All.” This will place a check mark in the column “Check to Clear” for all items in the display view.

2. If some of the items do not need to be cleared, you can deselect those. This process can be faster than selecting items one at a time.

3. Once the
items have been marked to clear, select the “Clear if Checked” bullet and select
the apply arrow button  .
This will place a “C” for cleared next to the marked items. The system
will also fill in the “Statement Date Cleared” column with the date of the
statement you are reconciling.

Option 3: Clearing items by Range
1. If you have a group of items that have cleared the bank, use the “Check by Range” option. Select the first item in the group and then the last item in the group that is to be cleared. Select the “Check by Range” arrow. This will mark all of the checks within the range.

2. Once the
items have been marked to clear, select the “Clear if Checked” bullet and select
the apply arrow button  .
This will place a “C” for cleared next to the marked items. The system
will also complete the “Statement Date Cleared” column with the date of the
statement you are reconciling.
