Revision: 5/2023
The instructions for the Fiscal Year End process are listed in basic and detailed format. You can use the basic format as a check list to complete each process. The detail instructions will cover where to go in the program and also shows screen shots for each step.
Basic Processing Instructions Format
1. Complete June Transactions
2. Transfer payroll and pay the liabilities
3. Make sure all entries are made Permanent
a. Accounts Payable
b. Cash Receipts
c. Journal Entries
4. Complete month end balancing
5. Run monthly reports
6. Print FY23 General Accounting Reports
a. Accounts Payable (Bills) group: Check Register
b. Accounts Payable (Bills) group: Paid Accounts Payable by Vendor
c. Vendor and Order for group: Vendor Detail Report
d. Vendor and Order for group: Vendor Publication
e. Finance Activity group: Cash Receipt Edit List
f. Finance Activity group: Transaction Balance Report All Transactions
7. Print FY23 Financial Reports
a. _Balance Sheet (BF)
b. Detail Ledger (could also be called a Trial Balance)
c. Expenditure Report Detail
d. Balance Sheet Report Detail
e. Revenue Sheet Report Detail
8. Review SDS Web Office Settings (if needed)
9. Change Finance Month to July
10. Verify July 2023 Balance sheet, BF figures are correct
11. Move Next Year POs to Current Year
12. Move Next Years Budget to Current Year
Detail Processing Instructions Format
1. Complete June Transactions. Process the accounts payable invoices, cash receipts, journal entries & payrolls that need to post to the current fiscal year.
2. Transfer Payrolls and Pay the Liabilities
3. Make all types of Accounts Payable Entries Permanent.
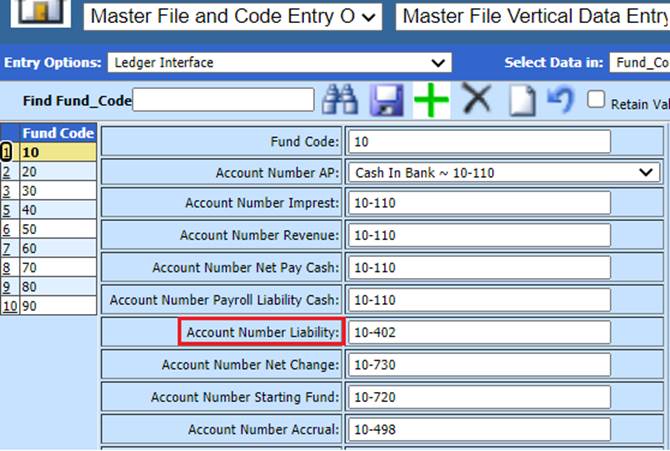
You can enter invoices that you want to apply in the current fiscal year, then date and print the check in the new fiscal year. For those items, the program will post the debit (+) to the expense or liability account used and credit (-) them to the ledger interface “Account Number Liability” account until the payment is processed. When these invoices are paid and made permanent, a credit (-) will post to cash for the month the check is dated.

See below link for more information on posting Accounts Payable entries:
http://help.schooloffice.com/financehelp/#!Documents/makecheckspermanentposttoledger.htm
4. Make all Cash Receipt Entries Permanent.
See below link for more information on posting Cash Receipt entries:
http://help.schooloffice.com/financehelp/#!Documents/makecashreceiptspermanent.htm
5. Make all Transactions Permanent.
See below link for more information on posting Journal Entries:
http://help.schooloffice.com/financehelp/#!Documents/makenewtransactionspermanent.htm
6. Run Monthly Reports.
7. Complete Month End Balancing.
8. Run FY23 Reports in General Accounting Reports area. There are several reports that can be printed for the fiscal year. A list of reports that you may wish to review is listed below:
a. Accounts Payable (Bills) group: Check Register
b. Accounts Payable (Bills) group: Paid Accounts Payable by Vendor
c. Vendor and Order for group: Vendor Detail Report
d. Vendor and Order for group: Vendor Publication
e. Finance Activity group: Cash Receipt Edit List
f. Finance Activity group: Transaction Balance Report All Transactions
9. Print FY23 Reports in Financial Reports area. As you prepare to move to the next Fiscal Year, and get information ready for your auditor, here are some suggested reports to process.
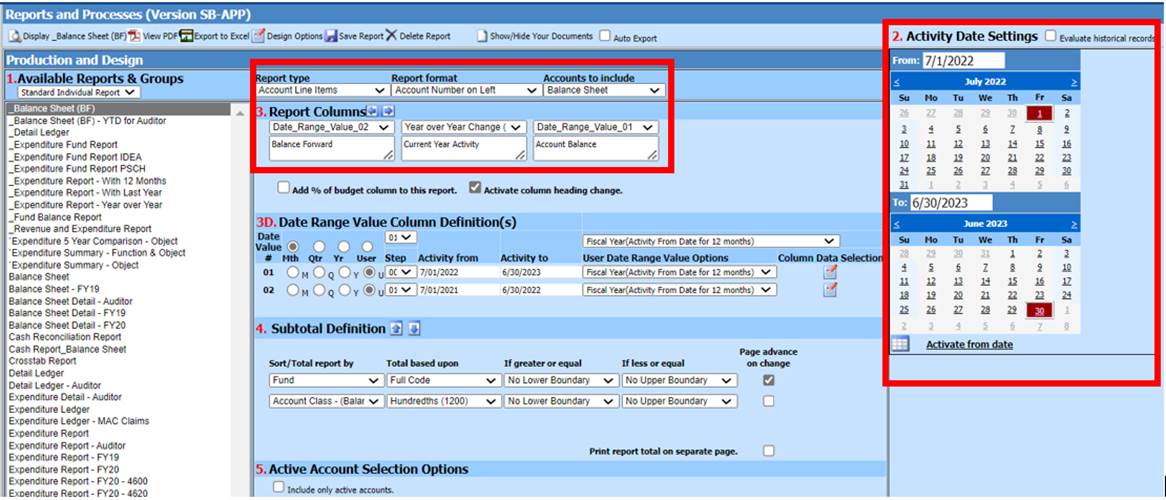
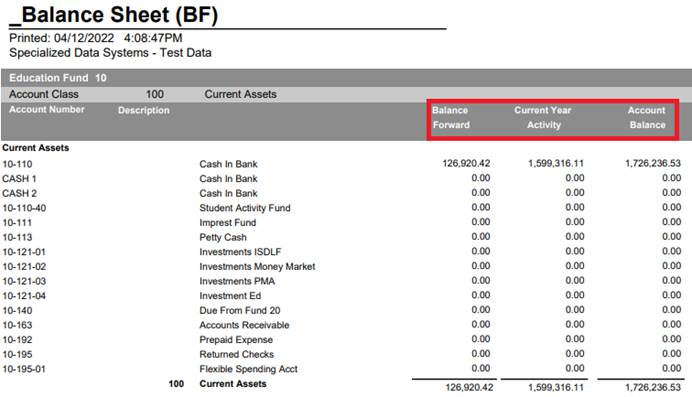
a. _Balance Sheet (BF) - (If you don’t have this report on the list, select Design Options and choose 8 Standard Reports in the Save Report Definition area)

This report has three columns just like the monthly Balance Sheet report. The difference with this report is the first column is the start of the fiscal year. The second column is the activity for the entire year and the third is the balance at the end of the finance fiscal year.
When the _Balance Sheet (BF) is selected, the dates are set for the current fiscal year.
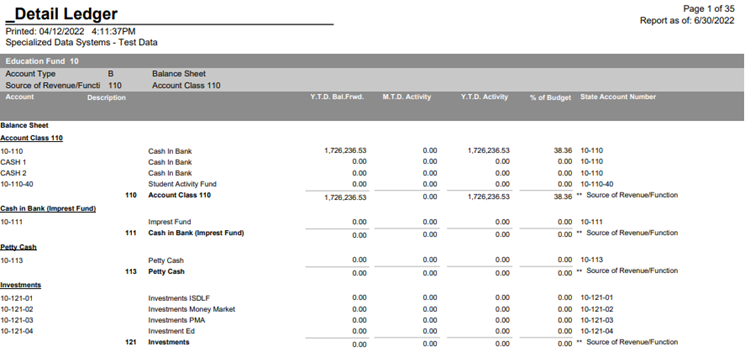
b. Detail Ledger (could also be called a Trial Balance) This report will show the Balance Sheet, Revenue, and Expense accounts in one report.
c. Expenditure Report Detail for the fiscal year
d. Balance Sheet Report Detail for the fiscal year
e. Revenue Sheet Report Detail for the fiscal year
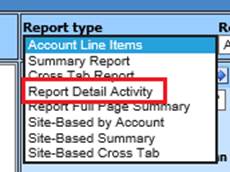
Select the report type “Report Detail Activity” to show all the detail for the year.
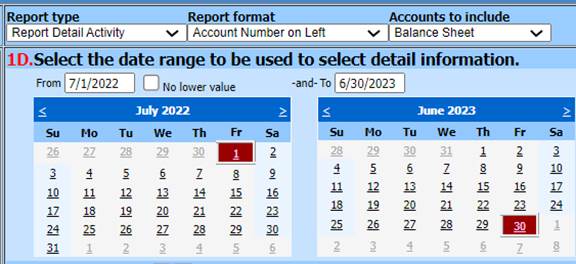
When this option is selected, a set of calendars will appear. Set the dates to 7/1/2022 and 6/30/2023 and you will get the detail for the entire year.
f. Excel reports for the auditor. Any of the financial reports can be exported to excel. Select the report and choose the “Export to Excel” option on the “Finance Reports” screen.


10. SDS Web Office Settings: Select Administrative Utilities | SDS Web Office Settings and review these selections in the Finance section.
a. Use Override Account to post Net Fund Change to Fund balance at year end

When using Net Fund Change Overrides on your accounts, change this setting to a Y so that it uses the override accounts instead of what is in the ledger interface.
If you are unsure if overrides are used:
i. Select Master File Code Entry Options
ii. Select Master File Horizontal Data Changes
iii. Entry Options: Select Budget Master (Basic Fields Due to Due from O.T.)
iv. Account Number Net Change Override field would have an account number listed.

b. Update Fund Balance Last (Y) or First (N) day of the year
i. If you want the Net Fund Change accounts to post to the Beginning Fund Balance on 7/1/22, select N.

ii. If you want the posting to be on 6/30/23, set this to a Y along with a Y for the option below it.

Reference to the Net Fund Change merging with the Fund Balance
The Net Fund Change account is the difference of your expenses and revenues. Here is an example of the fund accounts at the end of June:

When you move into July the Net Fund Change merges with the Fund Balance you started with on 7/1/2022 This creates the starting fund balance for 7/1/2023.

11. Change the Financial Month to July
a. Select General Ledger Processing and Entry Options
b. Select Financial Month and Auditor Control Options
c. Select the drop down to “Change the Accounting Default Month.”
d. Select July 2023
e. Select “Change Accounting Month.”
i. The system will move the finance month from June to July.

What Happens when you move from June to July to start a new Fiscal Year?
•An archive copy of the database is created
•The expense and revenue year to dates go to zero
•The dollar amounts in the Adopted Operating Budget populate the Last Year Budget field and all prior year budgets move
•The Net Fund Change merges with the Fund Balance
First Steps to Take in Fiscal Year 2023 (see next section)
First Steps to Take in Fiscal Year 2023
1. Run a Balance Sheet to check balance forward figures in the first column. They should be the same as the YTD Activity column 6/30/2023 balance sheet.


2. Move Next Year POs to Current Year. To move the Purchase orders that were processed as “Next Year Purchase Orders” to the current year, navigate to General Ledger Processing and Entry Options | Financial Month and Auditor Control Options. Select the button “Move POs to Current.” This will change the flag setting on the purchase orders from an “N” for next year to a “C” for current year.

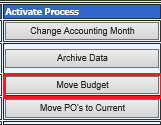
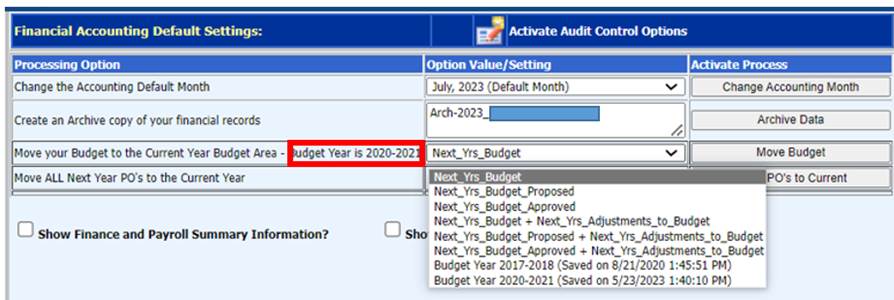
3. Move Next Year’s Budget to Current Year. If you have fiscal year 2023 figures in a next year budget field, those dollars need to be moved from the next year field to the “Current Adopted Operating Budget.” To accomplish this, select General Ledger Processing and Entry Options | Financial Month and Auditor Conrol. Select the drop down by “Move your Next Year Budget to the Current Year Budget Area.” Select which of the Next Year Budget fields the data is in, and then select the “Move Budget” button.

NOTE: If the “Move your Budget to the Current Year Budget Area – Budget Year is 2023-2024” has a different fiscal year,i.e. 2020-2021, it is because this option was not used last year. That is not a problem. If you use this to move the budget, it will change the fiscal year reference, if not, it will remain unchanged. This does not affect your accounting; it is only a reference.
4. Posting Audit Adjustments after closing the Finance Fiscal Year. After the audit is complete, there may be a few audit adjustments to be posted into the prior fiscal year. To post those entries, select General Ledger Processing and Entry Options| Ledger Transaction Entry and Changes
a. Select the Fund for the entry and the journal source.
b. Under the “New Entries will be recorded for” select the Month dropdown and select “Activate All.” Select the same dropdown and choose the month for which you want to process a journal entry. After selecting the prior month, the first drop down will automatically change to “Prior Month.”
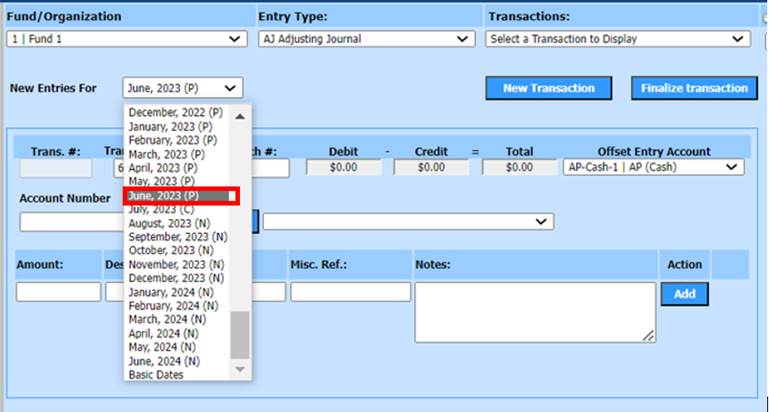
c. Enter 6/30/2023 as the transaction date and process the journal entry.
http://help.schooloffice.com/financehelp/#!Documents/ledgertransactionsentryandchanges.htm
When the journal entry is made permanent, it will post to June and adjust the 7/1/22 balances that are affected by the entry.
Running Corrected June Reports:
Reports/Financial Reports
Re-run these 3 reports for June 2023:
•Balance Sheet
•Revenue Report
•Expenditure Report
Upon entry of audit adjustments into the prior fiscal year, you will need to re-run all Financial Reports for any financial month that has been completed at that point in time.