Revised: 5/2021
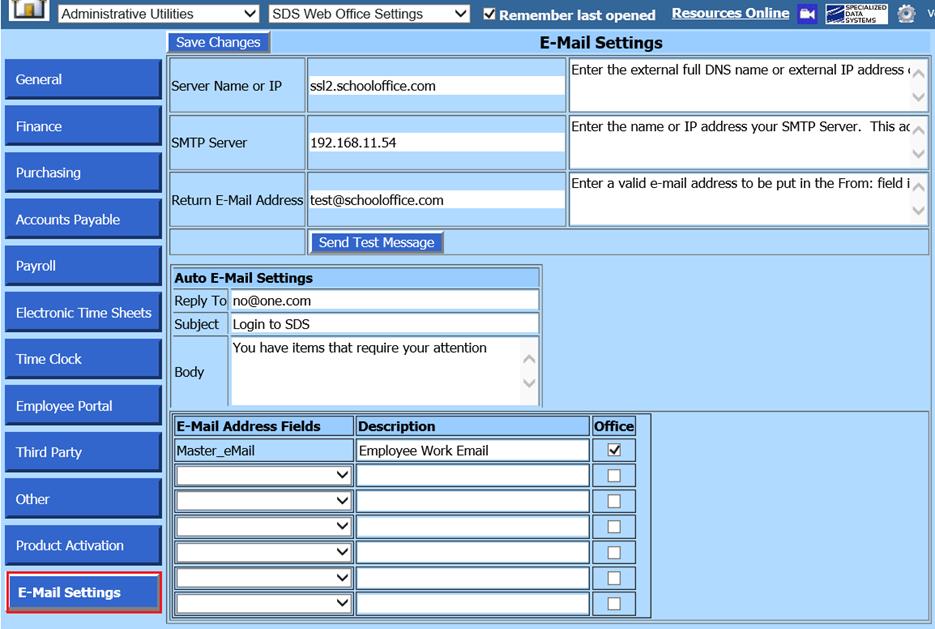
These settings are used when sending email messages from within the SDS Message Center.
1. Select Administrative Utilities
2. Select SDS Web Office Settings
3. Select E-Mail Settings

•Save Changes: Select Save Changes to save any changes to these fields.
•Server Name or IP: Enter the external full DNS name or external IP address of the SDS Web Office Server. This address will be used in some applications to give users external access to Web Office.
•SMTP Server: Enter the name or IP address of your SMTP Server. This address will be used by SDS Web Office to send emails. Make sure the SDS Web Office Server has permissions to relay email through this server
•Return Email Address: Enter a valid email address to be put in the “From” field in the sent email.
•Send Test Message: Once you have completed the fields, select “Send Test Message” to verify receipt of email delivery.

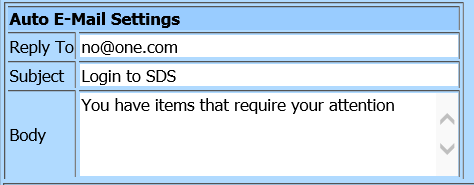
•Auto E-mail Settings: This field is the email notification that staff will receive when they have an item that requires their attention. You can adjust the Subject and Body, as needed.
•E-Mail Address Fields: For use with the Staff Email Communications Center, this area allows you to add additional email addresses for communications to be sent to employees.
For additional information regarding the Staff Email Communications Center process, see link below:
http://help.schooloffice.com/financehelp/#!Documents/staffemailcommunicationcenter.htm.

To add additional email fields to choose from, see link below:
http://help.schooloffice.com/FinanceHelp/#!Documents/addremovefields.htm
Once the additional email field is added, you will need to update the information in the Employee Master.
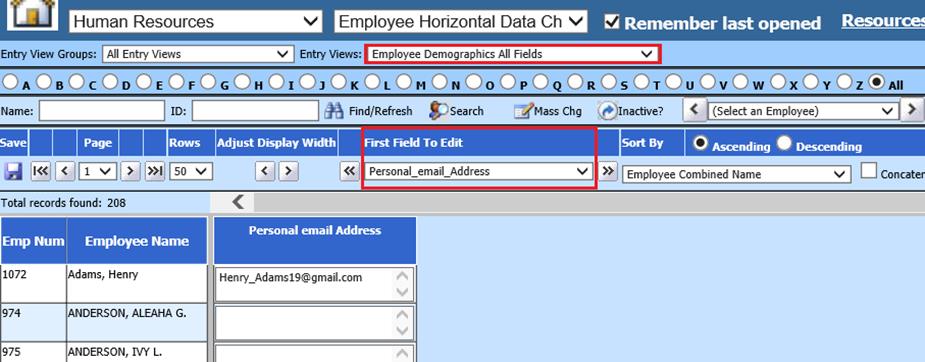
1. Select Human Resources or Payroll Processing
2. Select Employee Horizontal Data Changes
3. Select Employee Demographics All Fields
4. Use First Field to Edit to search out the new field added
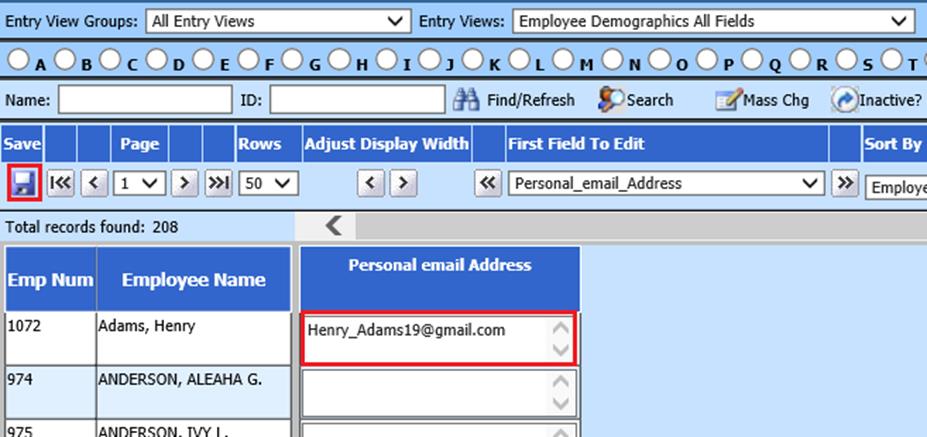
5. Update field and Save changes
6. Select Administrative Utilities
7. Select SDS Web Office Settings
8. Select Email Settings
9. This new field is available to use with the Staff Email Communications Center process.
10. Enter a description to identify which email can be used when sending to staff.
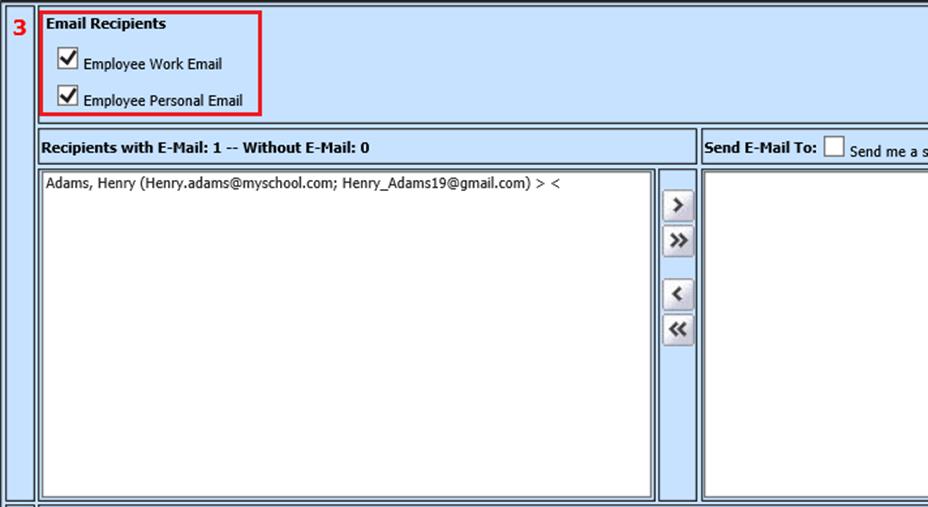
11. Place a check mark in email address(s) to send the Staff correspondence to.

12. Select Human Resources
13. Select Staff Email Communications Center
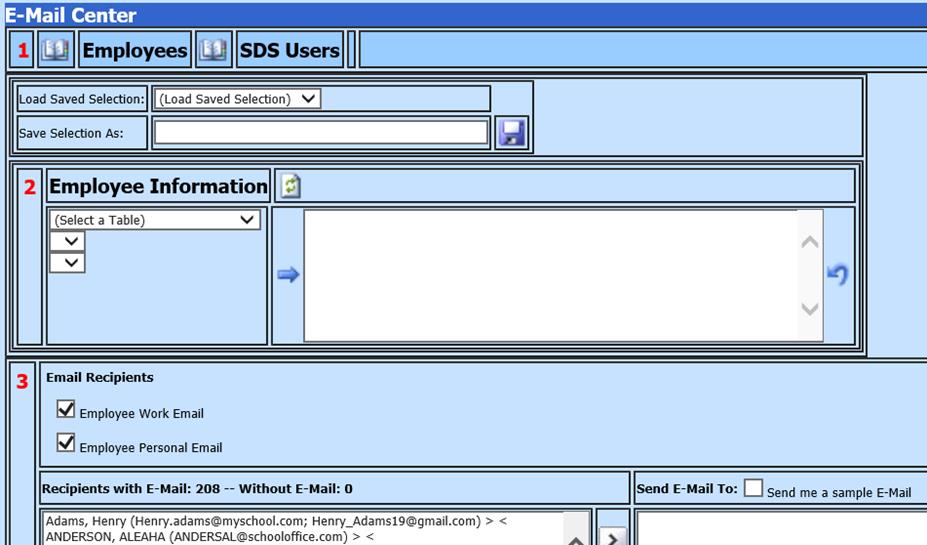
14. 1 Select Employees

15. 2 Select Employee Information to be emailed
16. 3 Place a check mark in the Email selection to send employee correspondence to.
For more detailed information regarding the Staff Email Communications Center process, see link below:
http://help.schooloffice.com/financehelp/#!Documents/staffemailcommunicationcenter.htm