Revised: 7/2020
After previewing a report from General Accounting Reports, it is possible to export the report to another format to do further processing with it. The steps are listed below.
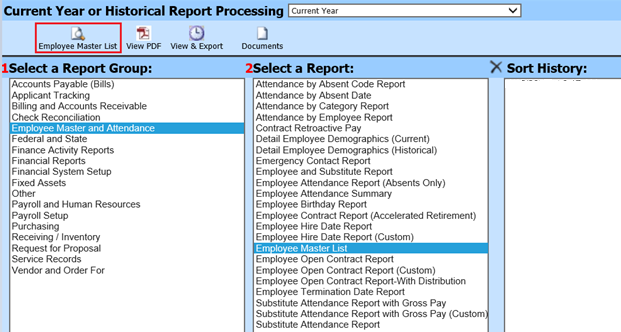
1. 1 Select a Report Group
2. 2 Select a Report

3. Click the magnifying glass to preview the report in Crystal report format.
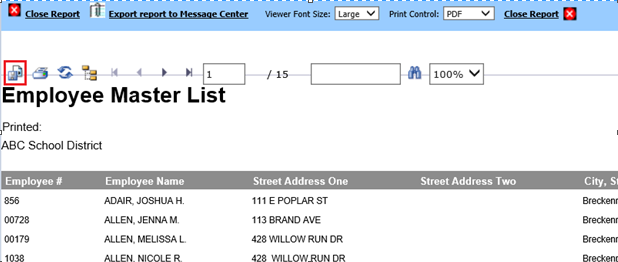
4. On the report preview screen, select the Export icon in the upper left corner

5. Select the type of export you desire.
a. Crystal Reports (RPT): this format will export the report to open in a third party program called Crystal Reports and allow you to edit the report to include/exclude more fields and sort the report in a different order. Training to do this is highly recommended.
b. Adobe Acrobat (PDF): this Portable Document Format (PDF) will export the report to open in a third party program called Adobe Reader or Adobe Acrobat and allow you to easily send it to another person or print it.
c. Microsoft Excel 97-2000 (XLS): this format will export that report to open in Excel, and all headings, page titles, will also be included in the export.
d. Microsoft Excel 97-2000 – Data only (XLS): this format will export the data fields and column headings only to Excel which allows you to do further processing, sorting, subtotals, mail merges, and more once the data is opened in Excel. This format is most commonly used.
e.
Microsoft Word (RTF): this format will export the report headings and
data to Word so that you could include it in a written report to be submitted to
a group for review. It also allows for editing where fields have wrapped
 when the data was too
long.
f. Microsoft Word – Editable (RTF): this format will export the report headings and data to Word and allows you to edit the data/headings if necessary.
g. Rich Text Format (RTF): this format works much like option E, but it works with other word processing software instead.
6. Select the page range to be exported.
7. Click OK.
8. You will be given the following options

a. Open: allows you to open the exported file in the appropriate export file type directly (i.e. Excel, Adobe, Word).
b. Save: has 3 options if you click the drop arrow
i. Save: save the file to your defaulted download area on your computer (i.e. downloads folder).
ii. Save As: save the file to your local computer or network drive that you specify.
iii. Save and Open: save the file to your defaulted download area on your computer (i.e. downloads folder) and open the file with the respective program.
c. Cancel: select this option if you don’t want to process the file at the moment.