Revised: 8/2021
The Gateway 100R Report creates a file to report
employees who earned wages for the year.
The file format is a .csv file
that reports the employee’s name, address of the district, employee title,
employee department/location and gross wages for the year.
•The employee’s title is retrieved from the employee master field called Title.
•The employee’s location is retrieved from the employee master field called School_Location.
•The employee’s gross wages are retrieved from the employee year to date detail history area using the date ranges entered on the screen.
To run the report, follow the steps below:
1. Select Payroll Processing
2. State and Federal Reporting
3. Select Indiana from the state dropdown
4. Select the 100R Report from the report dropdown

5. Complete the fields on the screen:


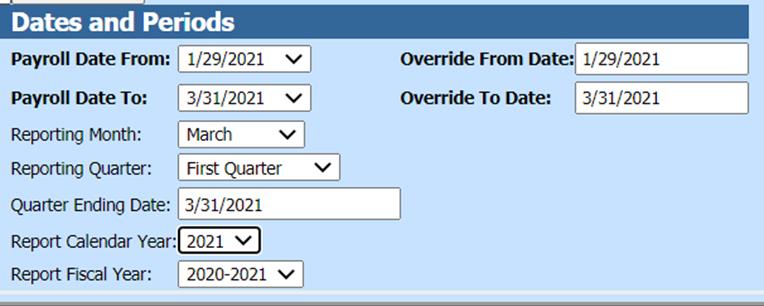
•Payroll Date From: select the earliest payroll in your reporting quarter.
•Payroll Date To: select the latest payroll in your reporting quarter.
•Reporting Month: select the month of your report.
•Reporting Quarter: select the quarter of your report.
•Quarter Ending Date: enter the ending date of your quarter.
•Report Calendar Year: select the correct calendar year.
•Report Fiscal Year: select the correct fiscal year.
•Override From Date and Override To Date: use only if necessary.
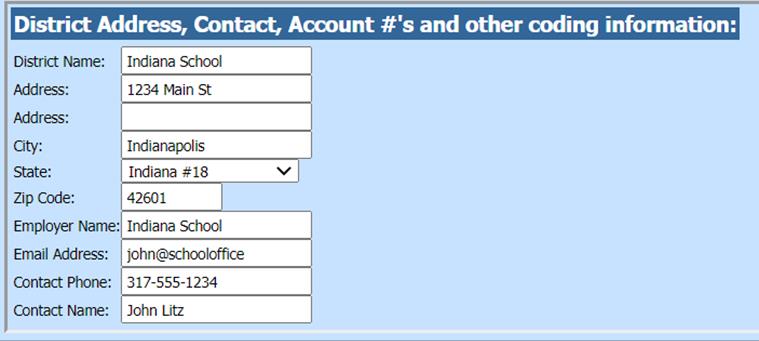
•District information: this information is completed from the information in the District Information table but update or complete as necessary.
6. Select Save Setup
7. To create the file, select the Create Report button. The file that is created will be listed at the top of the screen when first created.


8. To open the file to review, click on the yellow folder under the “Open” column.
9. To save the file to upload, right click on the folder and select “Save Target As.” Then save the file in a desired location on your computer.
10. The system will retain the files that have been created. These files can be viewed by selecting the “Show/Hide Historic Reports” button. All files created will have a date and time stamp on them for when they were created.

11. To delete any of the files, select the box under the “Del?” column and then select the “Delete” button.