Revised: 4/2021
The Manual Pay Entries and Adjustments option is used for recording extra pay, overtime pay, reimbursement pay, and payroll adjustments for the current pay period. After entry of all timecards for the pay period, the timecards will also be authorized for payment through this option. This option is also useful for viewing of attendance and contract records that are selected for payment in the current payroll.
Below will walk you through how to enter your time in manually.
1. Select Payroll Processing.
2. Select Manual Pay Entries and Adjustments.
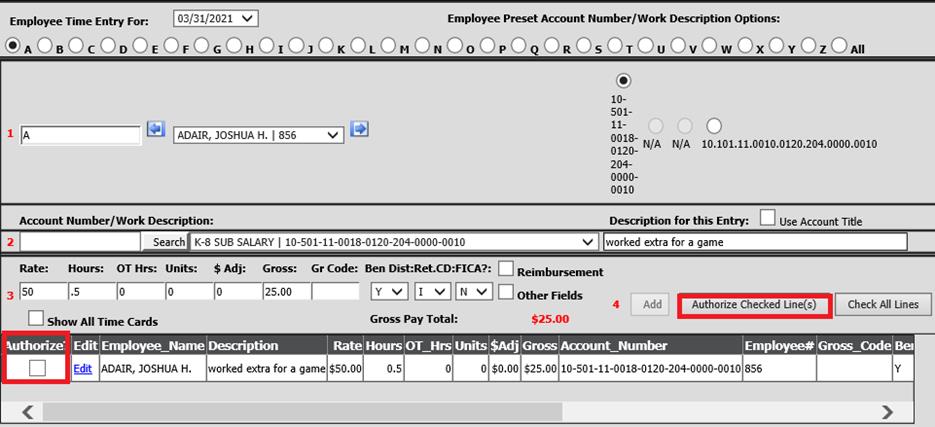
3. Select the alpha dot for the first letter of the employee’s last name.

4. In Number 1: Select the employee. If you have the account numbers completed in the employee master, those accounts will be displayed to the right of the employee name.

5. In Number 2: Enter the account number or search for the account number.

6. In Number 3: Enter the rate, hours, etc. as needed.

7. Select the
Number 4 button , (or enter) and the entry will be recorded.
8. Continue with entering the remainder of your manual time cards.
o At this point, it is suggested you verify your Payday Reports for accuracy. For Example:
§ Gross Pay by Employee
§ Gross Pay by Account
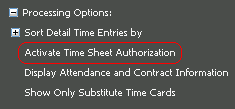
9. Once you have verified your entries: Select + Processing Options

10. Place a check in the Show all Time Cards, if you have more than 10 manual time card entries. Using this option, all time cards will be displayed to Authorize at once.
11. Select Activate Time Sheet Authorization. This process will authorize all time cards entered from a remote site or through attendance.

12. Select Check All Lines: This will place a check in the Authorize? Column in all entries. Or you can check each line one by one.
13. Select Authorize Checked Line(s).

Note: Time cards
that are incomplete will not be authorized. Use the Edit option to correct
missing information. If you did not select Show All Time Cards, repeat the
authorization process until all time cards are removed from this
screen.
Employee and Account Display Options
The Employee and Account
Display Options allow for entry for inactive employees, posting to non-expense
accounts and adjust your object range. 
Allow Entry for Inactive Employees
1. Select + next to Processing Options
2. Select + next to Employee and Account Display Options.
3. Select Allow Entry for Inactive Employees.
4. Your Employee Name dropdown will now populate with all employees, active and inactive.
5. To return to the active employees only displaying on the dropdown, Select + next to Employee and Account Display Options.
6. Select Allow Entry for Inactive Employees.
7. Your Employee Name dropdown will now populate with only active employees.
Allow Posting for a Non Expense Accounts
1. Select + next to Processing Options
2. Select + next to Employee and Account Display Options.
3. Select + Allow Posting for a Non-Expense Account.
4. The account drop down will populate with non-expense and expense accounts.
5. To return to the expense accounts only on the drop down, Select + next to Employee and Account Display Options
6. Select Allow Posting for a Non-Expense Account.
7. Your drop down will now be populated with only expense accounts.
Adjust Expense Account Object Code Restrictions
1. Select + next to Processing Options
2. Select + next to Employee and Account Display Options.
3. Select Adjust Expense Account Object Code Restrictions.
4. Enter restriction for the objects

5. To return to have no code restrictions, Select + next to Employee and Account Display Options.
6. Select Adjust Expense Account Object Code Restrictions.
7. You now have no code restrictions.
Processing
Options
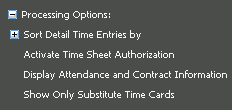
Processing Options allows you to sort time cards by
various categories, activates the time sheet authorization process and to see
time cards created from contracts. 
Sort Detail Time Entries by:
1. Select + next to Processing Options
2. Select + next to Sort Detail Time Entries by.
3. Select the category to sort by.

4. Your screen will display the time cards in the sort category selected.