Revised: 10/2020
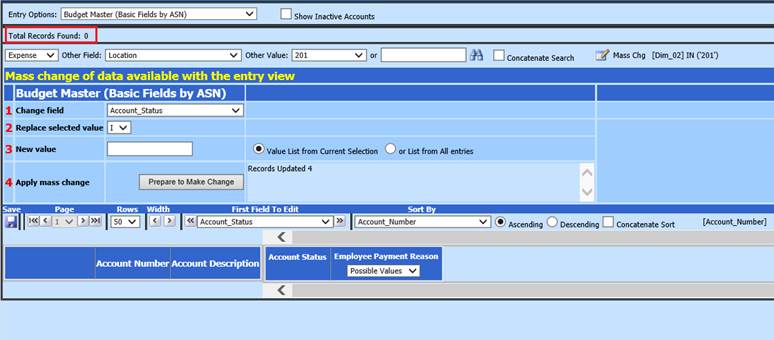
The Mass Change option allows the ability to change multiple items at once. This option is available for Finance and Payroll Master views. Using the searching or filtering process, you can limit items displayed and mass change a field for all items in the search.
1. Select Master File and Code Entry Options
2. Select Master File Horizontal Data Changes
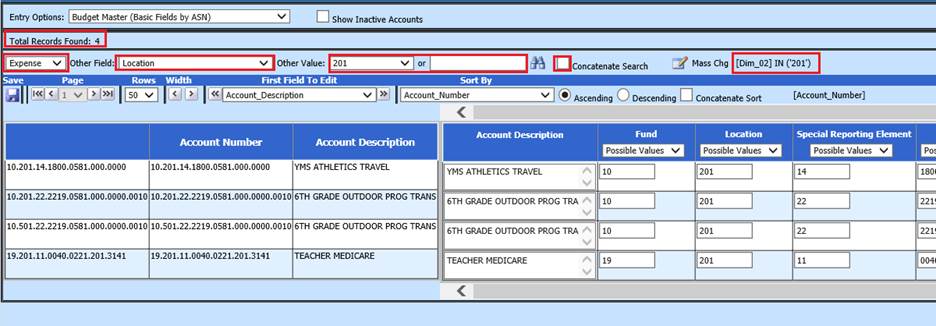
3. Entry Option Fields: Select Entry view i.e. Budget Master (Basic Fields by ASN)
a. Select Expense, Revenue or Balance Sheet.accounts
b. Show Inactive Accounts (Budget Master entry views only): Place a check in box to display inactive accounts, if needed
If searching or filtering specific accounts:
c. Other Fields: Dropdown lists all fields available in selected view for filtering or searching purposes.
d. Other Value: Dropdown lists all values in choosing Select Data in: field
i. Or blank space: enter part or all of search criteria
ii. Concatenate Search: Check this box to have more than one search criteria
e. The formula for selections will be listed on the right. i.e. (Dim_03) IN (‘201’)

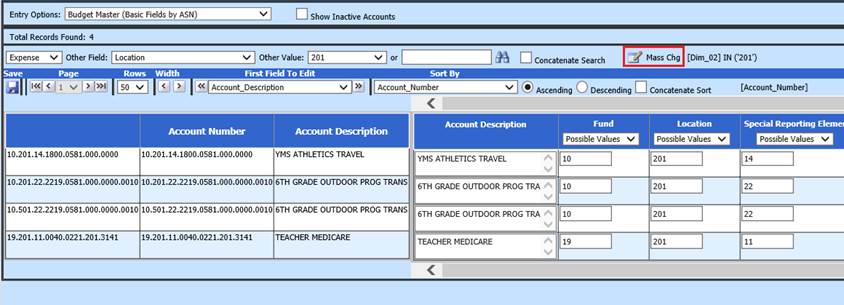
4. Select Mass Chg
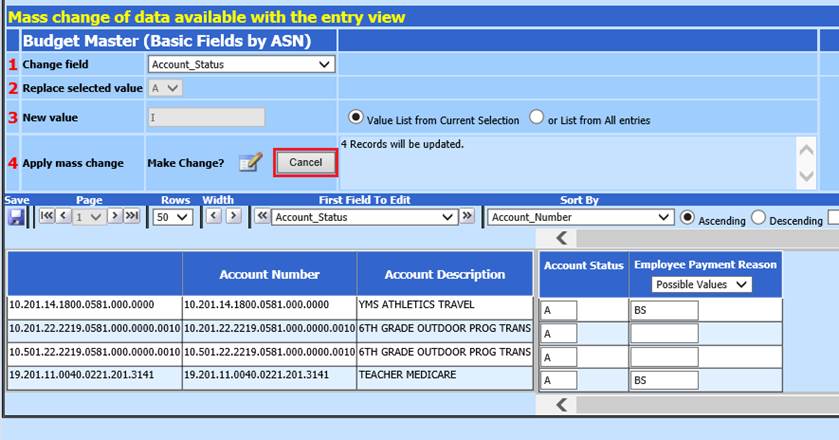
5. A new area will display “Mass change of data available with the entry view”

6. First Field to Edit: Used to display field to be changed next to “Account Description”

7. Select items for change:
a. 1 Change field: Select field to change
b. 2 Replace selected value: Select value to replace
c. 3 New value: Enter new value:
i. Value List from Current Selection
ii. Or List from All entries
d. 4 Apply mass change: Select “Prepare to Make Chage”
e. Verify items to be updated: The items will be displayed in formula box

f. Select Make Change?
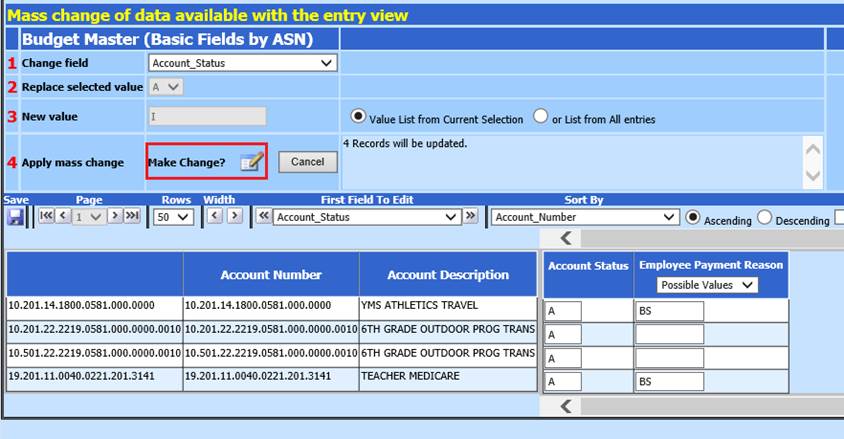
g. If you do not wish to proceed, Select Cancel
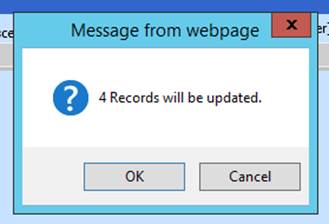
h. Select OK to Message from webpage
i. Records Updated
i. In example above, it is to inactivate accounts. No Active accounts are displayed after completing this process.
