Revised: 3/2021
Changing Account Numbers on a disbursement, after it has
been made permanent, can be completed for any month.
To activate this
option:
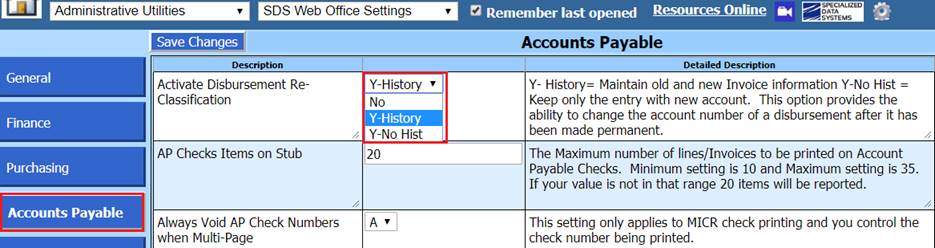
1. Select Administrative Utilities then select SDS Web Office Settings
2. Select the Accounts Payable section and find “Activate Disbursement Re-Classification“ there are three options:
o “No” Do not allow for account number changes to permanent disbursements.
o “Y-History” Allow for account change, preserve the original disbursement entry and the reversing entry.
o “Y-No Hist” Allow for account change, delete original disbursement entry
Note: If SDS Web Office setting was “Y-History”, all entries would remain. If it was set for Y_No Hist, only the new disbursement will show after making it permanent.
Once this process has been activated:
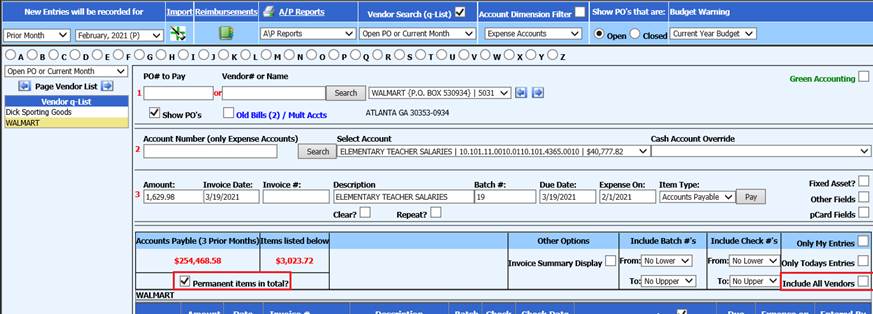
1. Select Accounts Payable
2. Select Disbursements/Accounts Payable Entry
3. Search for the entry that needs to be reclassified
o If the disbursement is in a prior month, select the down arrow next to the current Month/Year then select “Activate All”. Once selected a listing of prior months will appear for you to choose from

o Select “Permanent items in total?” to preview the invoices posted to the system. If searching for multiple vendors, verify Include “All Vendors” is checked.
4. Select the box next to “Account Number“
5. Re-classify will appear next to the invoices
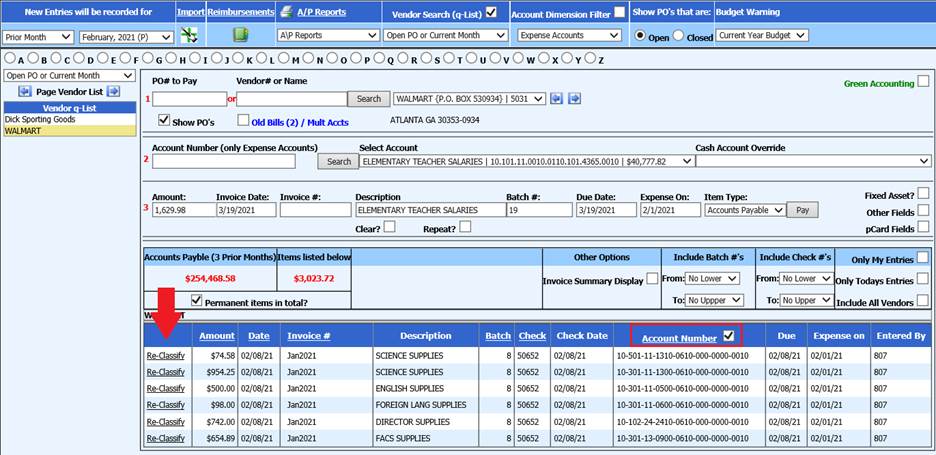
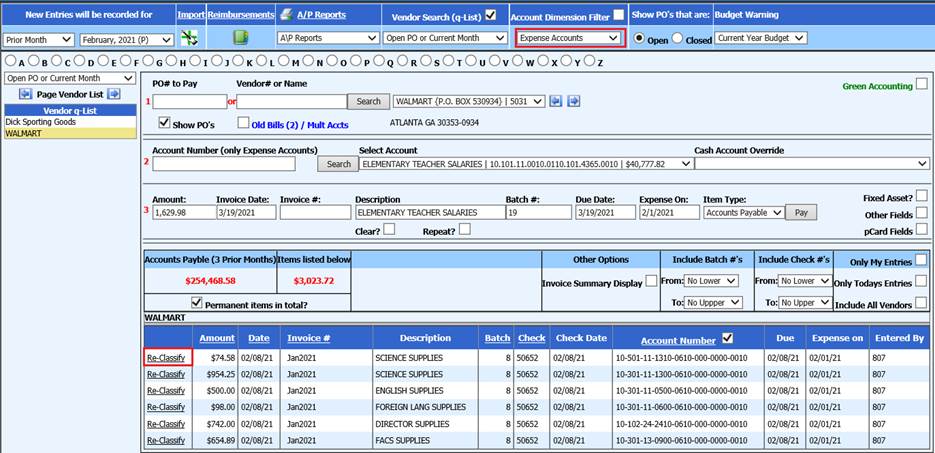
6. Select Account Type: Expense, Revenue or Balance Sheet Accounts

7. Select Re-Classify
8. 2 Enter/Select new account number
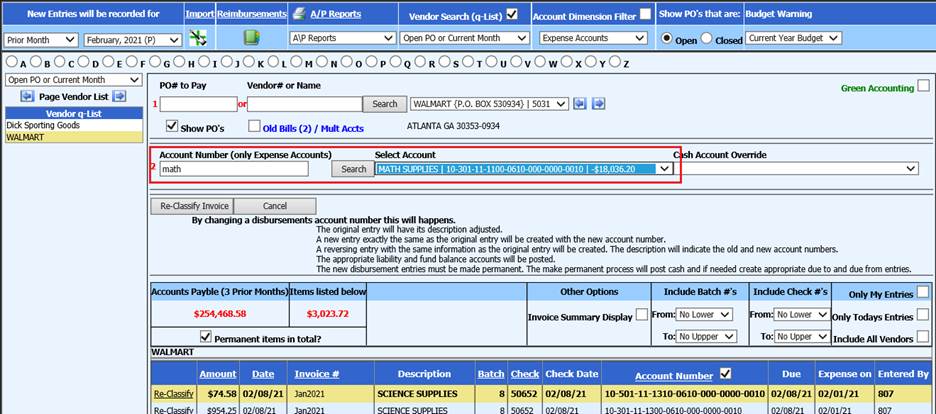
9. Select Re-Classify Invoice
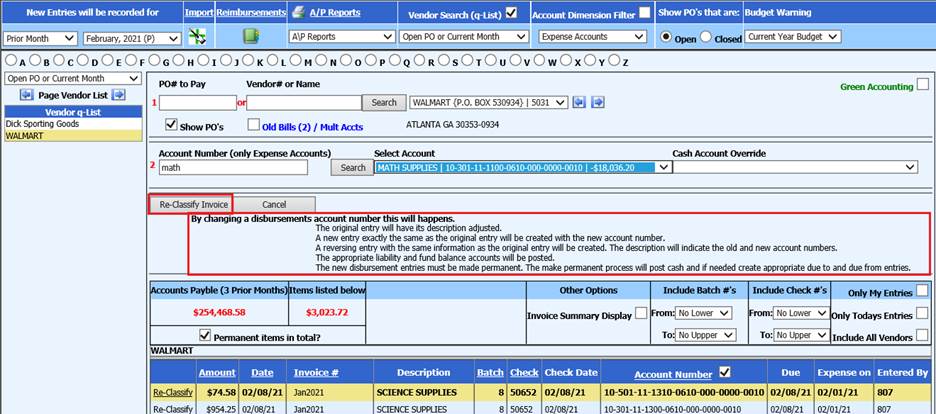
10. The Description has been updated and account adjusted.
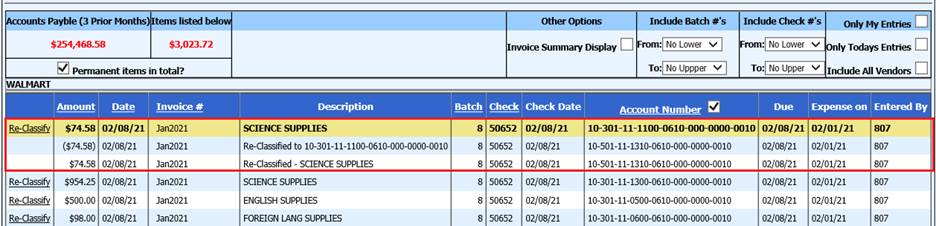
11. The transaction must be made permanent for the Reclassify to update records
12. Select Make Checks Permanent Post to Ledger
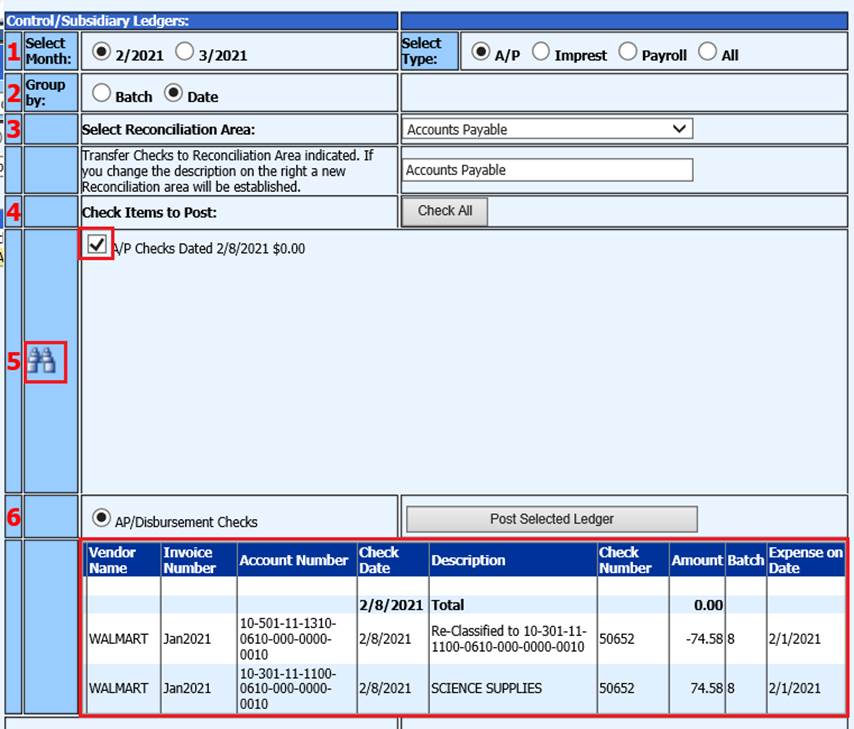
o 1. Select Month: This area shows the month(s) that checks need to be made permanent (post to ledger).
o Select Type: The “Select Type” is based upon the “Item Types” in the Disbursement / Accounts Payable Entry screen.
a. Accounts Payable: This selection shows in the #5 area the accounts payable invoices that were entered.
b. Impress: This selection shows in the #5 area the invoices that were entered as “Imprest Item Types”.
c. Payroll: This selection shows in the #5 area the invoices that have been posted from payroll or other invoices that have been entered with an Item Type of “Payroll.”
d. All: This selection shows all of the invoices that 5ave posted into the system.
o 2. Group by: There are two selection options in this area. The “Batch” selection will list in the #5 area the checks by batch number. The “Date” selection will list in the #5 area the checks by check date. The default setting for this is “Date”.
o 3. Select Reconciliation Area: Select the Check reconciliation area the checks need to post to.
Note: If a new Check Reconciliation area needs to be created enter in the name of the new reconciliation area. Once the checks are posted the new check reconciliation area will be created. This new check reconciliation area will be available in the drop down selection area the next time checks need to be posted to this reconciliation area.
o 4. Check items to Post: Select the checks to post, or select “Check All”.
o 5. Select the Binoculars to preview the Checks to be made permanent.
13. Select Post Selected Ledger
Print Account Reclassification Report
To print an Accounts Payable Reclassification Report
1. Select Reports
2. Select General Accounting Reports
3. 1 Select a Report Group: Select Accounts Payable (Bills)
4. 2 Select a Report: Select Account Reclassification Report
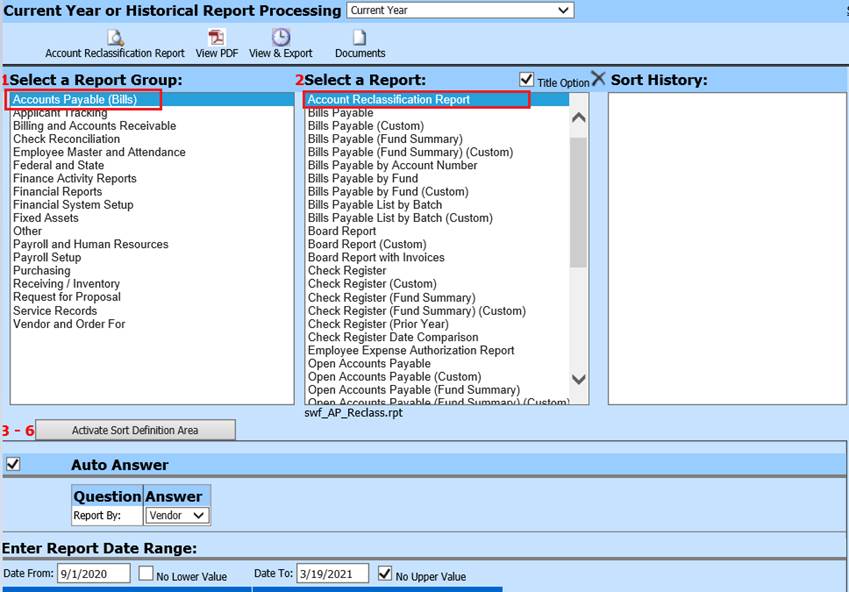
5. Verify Auto Answer and Date Range needed
6. Preview Report
7.