Revised: 7/2020
Using the Activate Sort Definition Area you can query certain
criteria to be pulled into the standard reports.
12. Select Reports
13. Select General Accounting Reports
14. 1 Select a Report Group: i.e. Employee Master and Attendance
15. 2 Select a Report: i.e. Employee Open Contract Report
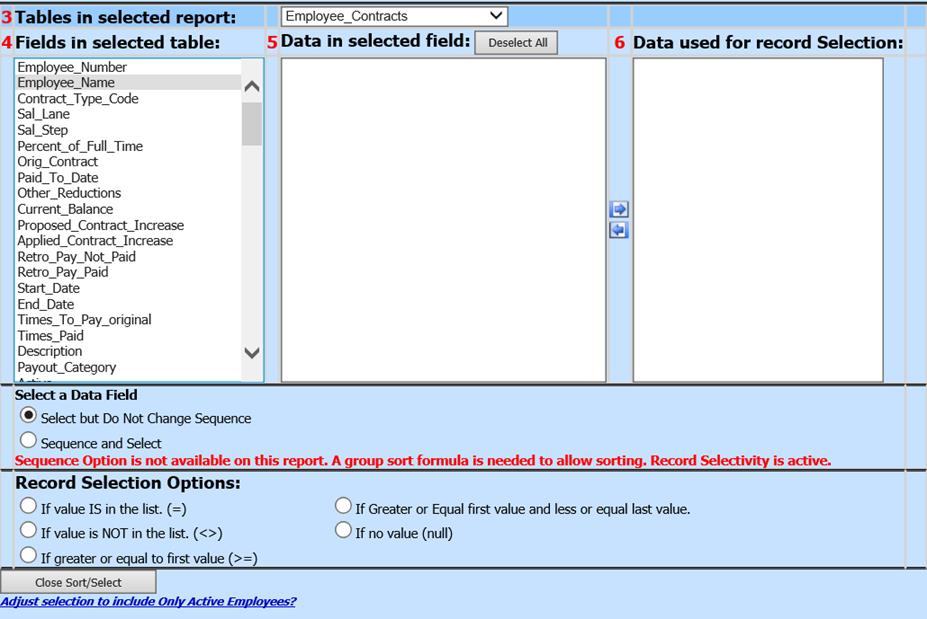
16. 3 – 6 Select “Activate Sort Definition Area” to sort the report.
a. 3 Select Tables in selected report: i.e. Employee_Contracts
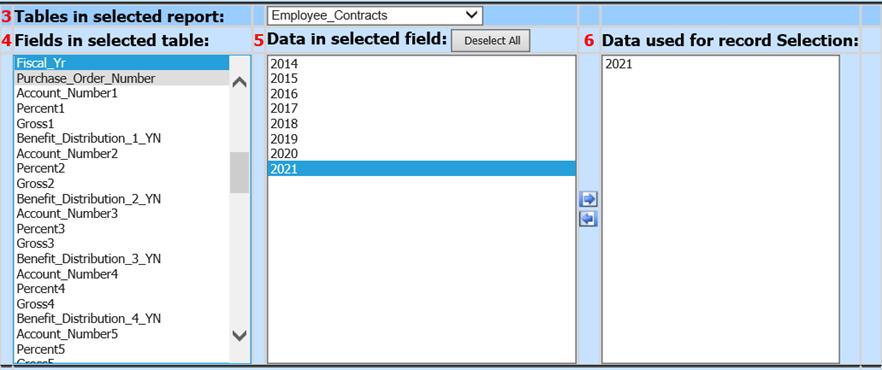
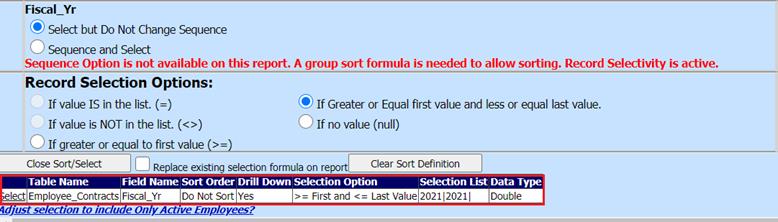
b. 4 Fields in selected table: i.e. Fiscal_Yr
c.
5 Data in selected field:
Select data, use  to move to
6; i.e. 2021
to move to
6; i.e. 2021
d. 6 Data used for record Selection: Verify Data listed is correct
e. Select Data Field:

i. Select but Do Not Change Sequence: If this options is selected, it will not change the grouping on the report
ii. Sequence and Select: If this option is selected, it will change the grouping on the report
f. Record Select Options:

i. If value IS in the list (=): The report will show detail that is = to the data chosen under “Data used for record selection”
ii. If value is NOT in the list (<>): The report will show detail that is <> than the data chosen under “Data used for record selection”
Note: The two options above will not be active if your field is a numeric field (as opposed to an alphanumeric field)
iii. If greater or equal to first value (>=): If selected, this will display data that is greater or equal to the first value in “Data used for record selection”
iv. If Greater or Equal first value and less or equal last value: If one item is listed, this is equivalent to saying “is equal to”. If two are chosen, they allow for a lower or upper range.
v. If no value (null): When looking for a “Null” record, a normal sort will not work. You can’t ask for less than or equal to a value in a field that has no value (null). This option gives you a way to find records with no entry in a particular field.
g. Select Save New Sort
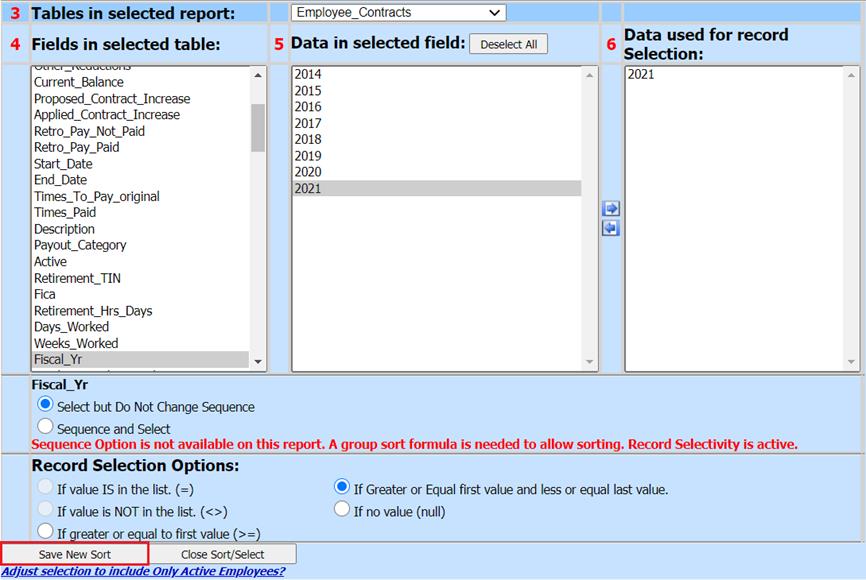
i. The formula will be added below
ii. Add any additional sorts, if needed
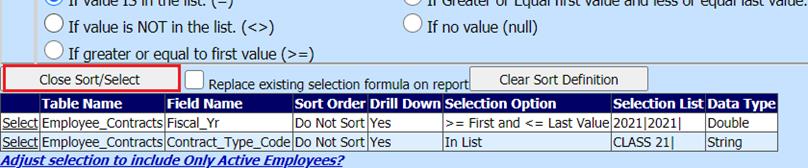
h. Select Close Sort/Select
i. You return to the main Reporting screen.
17. Activate Auto Answer: Once you have selected your report, create any sorts you would like, answer the questions under “Activate Auto Answer” and place a check in the box next to Activate Auto Answer. By checking “Activate Auto Answer” it will retain those same parameter answers the next time you run that same report and sort.

a. Question: Choose to hide or display the social security number
b. Answer: Hide or Display
For more detailed information on Activate Auto Answer, see below link: http://help.schooloffice.com/financehelp/#!Documents/activateautoanswer1.htm
18. Preview, Print or Export the report
19. If you wish to save the sort/selection setup: Under Sort History, select Date and time stamp
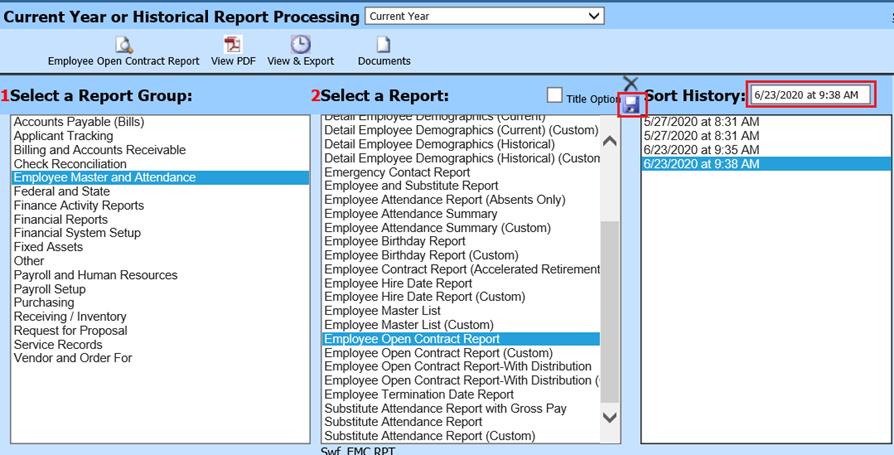
20. Enter a new Title for report; i.e. 2021 Active Contracts
21. Select Save
a. The new Title will be saved and listed under Sort History

To delete a saved report:
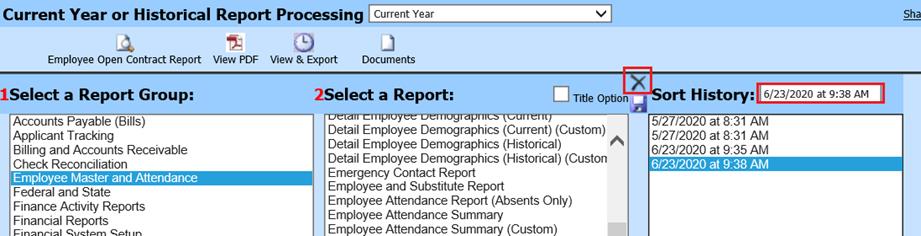
4. 1 Select Report Group
5. 2 Select a Report
a. Select sort to delete
6. Select X to remove from Sort History list