Revised: 4/2021
This process can be used if you have a miss feed or printer paper jam and did not get all checks run with the initial attempt to print checks.
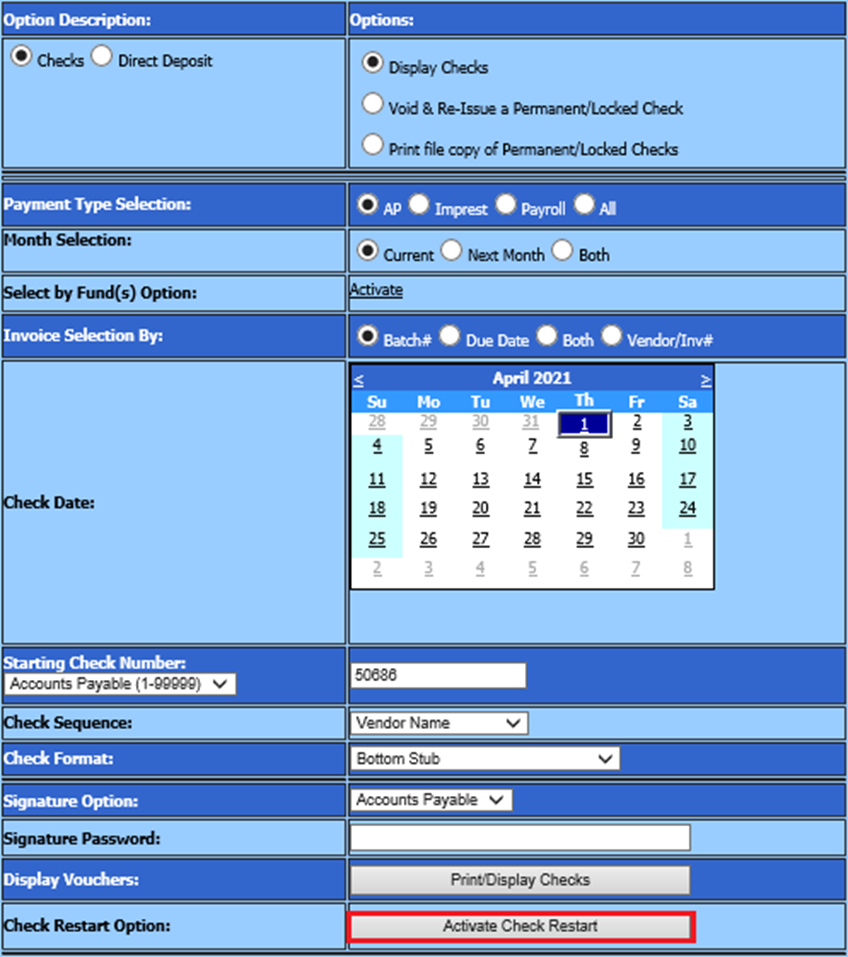
1. Select Accounts Payable
2. Select Check Voucher/Processing
3. Select “Activate Check Restart”
4. On the right side of the screen, select the checks to restart.
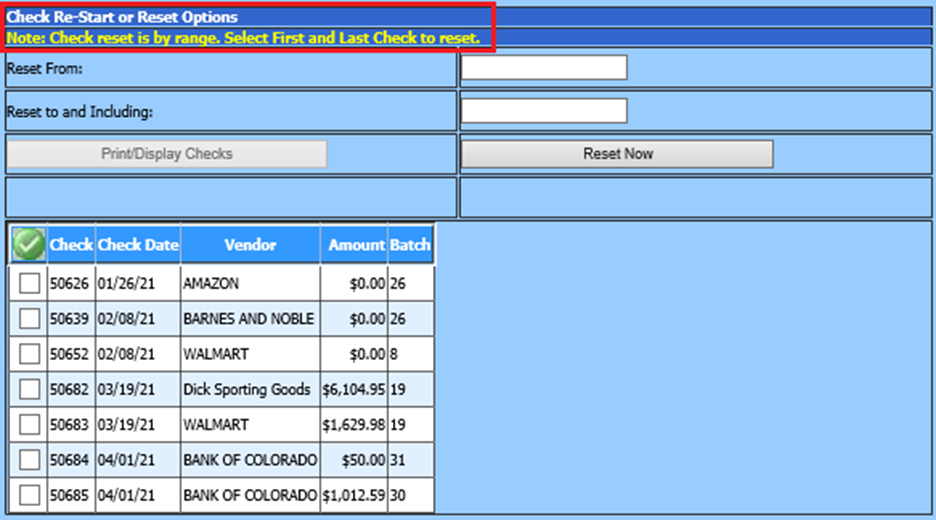
•To reset checks, the user should put a check mark next to the first check number and the last check number to be reset. When completed, all the checks in-between will automatically be checked. The starting check number and ending check number will appear in the “Reset from” and Reset to and Including” boxes.
•A Green Check button  is available at the top of the list of
checks. If selected, all checks will be checked and the starting and ending
numbers will appear in the reset boxes. If any checks are selected when this
icon is clicked, the program will un-check them.
is available at the top of the list of
checks. If selected, all checks will be checked and the starting and ending
numbers will appear in the reset boxes. If any checks are selected when this
icon is clicked, the program will un-check them.
NOTE: Checks are
only allowed to be reset within a range of numbers. The system will not allow a
user to leave a gap in the number list. If checks which are not in consecutive
order, reset one group, then reset the next group.
•Select “Reset Now”, and your checks are ready to print again.