Revised: 7/2020
If
you have a custom report you would like to use in place of a standard financial
crystal report follow the below instructions.
Upload custom report to system
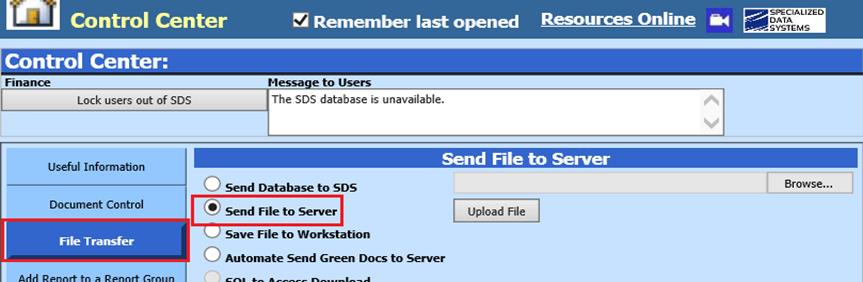
1. Select Administrative Utilities
2. Select Control Center
3. Select File Transfer
4. Select Send File to Server
See below link for more information on Sending files to Server: http://help.schooloffice.com/FinanceHelp/#!Documents/filetransfersendfiletoserver.htm
5. Select Reports
6. Selct Financial Reports
7. Select the report you would like to add the custom to (i.e. Expenditure Report)
8. Select Design Options
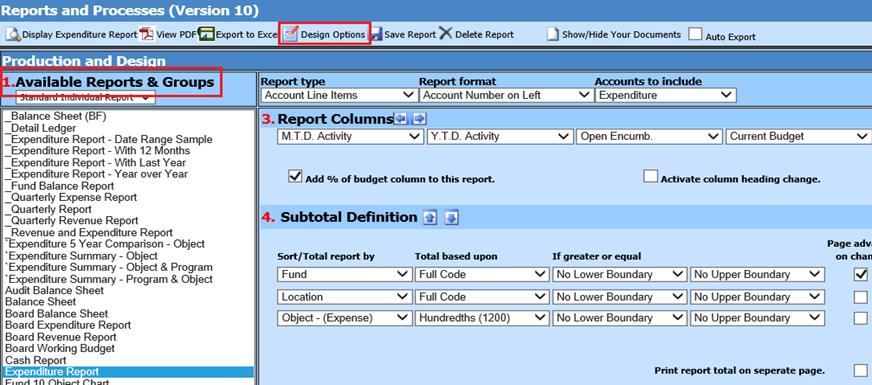
9. Scroll to the bottom and click on “Custom Crystal Report”:
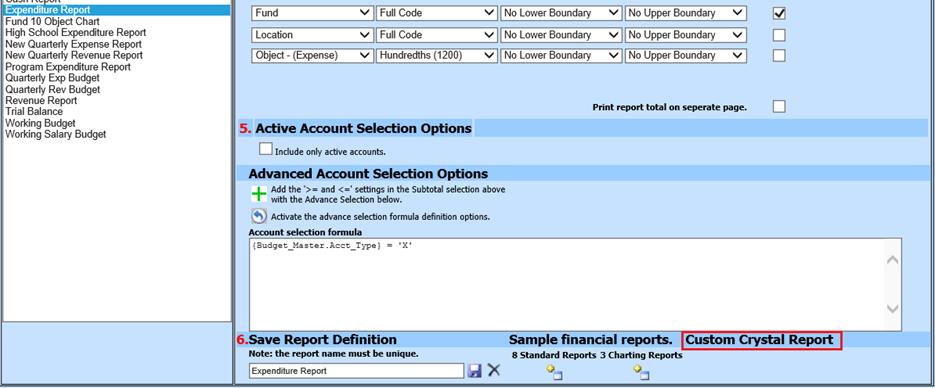
10. A new box below will display.

11. Enter in the custom report name (i.e. swfcbrp5_p.rpt)

12. Select Save