Revised: 4/2021
Changing Account Numbers on a
Cash Receipt entry, after it has been made permanent, can be done for any month.
To activate this option:
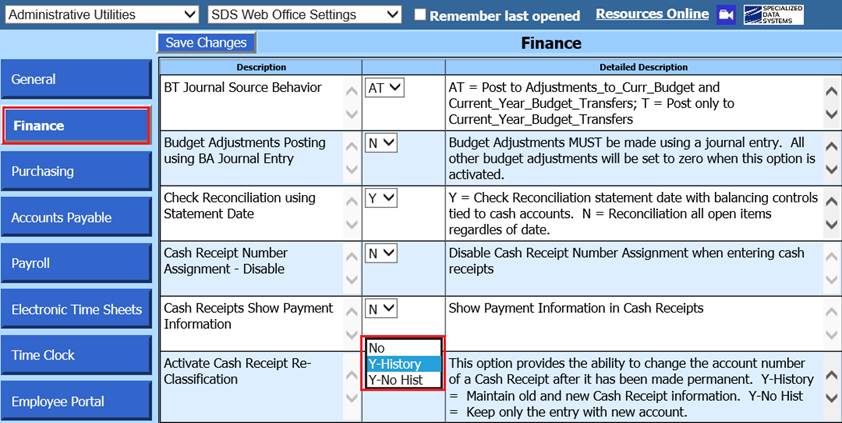
1. Select Administrative Utilities then select SDS Web Office Settings
2. Select the Finance section and find “Activate Cash Receipt Re-Classification“ there are three options:
•“No” Do not allow for account number changes to permanent disbursements.
•“Y-History” Allow for account change, preserve the original disbursement entry and the reversing entry.
•“Y-No Hist” Allow for account change, delete original disbursement entry
Once this process has been activated:
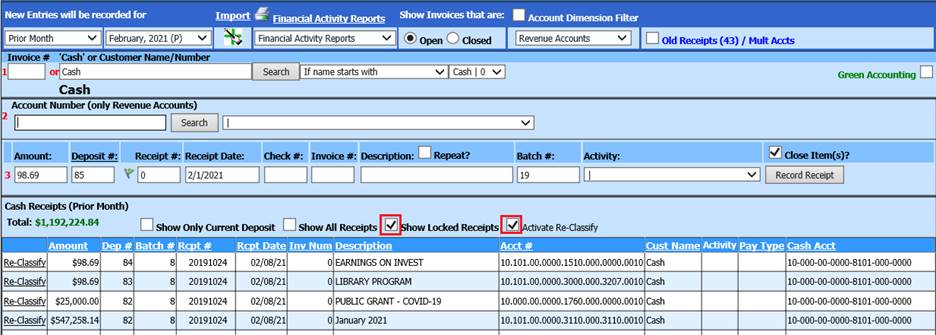
1. Select Cash Receipts
2. Select Cash Receipts
3. Search for the entry that needs to be reclassified.
o If the disbursement is in a prior month, select the down arrow next to the current Month/Year then select “Activate All”

4. Select Show Locked Receipts
5. Select Activate Re-Classify
6. Select Account Type
7. Select Re-classify
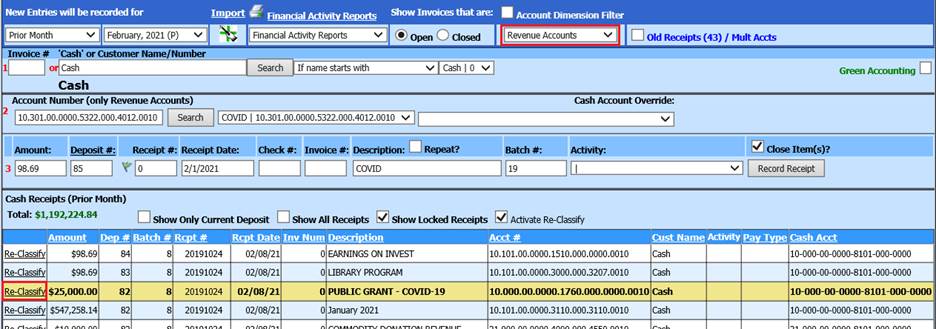
8. Enter new account number
9. Select Re-Classify Receipt
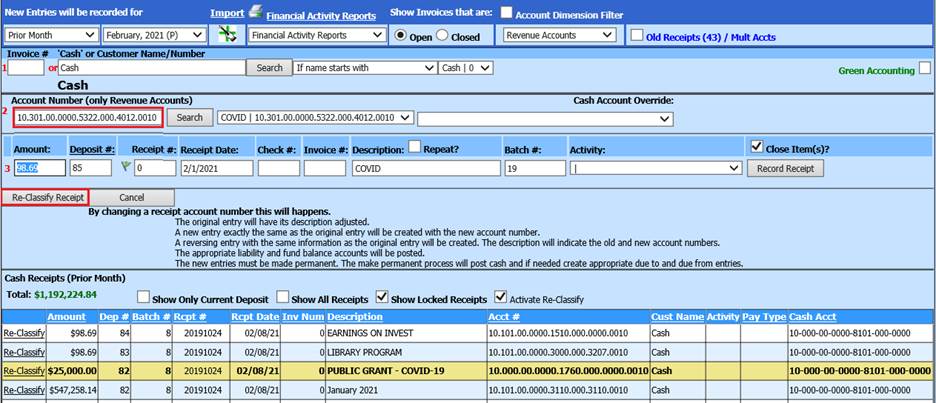
10. The Description has been updated and account adjusted

11. The transaction must be made permanent for the Reclassify to update records
12. Select Make Cash Reciepts Permanent
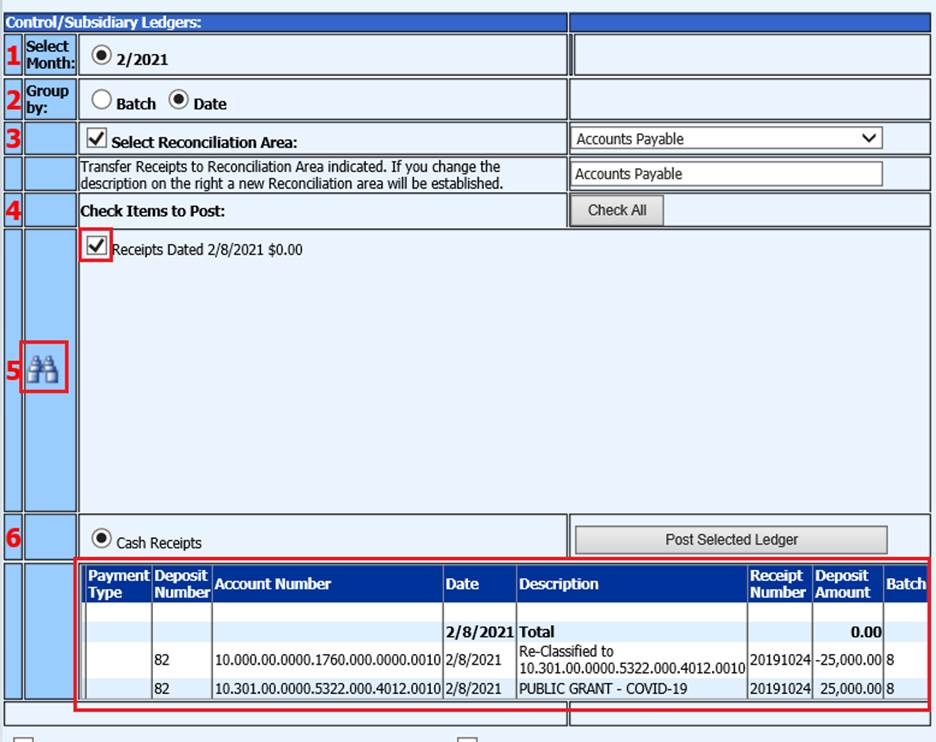
o 1 Select the month: Select the month to make entries permanent (all receipts for the month selected will show in Section 5)
o 2 Group by: Date is the default, if you want to post by batch choose “Batch”
o 3. Select Reconciliation Area: From the drop down select the check reconciliation area you want a select group of checks to post to for check reconciliation purposes.
o If the reconciliation area is not listed that you need to post a group of checks to, you can create a new check reconciliation group. To create a new check reconciliation group, enter the name needed into the field next to “Transfer Receipts to Reconciliation Area indicated.”
o 4. Check items to Post: Select the items being made permanent or select Check All.
o 5. Use the Binoculars to preview the Items to be made permanent.
13. Select Post to Ledger