
The Colorado PERA 457 Report is used to report the PERA 457 information for each employee in the school district that has enrolled in the PERA 457 Plan on a per payroll basis.
For more information on the PERA 457 Report visit the PERA website: www.copera.org
Note: The payroll(s)
that are going to be reported on the PERA 457 Report must be closed.
Setting
Up the Deduction for the PERA 457
1. Select Human Resources
2. Select Human Resources Control Center
3. Select Deduction/Benefit Master.
4. Set up the code for the PERA 457 deduction
For information on setting up a deduction code select the following link: http://help.schooloffice.com/FinanceHelp/#!Documents/humanresourcescontrolcenterdeductionsbenefitsmaster1.htm
Processing the PERA 457 Report
1. Select Payroll Processing
2. Select State and Federal Reporting
3. Select Colorado
4. Select 457 Report
5. Select Report Date


Report Screen
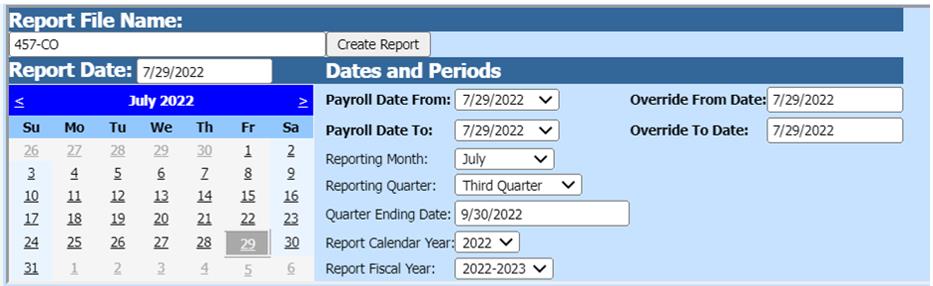
Fill in the following items on the 457-report screen:
Dates and Periods:

•Payroll Date From: This is the starting date of the payroll(s) in the SDS payroll calendar that need to be reported on the 401k report.
•Payroll Date To: This is the ending date of the payroll(s) in the SDS payroll calendar that need to be reported on the 401k report.
•Reporting Month
•Reporting Quarter
•Quarter Ending Dates
•Report Calendar Year
•Report Fiscal Year
District Address, Contact, Account #’s and other coding information:

•District Number: Enter 457 employer number
Benefit, Retirement, and Deduction Selection Options:

•Benefit Selector select the benefit codes for the PERA 457 report
•Deduction Selector select the deduction codes for the PERA 457 report
6. Once all of the items have been filled in on the screen, select Save Setup

7. To create the file, select the Create Report button.
a. The file that is created will be listed at the top of the screen when first created. When you re-enter this area, the report will be displayed under Show/Hide Historic Reports. All files created will have a date and time stamp on them from when they were created.
8. To save the file to send to PERA (or another appropriate agency) right click on the folder and select save target as. Then save the file on your desktop or other desired location on your computer. You can then send the file to PERA (or another appropriate agency).

a. The system will retain the files that have been created. These files can be viewed by selecting the Show/Hide Historic Reports button.

b. To delete any of the files select the box under the Del? column and then select the Delete button

9. After the report has been created a paper copy of the report will be available to print. Select the “print report” button to view this report.
