Revised: 4/2021
Under the direction of SDS support staff or programmers,
it is sometimes necessary to mass load or swap data into your database. The
steps below direct how to use this area.
1. Select Administrative Utilities
2. Select Control Center
3. Select Toolbox.
4. Login with password supplied by SDS support.
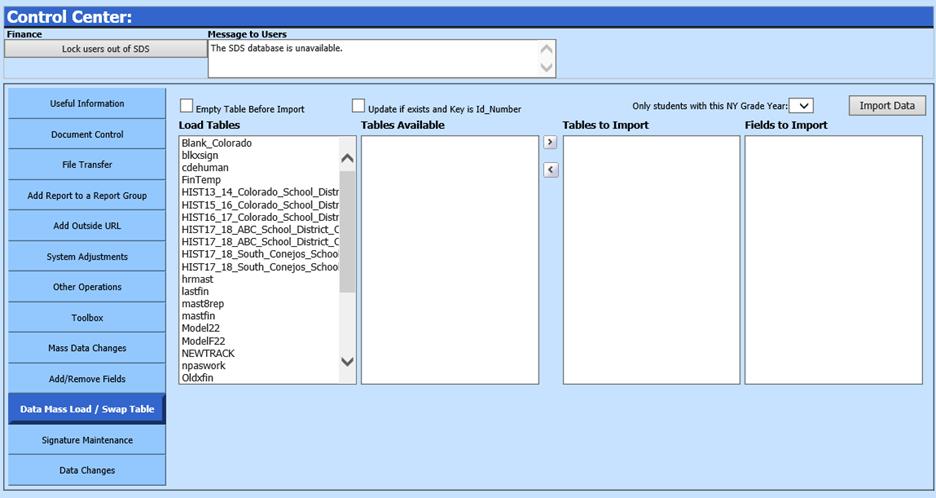
5. If the table in your current database should be emptied first before the new/replacement data is imported, then check the box for Empty table before import. Read the Warning message.
6. Verify you have a working backup then click OK.

7. In the Load Tables box, select the file name of the file or swaptable file with the new source data. Click on the file name.
8. In the Tables Available box, click on the name of the table being imported into your current database.
9. Select the > button to move the table(s) into the Tables to Import box.
10. Click once on the name of the table in the Tables to Import box. The fields in this table are listed in the rightmost box.
11. Highlight the field(s) to be imported. Hold your control key while clicking with the mouse to select multiple fields.
12. Select the Import Data button.

13. Select OK on the Process is complete information box.