
Revised: 4/2020
You will first need to activate this process in SDS Web office settings.
1. Select Administrative Utilities
2. Select SDS Web Office Settings.
3. Under the Finance Tab, verify or change the Fixed Assed Posting from A/P to “Y”
4. If changes were made, select Save Changes.
5. Log out and back in
Entering Invoice with Fixed assets fields
1. From Accounts Payable, select Disbursement / Accounts Payable.
2. 1 PO# to Pay or Vendor# or Name: Enter the Vendor Name or Number or enter the first few letters of the vendor name and select “Search”.
3. From the drop down selection, select the Vendor.
4. 2 Account Number: Enter in part or all of the Account number or Account Description.
5. Select “Search” or hit Enter.
6. From the “Select Account” drop down selection, select the account to expense.
7. If using the “Cash Account Override”, select the Cash Account associated with the expense entry.
8. 3 Complete the fields needed for the Invoice entry:
o Amount: Amount of Invoice line entry
o Invoice Date: Date of Invoice
o Invoice#: Invoice Number
o Description: Description of invoice, the account number description is defaulted
o Batch#: Defaulted number is day of month, you can change to your own designated number, if needed
o Expense On: Finance date expensed to the system, selected under New Entries will be recorded for
o Item Type: Accounts Payable, Imprest, Payroll
9. Place check mark in box next to “Fixed Asset”.
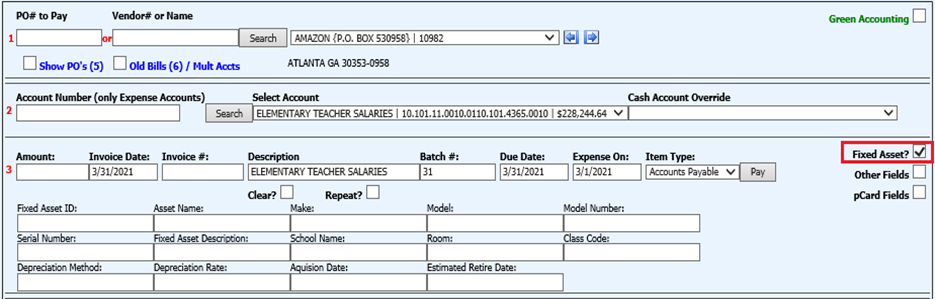
10. Complete appropriate fields for purchase of the fixed asset item.
11. Select “Pay”.
12. Once the check has been produced for this fixed asset and the check has been made permanent, this will display in the fixed asset table in the Master File.