Revised: 4/2021
You can enter in your purchasing card information upon
Invoice entry.
1. From Accounts Payable, select Disbursement / Accounts Payable.
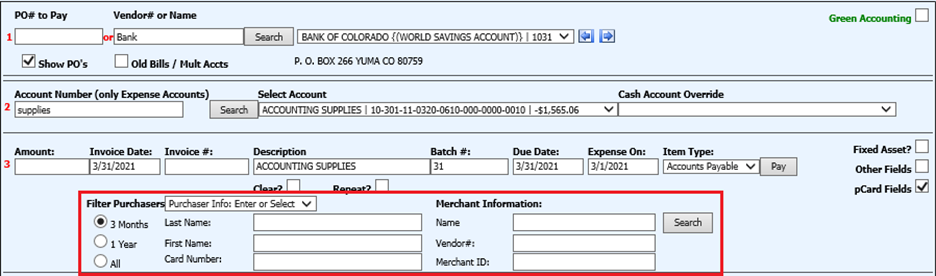
2. 1 PO# to Pay or Vendor# or Name: Enter the Vendor Name or Number or enter the first few letters of the vendor name and select “Search”.
3. From the drop down selection, select the Vendor.
4. 2 Account Number: Enter in part or all of the Account number or Account Description.
5. Select “Search” or hit Enter.
6. From the “Select Account” drop down selection, select the account to expense.
7. If using the “Cash Account Override”, select the Cash Account associated with the expense entry.
8. 3 Complete the fields needed for the Invoice entry:
o Amount: Amount of Invoice line entry
o Invoice Date: Date of Invoice
o Invoice#: Invoice Number
o Description: Description of invoice, the account number description is defaulted
o Batch#: Defaulted number is day of month, you can change to your own designated number, if needed
o Expense On: Finance date expensed to the system, selected under New Entries will be recorded for
o Item Type: Accounts Payable, Imprest, Payroll
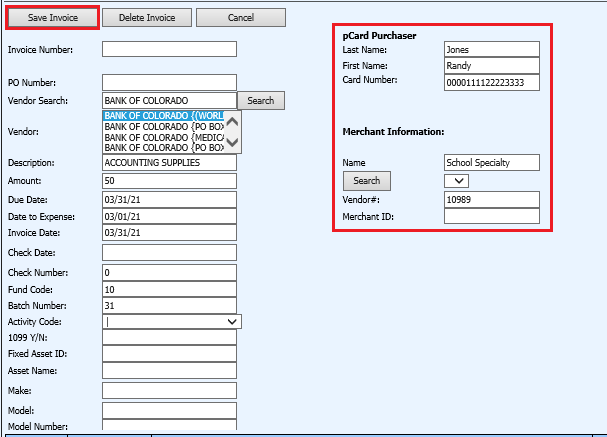
9. Place check mark in box next to “pCard Fields”.
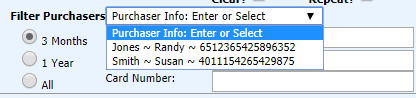
10. Enter in name of Purchaser information.
o The filter reference shows purchasers who had a purchase in the time frame: 3 Months or 1 Year. If you select all - the drop down arrow will list all the purchasers.
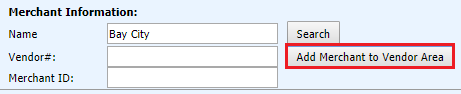
11. Enter in name of Merchant and hit the Search button

12. If Vendor is not found a message will pop up. Say ok to create an Add button on the disbursement screen.
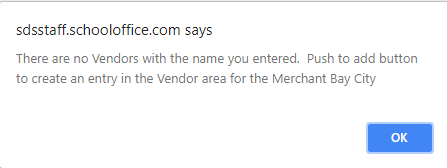
13. Select add Merchant to Vendor Area button. This will add the merchant name to the Vendor Master area.
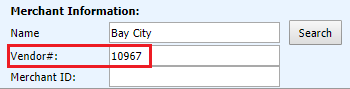
14. The program will assign a Vendor number automatically.
15. Select “Pay”.
16. The entries will display the Merchant, Credit Card number and Purchaser information fields.

How to edit pCards:
1. In Disbursement/Accounts Payable entry view, select the View/Edit next to the item to change.

2. Make the needed adjustments
3.
Select “Save Invoice”