Revised: 4/2021
Fairbanks assists states in designing and implementing a cost settlement approach, regarding the related federal Centers for Medicare and Medicaid Services (CMS) requirements.
These steps will help you with printing reports, by individual or with multiple employees, from SDS to submit to Fairbanks.
To print a report for individual or multiple employees Gross Pay and Benefits, you can use the General Accounting Reports or create a Customizable Payroll Report.
Printing Report using General Accounting Reports
1. Select Reports
2. Select General Accounting Reports
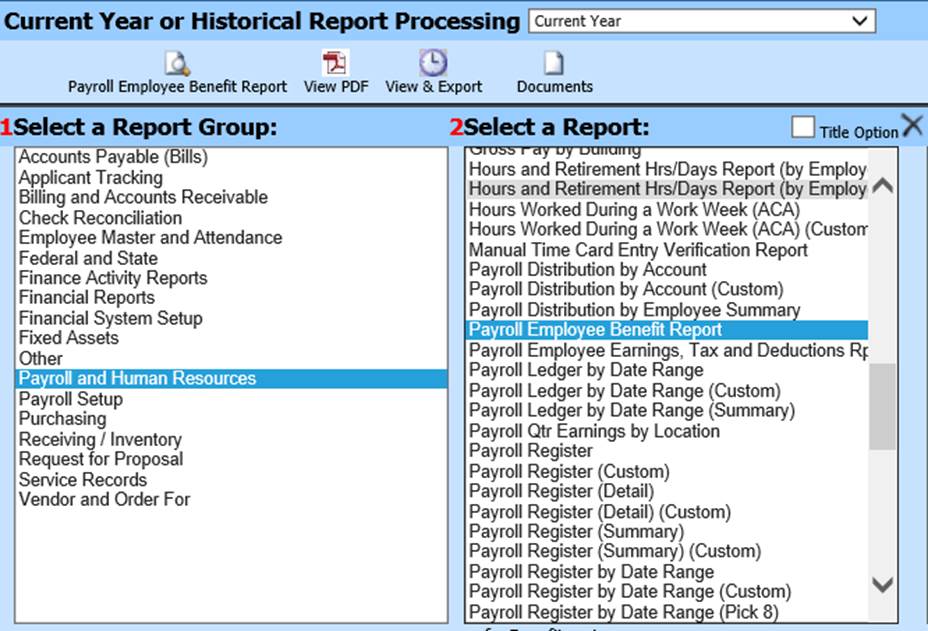
3. 1 Select a Report Group: Select Payroll and Human Resources
4. 2 Select a Report: Select Payroll Employee Benefit Report
5. 3 – 6 Select Activate Sort Definition Area

6. 3 Tables in selected report: Select Employee Master

7. 4 Fields in selected table: Select field to select employees; i.e. Employee Name
8. 5 Data in selected field: Select Employee to work
with, use the  to move name into 6
9. 6 Data used for record Selection: Employee to be listed on report
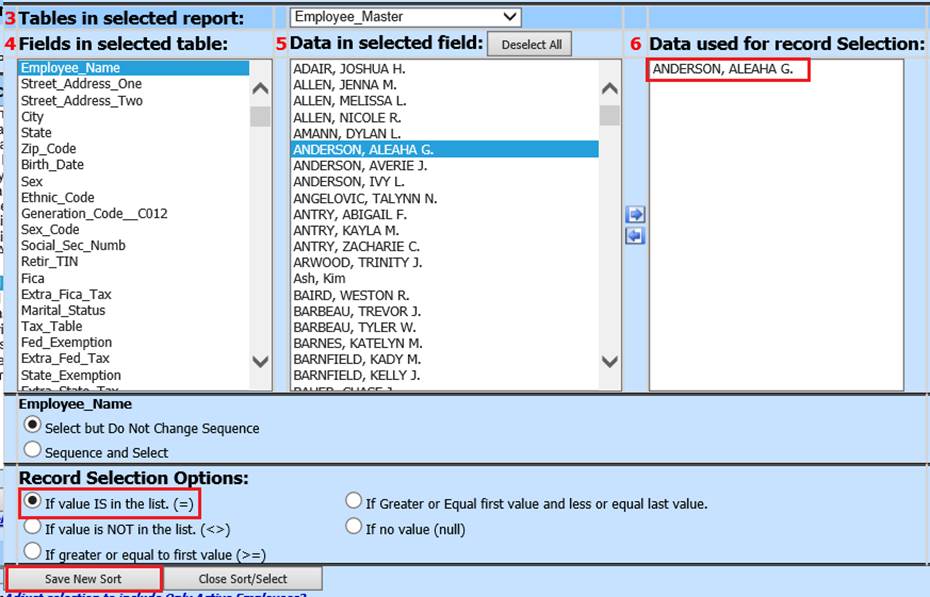
10. Check mark: If value IS in the list (=) This will only include the employees listed in #6
11. Select Save New Sort

12. Select Close Sort/Select
13. The employee formula will be listed under 3 – 6 Activate Sort Definition Area
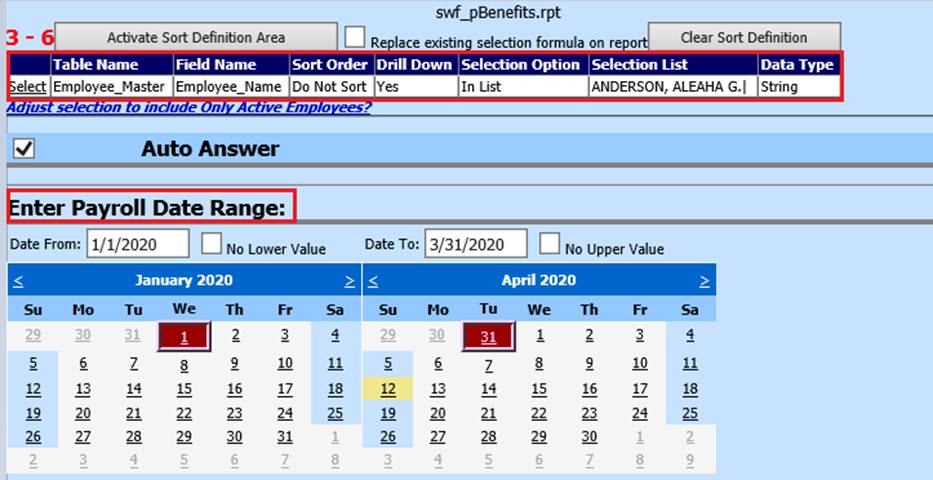
14. Enter Payroll Date Range: Select date(s) to be reported (i.e. report can be selected with quarterly dates; 1/1/2020 – 3/31/2020)
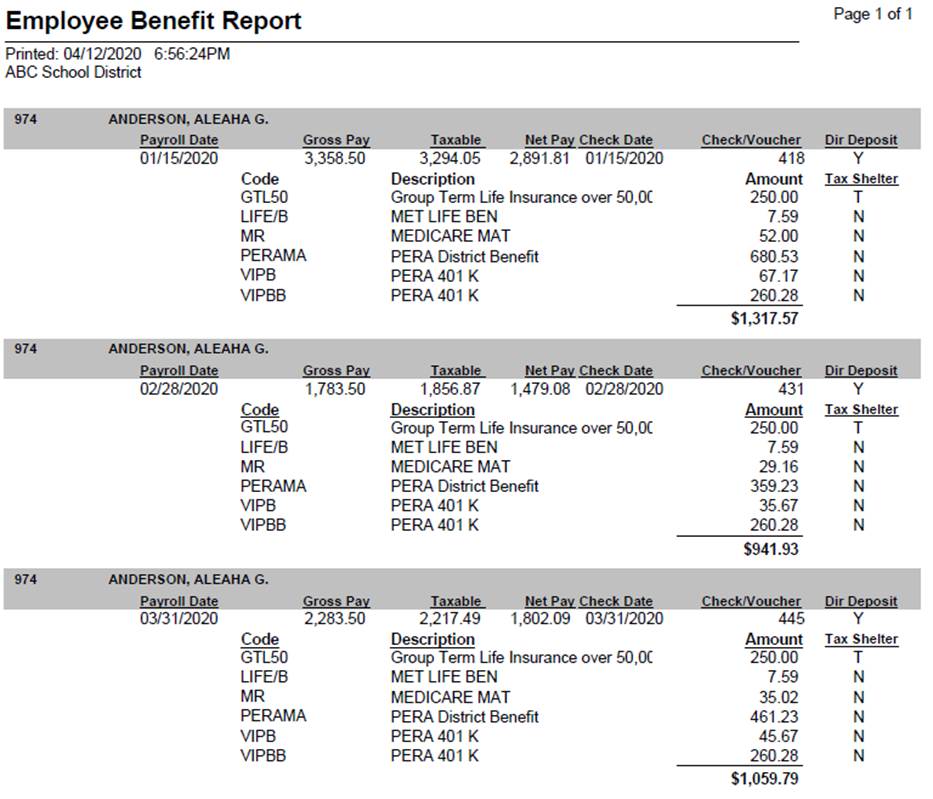
15. Preview Report

16. Review Report
Printing Report using Payroll Customizable Reports
1. Select Payroll
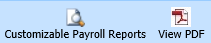
2. Select Customizable Reports
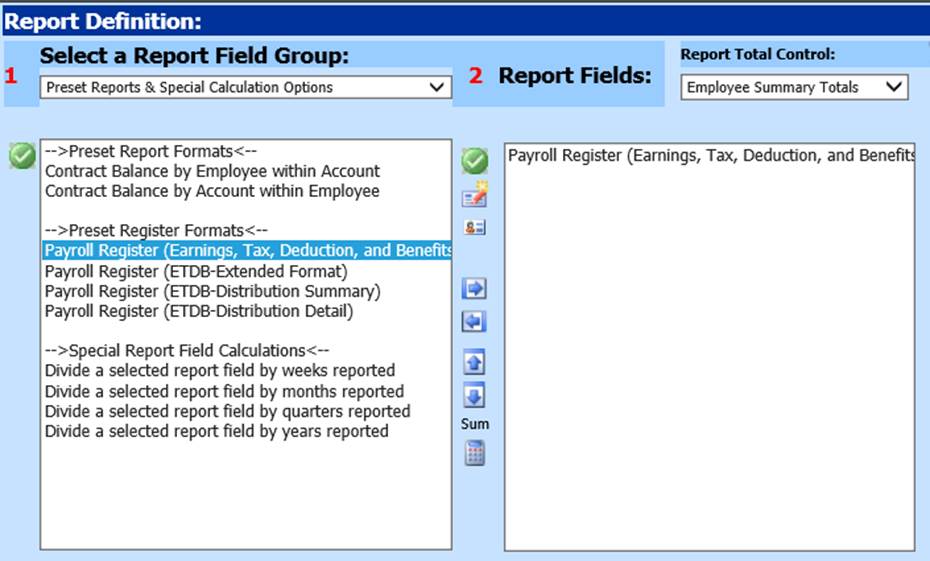
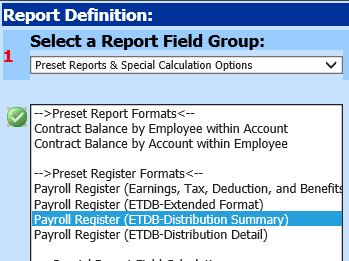
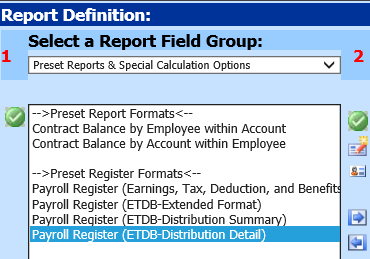
3. 1 Select a Report Field Groups: Select Preset Reports & Special Calculation Options
a. Preset Register Formats: Select Payroll Register (Earnings, Tax, Deduction, and Benefits)
b. Use the to move into 2
4. 2 Report Fields
5. 3 – 6 Select Activate Sort Definition Area

6. 3 Tables in selected report: Select Employee Master

7. 4 Fields in selected table: Select field to select employees; i.e. Employee Name
8. 5 Data in selected field: Select Employee to work
with, use the to move name into 6
9. 6 Data used for record Selection: Employee to be listed on report

10. Check mark: If value IS in the list (=) This will only include the employees listed in #6
11. Select Save New Sort
12. Select Close Sort/Select
13. The employee formula will be listed under 3 – 6 Activate Sort Definition Area
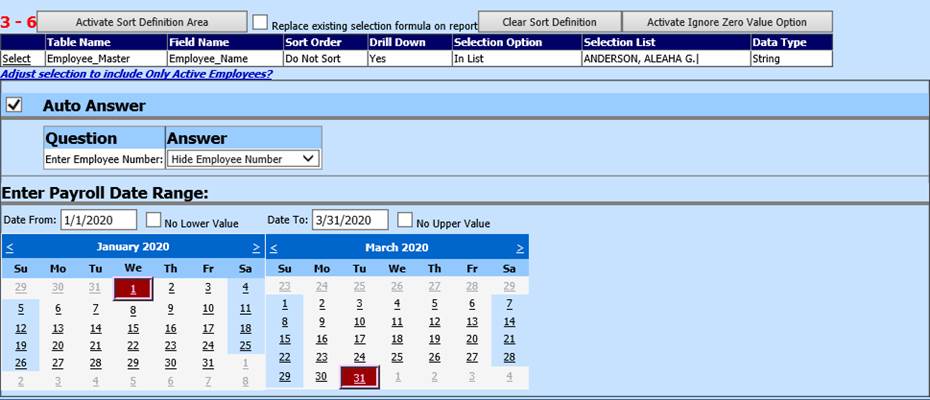
14. Enter Payroll Date Range: Select date(s) to be reported (i.e. report can be selected with quarterly dates; 1/1/2020 – 3/31/2020)
15. Preview Report
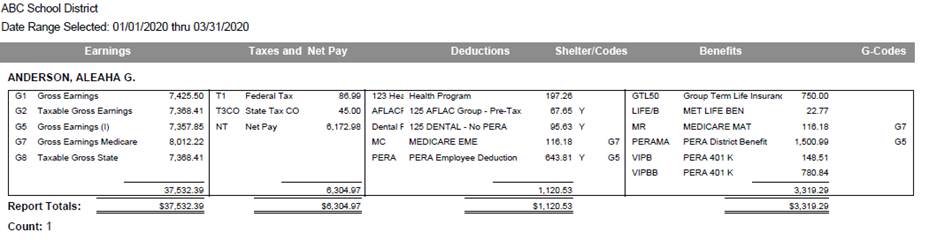
16. Review Report
Note: To preview accounts expensed during payroll, under Preset Reports & Special Calculation Options, preview:
Payroll Register (ETDB-Distribution Summary)
Payroll Register (ETDB-Distribution Detail)
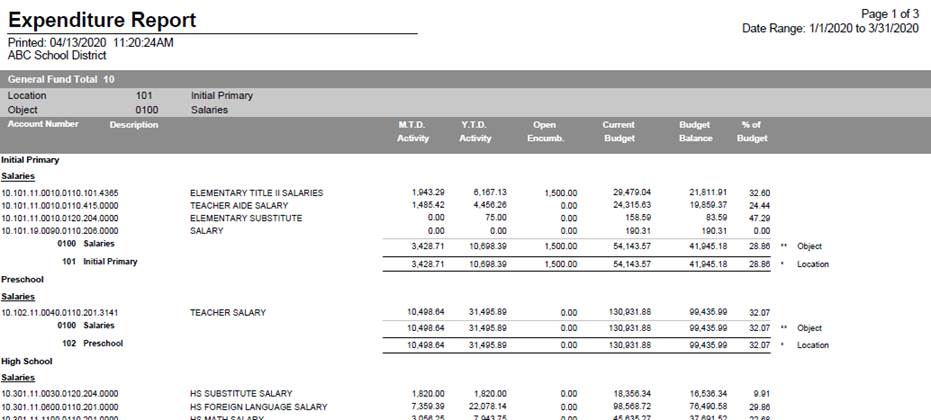
Printing an Expenditure Report with Lump Sum Salaries
1. Select Reports
2. Select Financial Reports
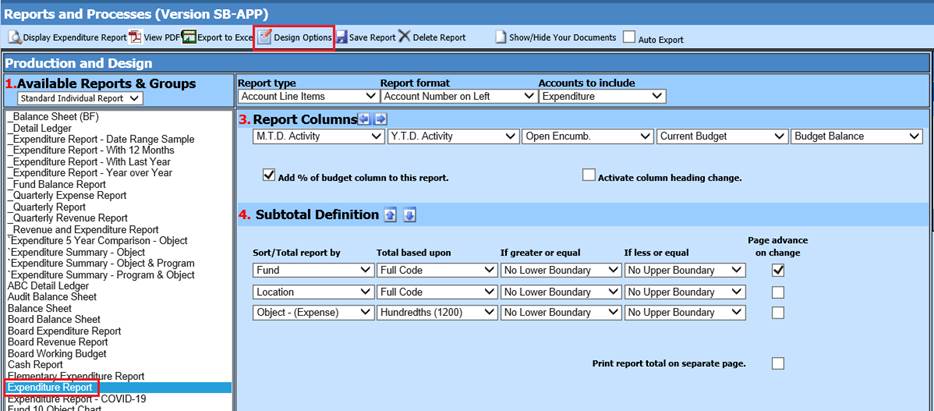
3. 1 Available Reports & Groups: Select Expenditure Report
4. Select Design Options
5. 2 Select Activity Date Settings
6. 3 Report Columns
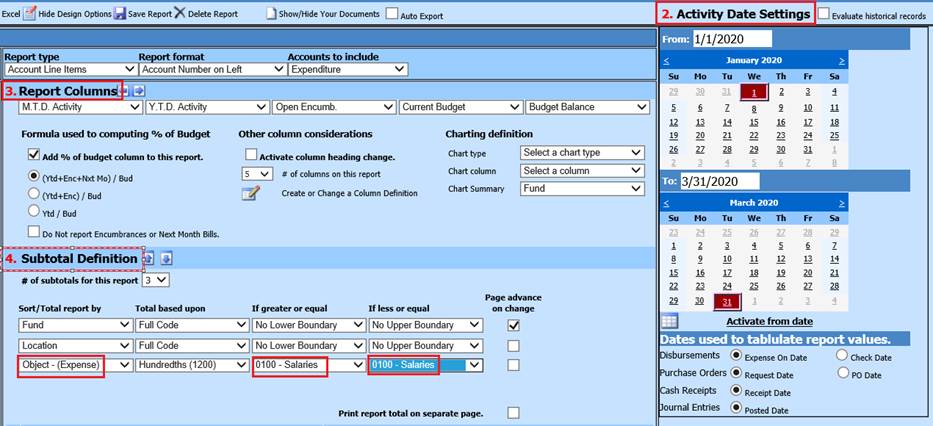
7. 4 Subtotal Definition: Make sure you have the Object code listed in one line item.
a. Sort/Total report by: Object
b. Total based upon: Determine how you wish to view accounts
c. If greater or equal: Select lowest salary code
d. If less or equal: Select highest salary code
8. Preview Report
9. Close Report
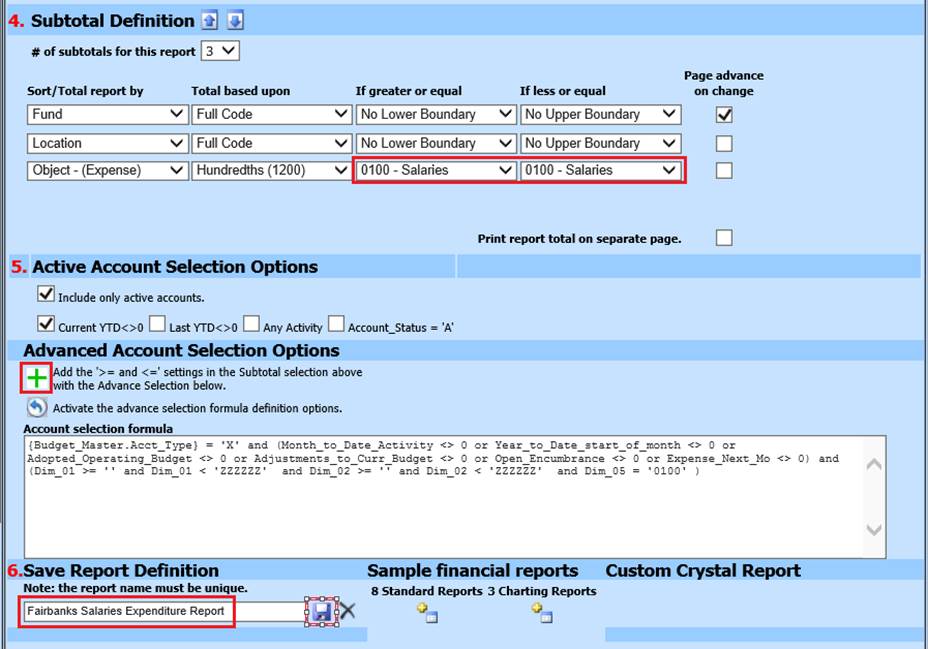
10. 4 Subtotal Definition: Verify State Code selectors are listed
11. Use  to
Add Salaries formula to the Account selection formula
to
Add Salaries formula to the Account selection formula
12. 6 Save Report Definition: Update new report name
13. Save report
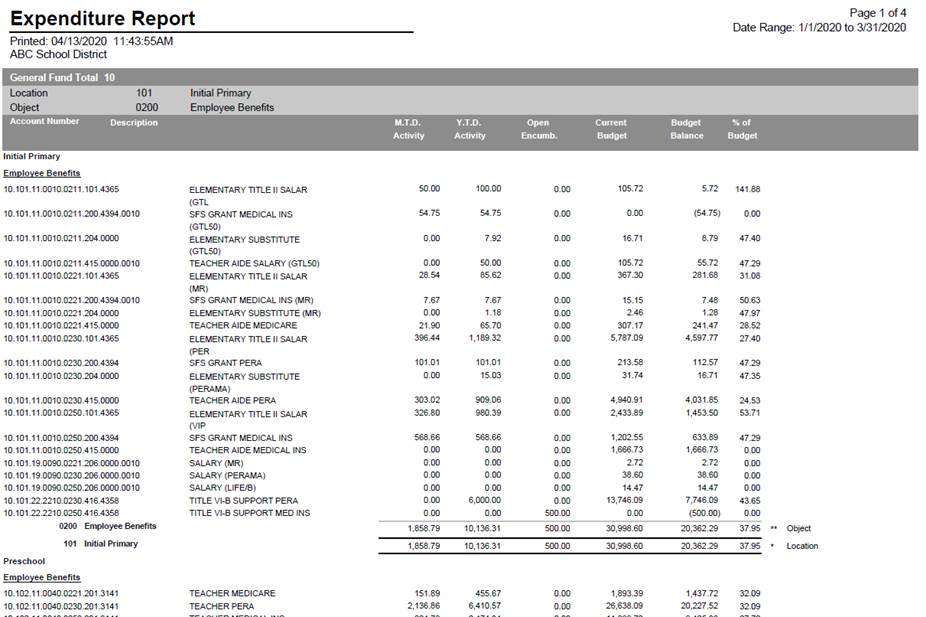
Printing an Expenditure Report with Lump Sum Benefits
1. Select Reports
2. Select Financial Reports
3. 1 Available Reports & Groups: Select Expenditure Report
4. Select Design Options
5. 2 Select Activity Date Settings
6. 3 Report Columns
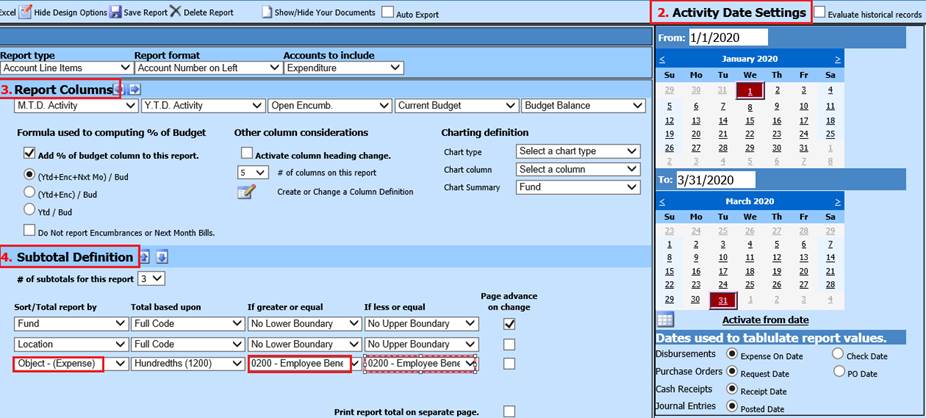
7. 4 Subtotal Definition: Make sure you have the Object code listed in one line item.
a. Sort/Total report by: Object
b. Total based upon: Determine how you wish to view accounts
c. If greater or equal: Select lowest benefit code
d. If less or equal: Select highest benefit code
8. Preview Report
9. Close Report
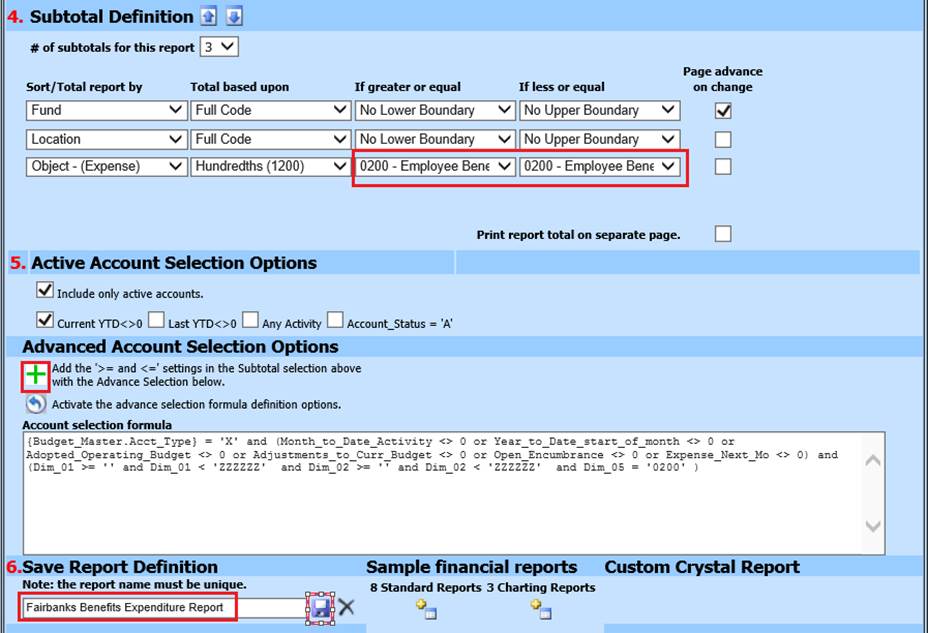
10. 4 Subtotal Definition: Verify State Code selectors are listed
11. Use  to
Add Salaries formula to the Account selection formula
to
Add Salaries formula to the Account selection formula
12. 6 Save Report Definition: Update new report name
13. Save report