Revised: 4/2021
GASB (Governmental Accounting Standards Board) Statement No. 84 is the reporting required to identification of fiduciary activities for accounting and financial reporting purposes.
There are four steps to complete, before using this process:
•Set up a New Fund
•Set up Balance Sheet, Revenue and Expenditure accounts
•Set up Ledger Interface
•Create Student Activity financial reports
Set up New Fund
1. Select Master File and Code Entry Options
2. Select Master File Vertical Data Entry and Changes
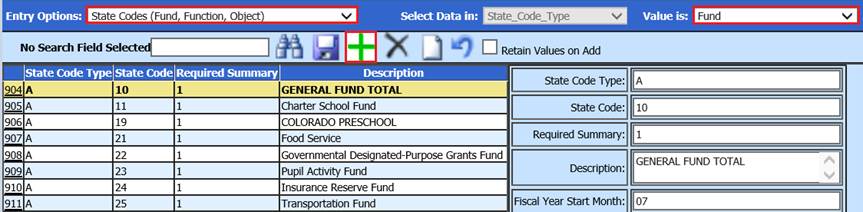
3. Entry Options: Select State Codes (Fund, Function, Object)
4. Value is: Fund
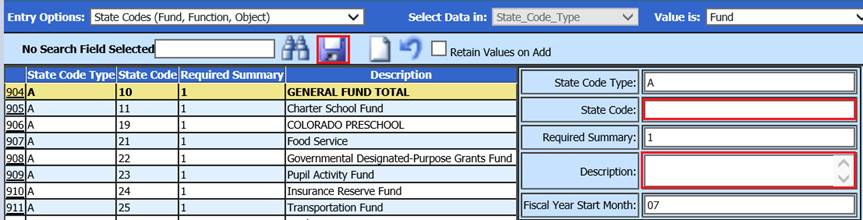
a. If the Fund code needed is not listed, select the Add a Record
b. State Code: Enter in New code i.e. 29
c. Description: i.e. Student Activities
d. Select Save
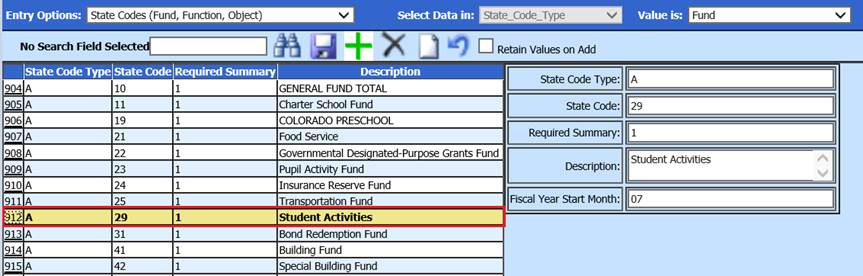
5. The new Fund code will be listed:
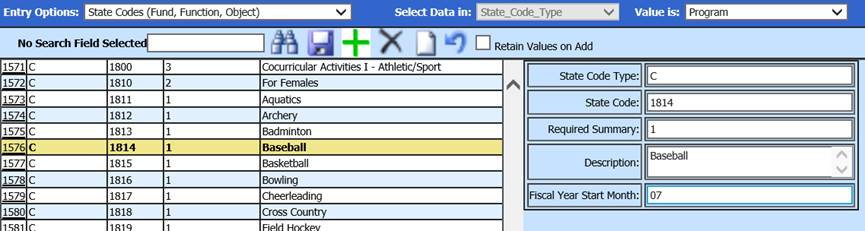
6. Change Entry Options to the State code selection you are identifying the activity account. i.e. Program
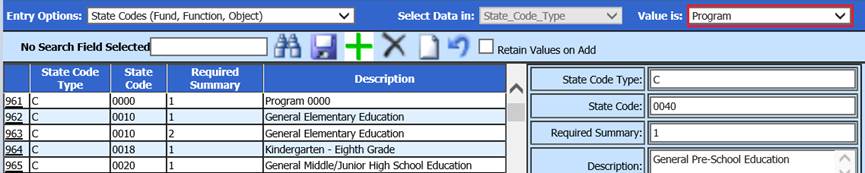
a. Select Add a Record, to enter a new code, i.e. 1814
b. Enter new code description, i.e. Baseball
7. Select Save
8. Complete step 6a, 6b and 7 above, for all activity codes needed
Set up Balance Sheet Accounts
1. Entry Options: Select Budget Master (Basic Fields by ASN)
2. Select Balance Sheet Accounts
3. Select Add a Record

4. Enter Fund Overall Cash account: Complete ASN, Description and State Codes
5. Select Save
6. Select the  to add Accounts Payable Liability
account
to add Accounts Payable Liability
account
a. Complete ASN, Description and State Codes
b. Select Save

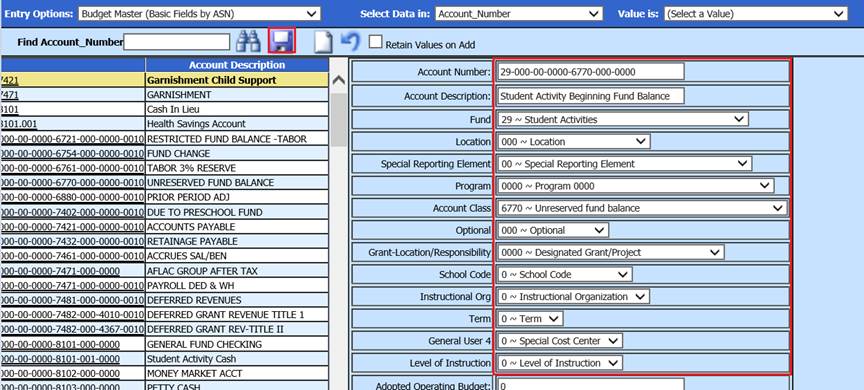
7. Select the to add Beginning Fund Balance
account.
a. Complete ASN, Description and State Codes
b. Select Save
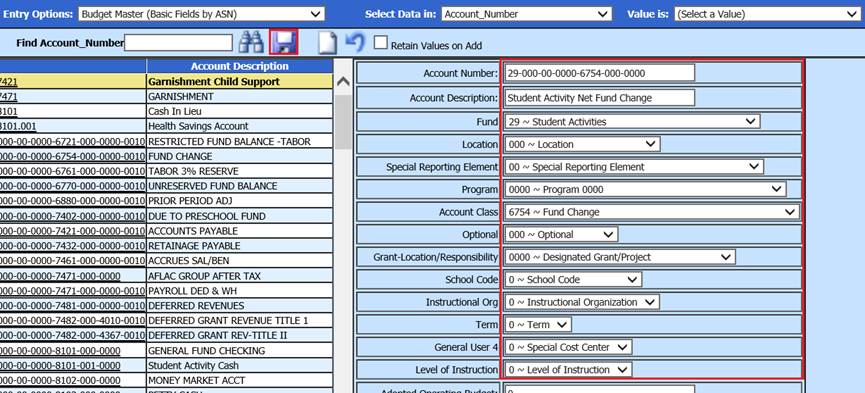
8. Select the to add Net Fund Change
account.
a. Complete ASN, Description and State Codes
b. Select Save
Create New Cash Account for Each Activity account
Note: When
using the “Retain Values on Add” option, this will clone the account number
highlighted. You can continue just selecting  to start with a blank account
record.
to start with a blank account
record.
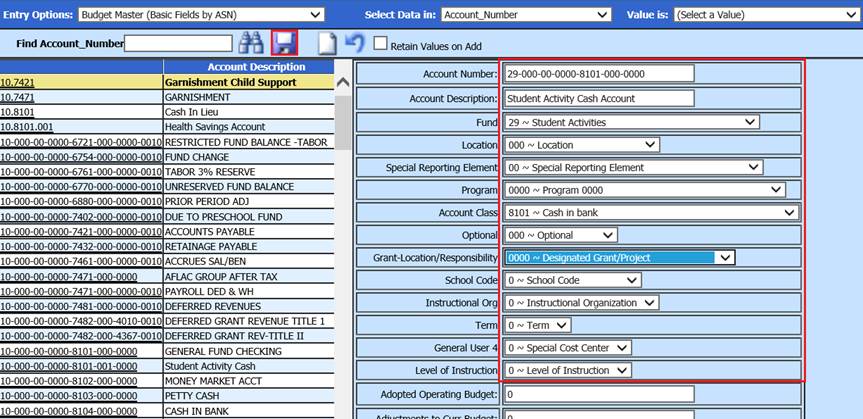
9. Select the  to add new activity cash
account
to add new activity cash
account
10. Complete Account Number, Description and State Code fields for Activity code: i.e. Program 1814
11. Select Save
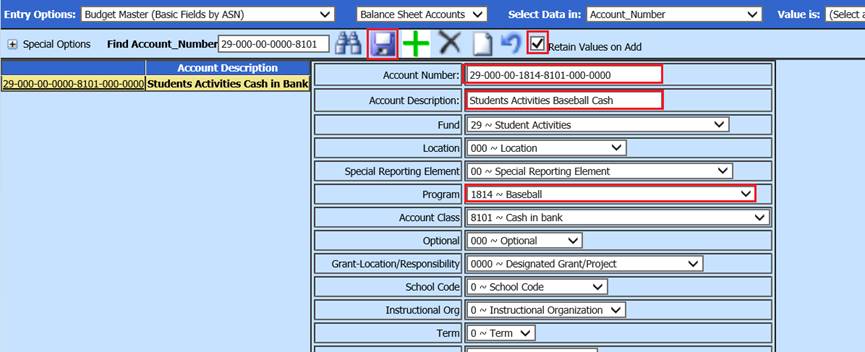
Note: Example is using the Retain Values on Add
option. Searched for new overall Student Activity cash account, placed a
check in Retain Values on Add, before selecting  .
.
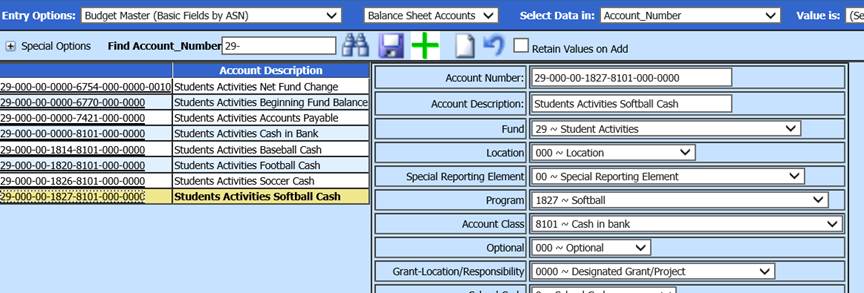
12. Complete Steps 9 thru 11 for each activity cash account needed
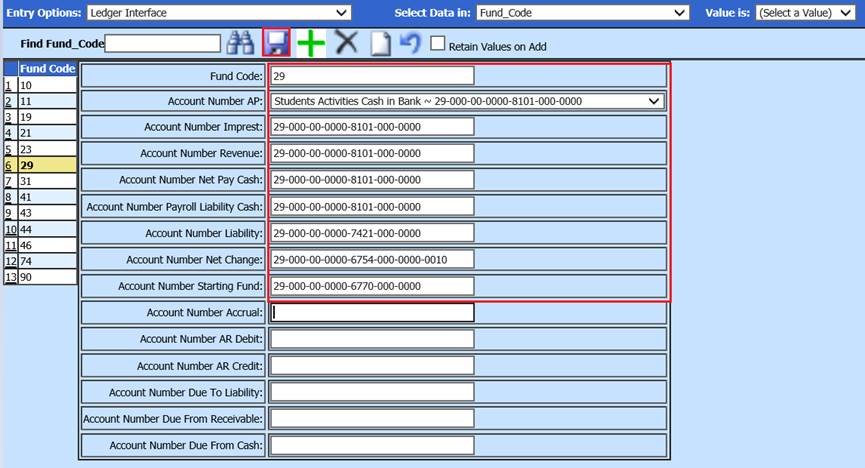
Set up Ledger Interface for New Fund
1. Entry Options: Select Ledger Interface
2. Select the to Add a new fund

3. Update Ledger Interface accounts
4. Select Save
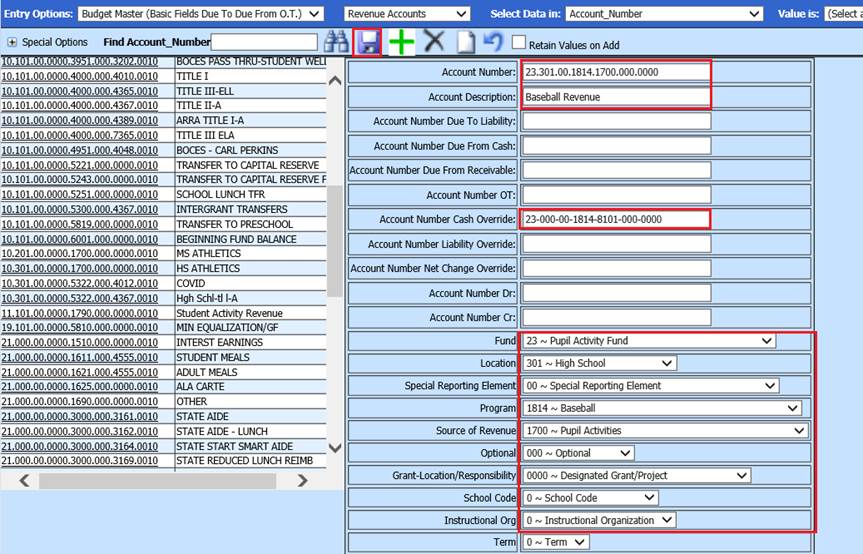
Add Revenue Account
1. Entry Options: Select Budget Master (Due to Due from with O.T)
2. Select Revenue Accounts

3. Select  to Add new record
4. Update fields:
a. Account Number
b. Account Description
c. Account Number Cash Override: Add in the Cash account associated with the activity. i.e. 1814 for Baseball
d. Complete the required Fund, Location, etc. as needed for State Revenue account
e. Select Save
5. Complete Steps 3 thru 4e for each activity revenue account needed
Note: Upon deposit entry for GASB set up funds, the Cash Override field will auto populate with what is listed in the “Account Number Cash Override field”. All transactions should be completed through Accounts Payable or Cash Receipts for each Activity Cash Account to post correctly.
Add Expense Account
1. Select Expense Accounts

2. Select  to Add new record
3. Update fields:
a. Account Number
b. Account Description
c. Account Number Cash Override: Add in the Cash account associatedwith the activity: i.e. 1814 for Baseball
d. Complete required Fund, Location, Program, etc. as needed for State Expense account
e. Select Save
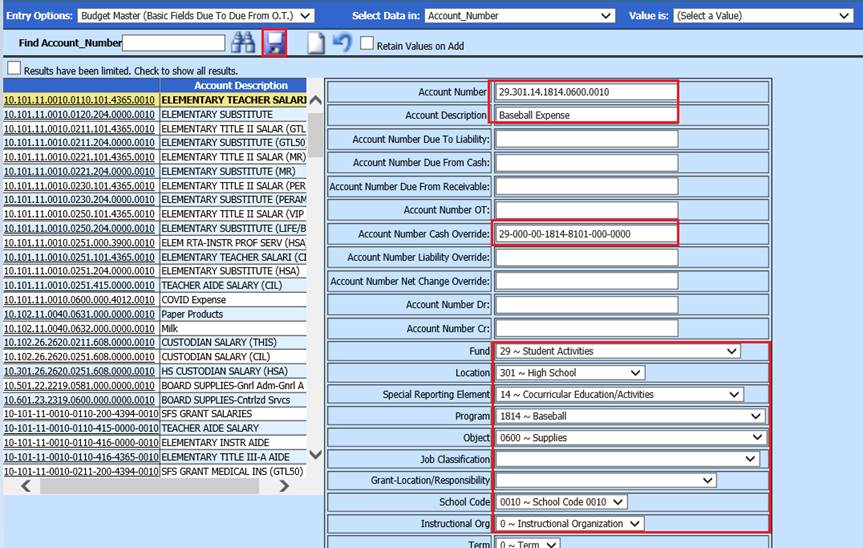
4. Complete Steps 2 thru 3e for each activity revenue account needed
Note: Upon invoice entry for GASB set up funds, the Cash Override field will auto populate with what is listed in the “Account Number Cash Override field”. All transactions should be completed through Accounts Payable or Cash Receipts for each Activity Cash Account to post correctly.
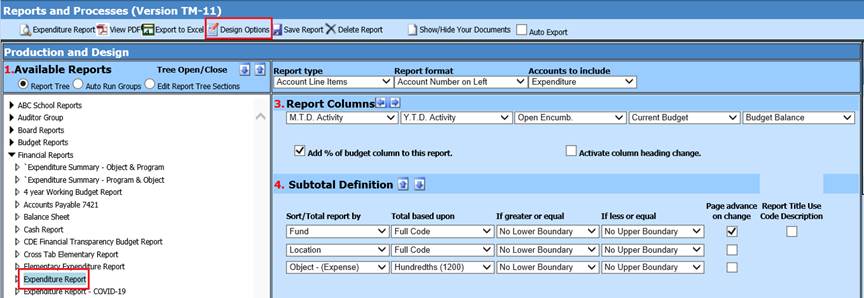
Creating Student Activity Reports
You will need to create two new column formulas to utilize with the Student Activity reporting. If you would like assistance with financial report set up, please xconnect and someone in software support will assist you.
1. Select Reports
2. Select Financial Reports
3. 1 Available Reports & Groups: Select Expenditure Report
4. Activate the Design Options
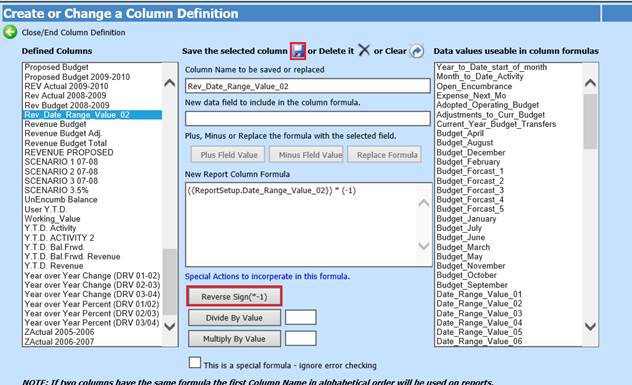
5. Select the Create or Change a Column Definition
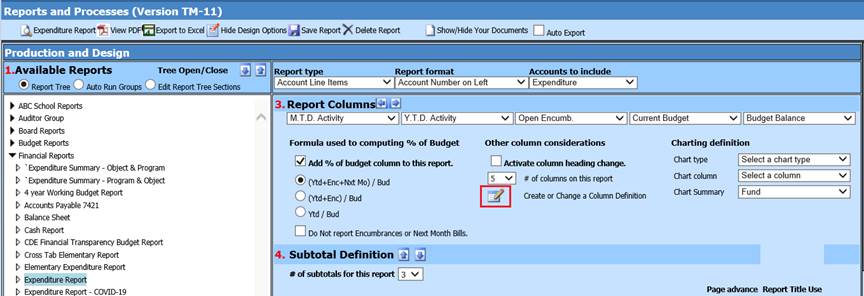
a. A new window will display
b. Data Values useable in column formulas: Select Date_Range_Value_02
c. Add the Reverse sign (-1)
d. Change the Column name to Rev_Date_Range_Value_02
e. Select Save
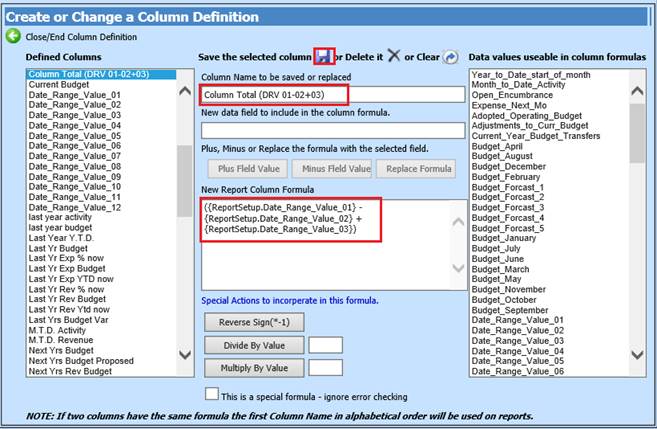
6. Create the second new column to use in new Reports:
a. Data Values useable in column formulas: Select Date_Range_Value_01 - Date_Range_Value_02 + Date_Range_Value_03
b. Change the Column Name: Column Total (DRV 01-02+03)
c. Select Save
7. Once completed, select Close/End Column Definition

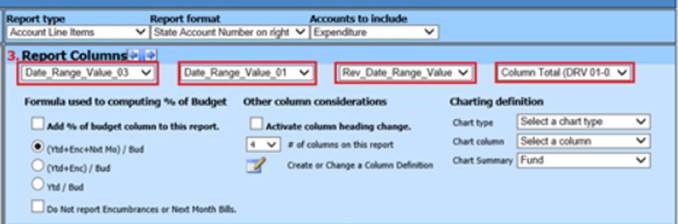
8. You will be back to the main page. Select the 4 columns listed below for the report
a. Date Range Value 03
b. Date Range Value 01
c. Rev Date Range Value 02
d. Column Total (DRV01-02+03)
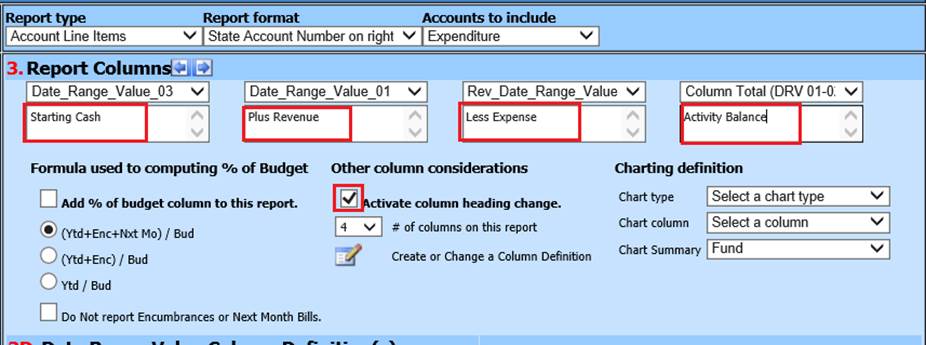
9. Activate the column heading Change
10. Change the name of the Columns, Rename as desired
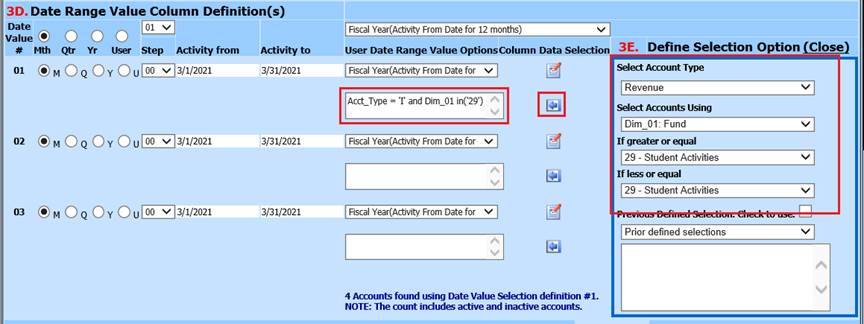
11. Date Range Value Column Definitions (s), Adjust the Column Data Selection to include the Revenue, Expense and Balance Sheet Accounts accordingly.
a. #01 Select  to open up the formula
selection
to open up the formula
selection
b. Select Account Type: Select Revenue from the drop down selection
c. Select the Fund
d. Use the
 to move the formula
over
to move the formula
over
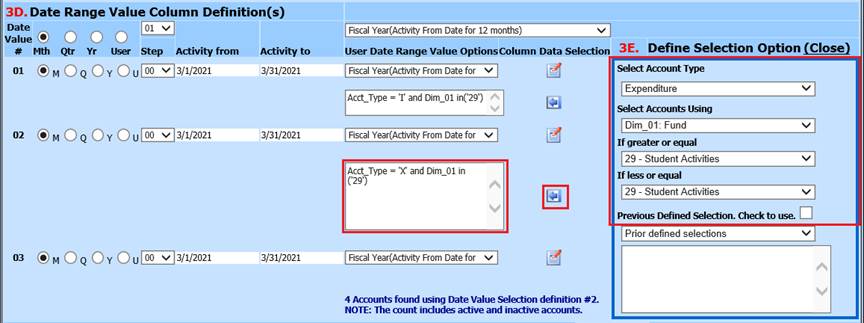
e. #02 Select to open up the formula
selection
f. Select Account Type: Select Expenditure from the drop down selection
g. Select the Fund
h. Use the
to move the formula
over
i. #3 Select to open up the formula
selection
j. Select Account Type: Select Balance Sheet from the drop down selection
k. Select the Fund
l. Use
the to move the formula
over
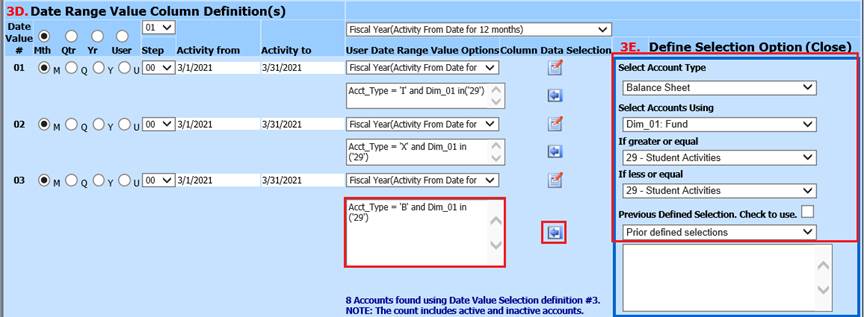
m. Select  when completed
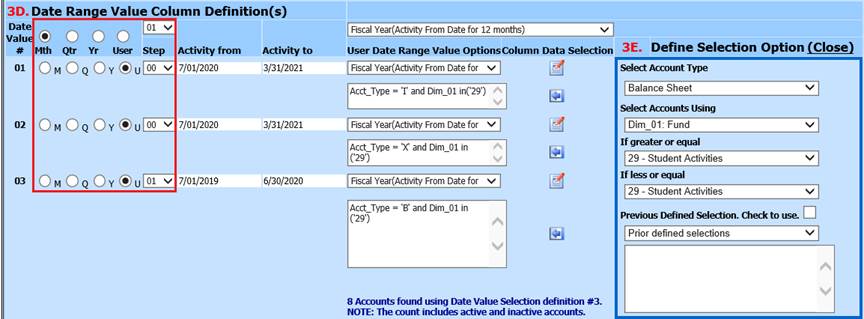
12. Update Steps for each Date Range Value selection
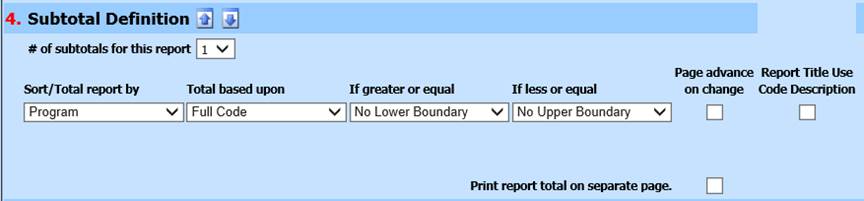
13. Subtotal Definitions: Depending upon your set up use either 1 or 2 Subtotals. Below example is using 1 subtotal
a. Select Program
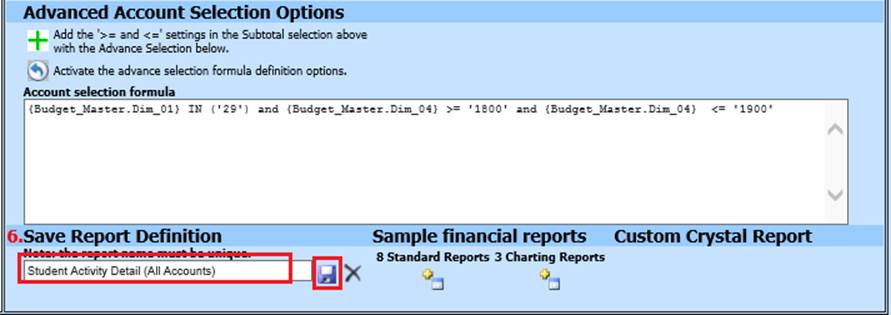
14. Active Account Selection Options: Select the Activate the advance selection formula definition options
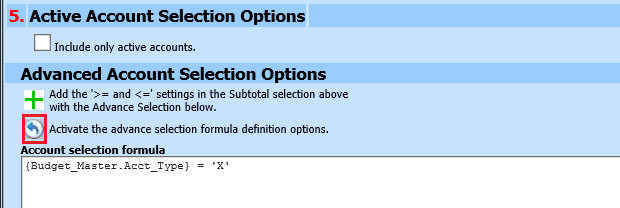
15. Create the formula for the Student Activity accounts, as needed
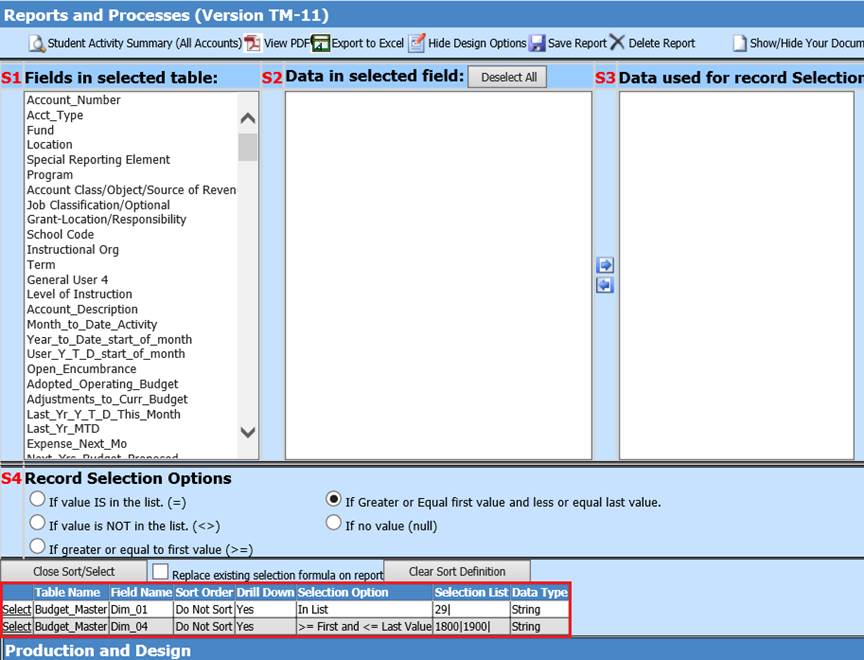
16. Select “Close Sort/Select”
17. You will be back at the main Reports page.
18. The formula will be listed in the Account Selection Formula box
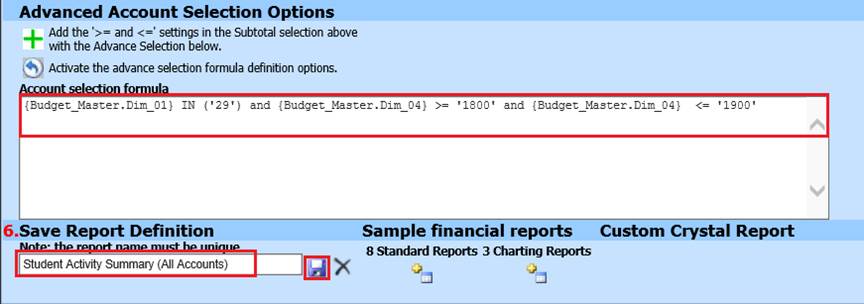
19. Under Save Report Definition, Change the Report name
20. Select Save
21. Preview the report
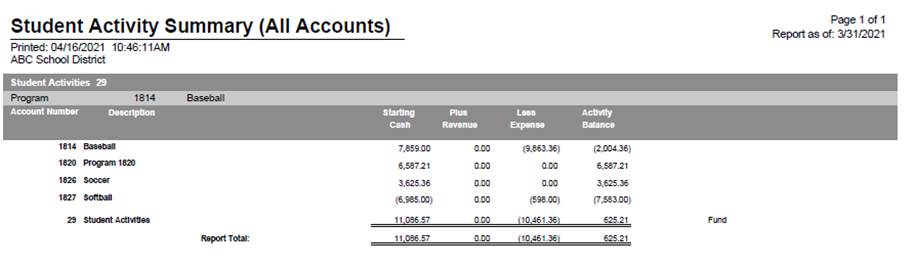
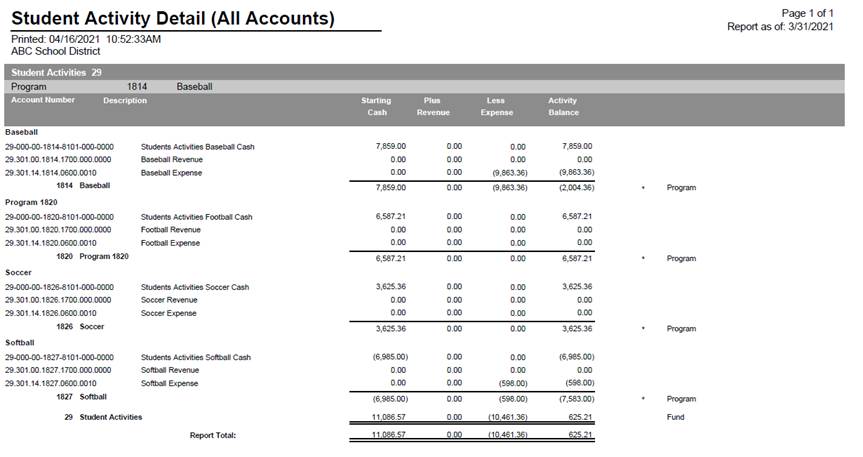
22. Using the Student Activity Summary Report (All Accounts), change Report Type to “Account Line Items”
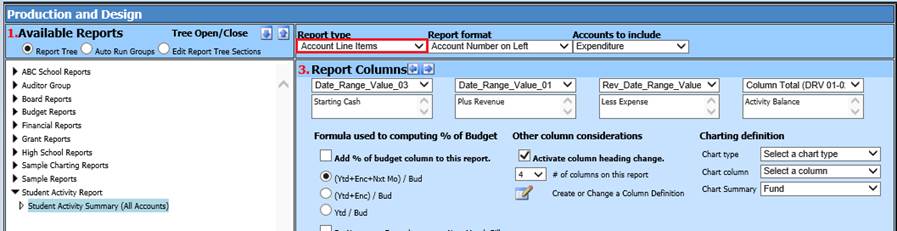
23. Under 6 Save Report Definition: Change the name of the Summary report to Student Activity Detail (All Accounts).
24. Select Save
25. Preview report