
Revised: 2/2019
Before starting please
note, to import the file it must be in CSV or XLXS Format.
1. Select Purchasing
2. Select Import Purchase Order
3. Select Browse to locate your file
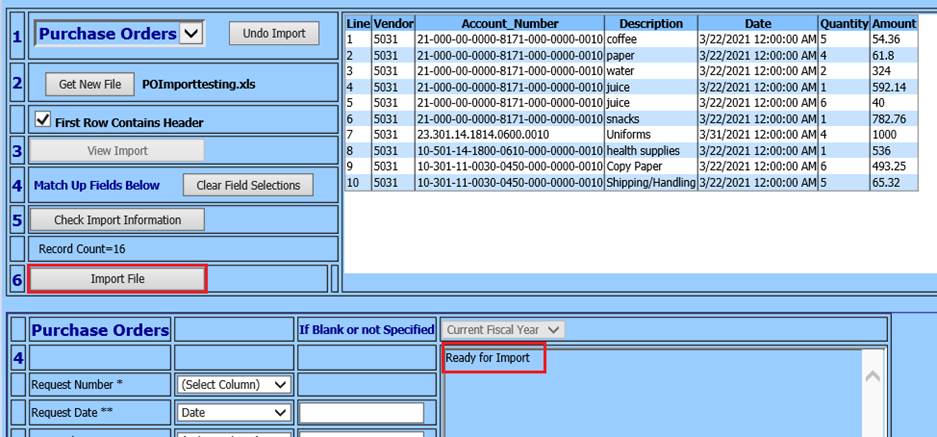
4. Select View Import
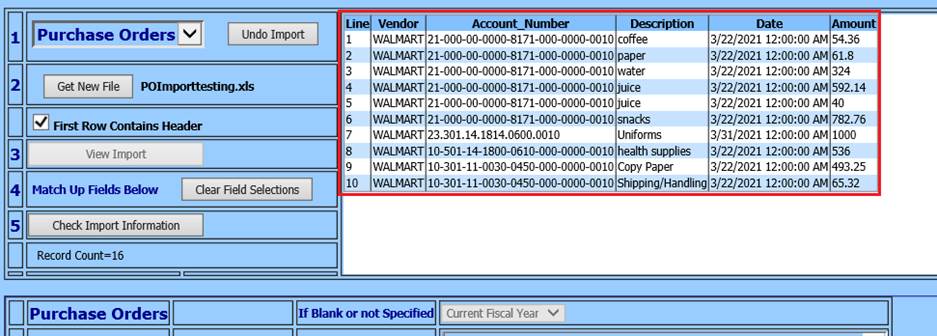
5. The file information will appear to the upper right
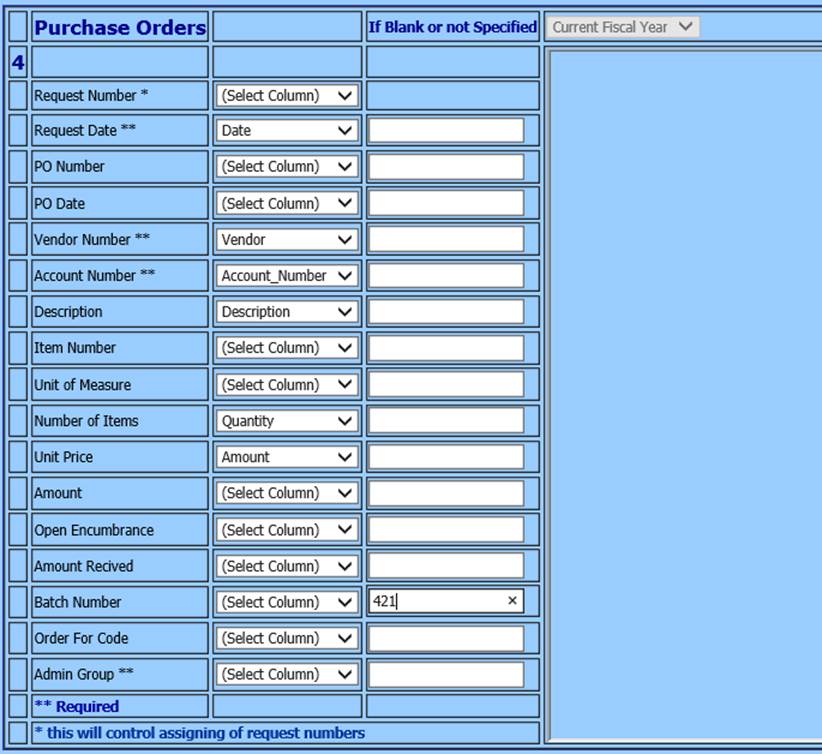
6. Match the SDS fields up with the file headers on the left (i.e. Request Number, Request Date, etc.) If you want a default value for any of the fields key it in on the right (i.e. Batch Number)
7. Select Current Fiscal Year/Next Fiscal Year
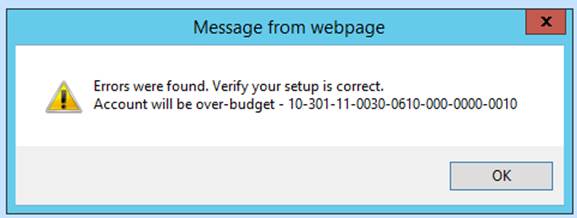
8. Select “Check Import Information” when the verification is done a message will appear. Either “Ready for Import” or a warning message will be generated. If a warning message appears, it will list the errors found when preparing the import. Select OK on the warning message to review the error items.

•If warning messages are noted, a message from web page will display.
•The message will also be in the space provided
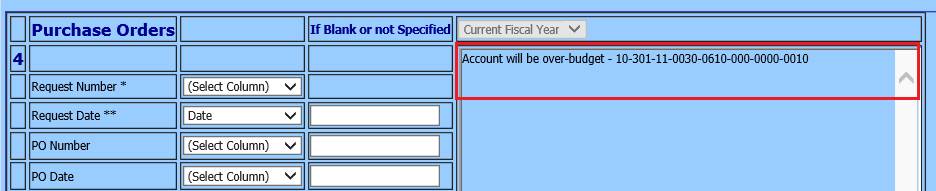
•Note: Errors must be corrected to proceed with importing file. Make needed corrections and complete above steps, until no error message are received.
9. When “Ready for Import” is diplayed, select Import File
10. You will receive a message the import has been completed. Select OK.
11. Select Request for Purchase Entry and Changes
12. Select the Vendor in the import
13. Select the view/edit of the imported entry
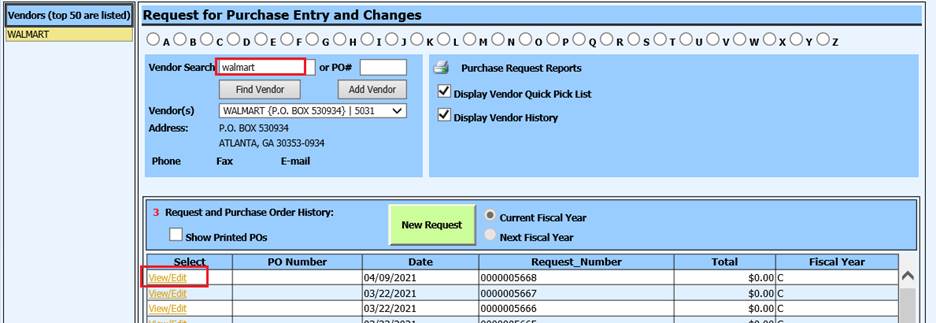
14. Verify the data imported is correct on the request
Notes:
•If you are using the Group Authorization process, the requests will now be available for approval.
•Any imported PO’s that have been changed or approved can’t be deleted in the import program.