 to save
 Revised: 2/2022
Invoices may be emailed to
customers. These invoices can be emailed to customers through use of the
customer’s email address field if completed in Customer Master.
Verify the Server and Return Email Address Information
Note: This section may have already been done if you are using email direct deposit for your employees and/or vendors.
1. Select Administrative Utilities
2. Select SDS Web Office Settings
3. Select the bullet E-Mail Settings
Server Name or IP
Enter the external full DNS name or external IP address of the SDS Web
Office Server. This address will be used in some applications to give users
external access to Web Office.
SMTP Server
Enter the name or
IP address of your SMTP Server. This address will be used by SDS Web Office to
send emails. Make sure the SDS Web Office Server has permissions to relay email
through this server
Return Email Address
Enter a valid email
address to be put in the “From” field in the sent email.
Send Test
Message
Once you have completed the fields, select Send Test Message to
verify receipt of email delivery.
Save Changes
Select Save
Changes to save any changes to these fields.
Auto E-mail Settings
This field is the email notification that staff will receive when they
have an item that requires their attention. You can adjust these settings as
needed.
E-Mail Address Fields and Descriptions
If staff have other e-mail fields available for use (i.e. Spouse_E-mail, Home_E-mail, etc.), these fields can be selected here and made available for use in other applications by checking the box “Office”.
Enter Email Information for Person Sending Invoices by Email
1. Select Master File and Code Entry Options then select Master File Horizontal Data Changes
2. Entry Options: Select Users
3. Locate the User sending out the Invoices
4. In the field "e-mail" enter the Users email address
5. Click to save
Enter Email Information for Customers receiving Invoices
1. Select Master File and Code Entry Options then select Master File Vertical or Horizontal Data Changes
2. Entry Options: Select Customer Master
3. Enter the customer’s email address into the field Email Address for customers to receive invoices by email.
4. Click to save
Create Invoices to Send by Email
Invoices sent by email can be a part of the normal process. All steps in the invoices process will be completed, until the point of viewing the invoice.
1. From Invoice Production, view your Invoice(s)
2. Select Export report to Message Center.
3. Then select “Send Now”. Once completed, you will have a copy to view in Look and Browse and it is ready to email to the Customer.
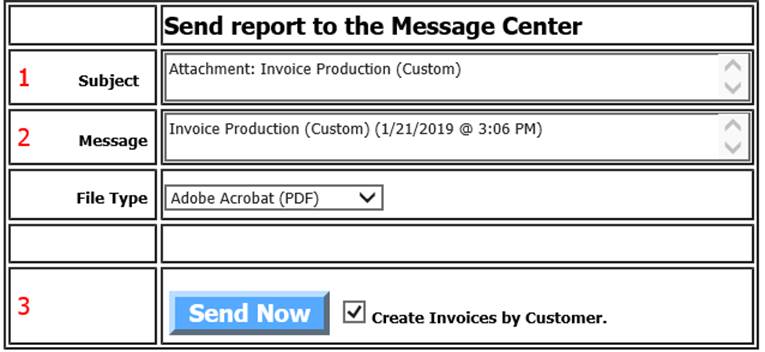
4. This process will create a copy to view in Look and Browse and to be sent to Customers.
Send Invoice(s) by Email
1. Select Accounts Receivable
2. Select Invoice Email (Message Center).
3. From the “To” dropdown, select the invoice date that you wish to email.
4. Select the customer(s) that you wish to email an invoice from the list at the left side of the screen.
o To select a single customer, highlight the customer and select the single arrow key (>) to move that customer to the Send Message to: box at the right side of the screen.
o To select all customers listed, click the double arrow key (>>) to move all customers to the Send Message to: box at the right side of the screen.
5. Enter a subject and a message for the email.
6. Select
 , each customer will receive an email with an
attachment containing the invoice.
, each customer will receive an email with an
attachment containing the invoice.
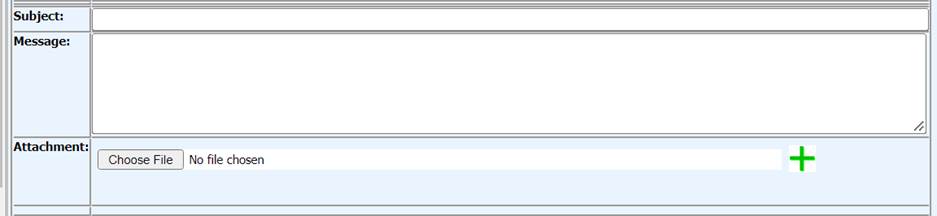
Note: Users have the ability to add more than one attachment by clicking on the green plus sign, located on the right side of the “Attachment;” area.