Revised: 4/2020
1. Select Cash Receipts.
2. Select Make Receipts Permanent (Post to Ledger)
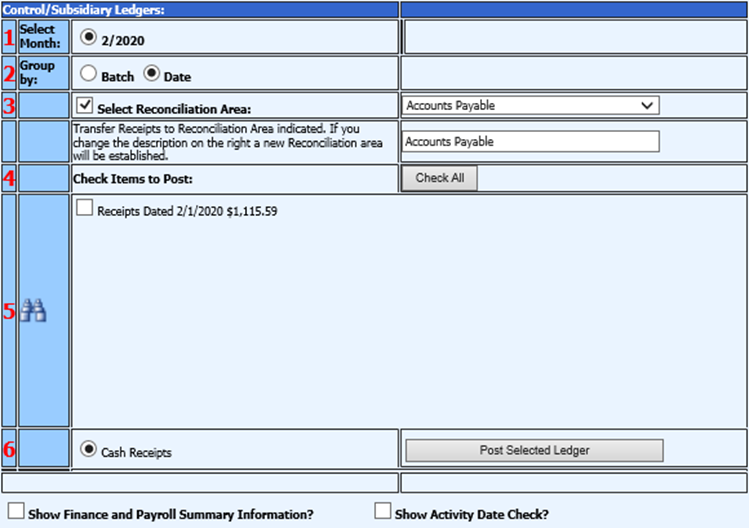
3. 1 Select the month: Select the month to make entries permanent (all receipts for the month selected will show in Section 5)
4. 2 Group by: Date is the default, if you want to post by batch choose “Batch”
5. 3. Select Reconciliation Area: From the drop down select the check reconciliation area you want a select group of checks to post to for check reconciliation purposes.
o If the reconciliation area is not listed that you need to post a group of checks to, you can create a new check reconciliation group. To create a new check reconciliation group, enter the name needed into the field next to “Transfer Receipts to Reconciliation Area indicated.”
6. 4. Check items to Post: Select the items being made permanent or select Check All.
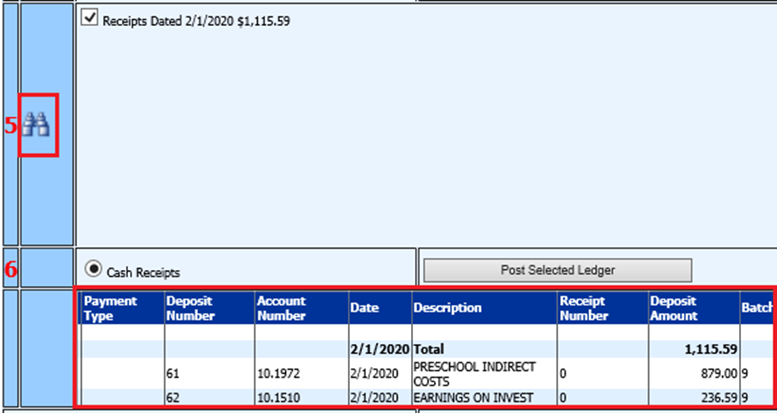
7. 5. Use the Binoculars to preview the Items to be made permanent.
8. 6 Select “Post Selected Ledger”