Revised: 4/2021
The final step after running the check production process is to “Make the Checks Permanent (Post to Ledger)”.
1. Select Accounts Payable
2. Select Make Checks Permanent (Post to Ledger)
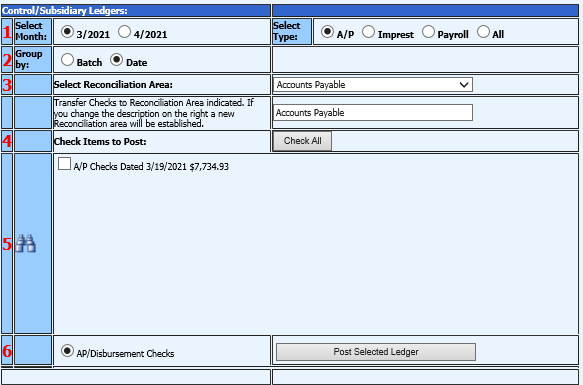
3. 1. Select Month: This area shows the month(s) that checks need to be made permanent (post to ledger).
4. Select Type:
o NOTE: The “Select Type” is based upon the “Item Types” in the Disbursement / Accounts Payable Entry screen.
•Accounts Payable: This selection shows in the #5 area the accounts payable invoices that were entered.
•Impress: This selection shows in the #5 area the invoices that were entered as “Imprest Item Types”.
•Payroll: This selection shows in the #5 area the invoices that have been posted from payroll or other invoices that have been entered with an Item Type of “Payroll.”
•All: This selection shows all of the invoices that 5ave posted into the system.
5. 2. Group by: There are two selection options in this area. The “Batch” selection will list in the #5 area the checks by batch number. The “Date” selection will list in the #5 area the checks by check date. The default setting for this is “Date”.
6. 3. Select Reconciliation Area: Select the Check reconciliation area the checks need to post to.
Note: If a new Check Reconciliation area needs to be created enter in the name of the new reconciliation area. Once the checks are posted the new check reconciliation area will be created. This new check reconciliation area will be available in the drop down selection area the next time checks need to be posted to this reconciliation area.
7. 4. Check items to Post: Select the checks to post, or select “Check All”.
8. 5. Select the Binoculars to preview the Checks to be made permanent.
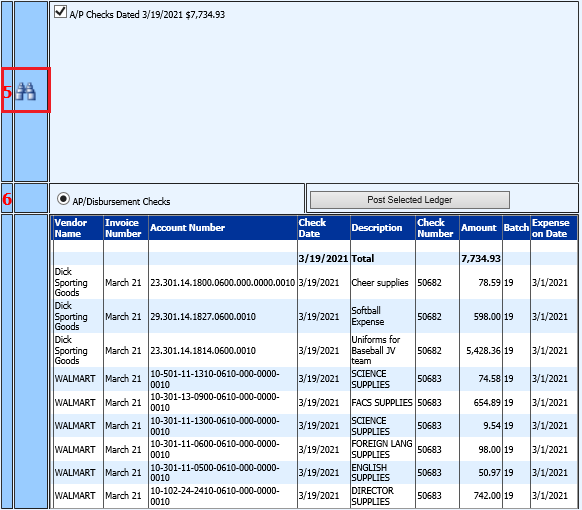
9. 6. Select “Post Selected Ledger” once you have verified the checks to be make permanent