Revised: 4/2021
The Master Code Field Definition and Maintenance controls the data fields on the entry screens. In this section, you can Code or Un-code a field and adjust the Heading or Hover Texts.
Coded Field
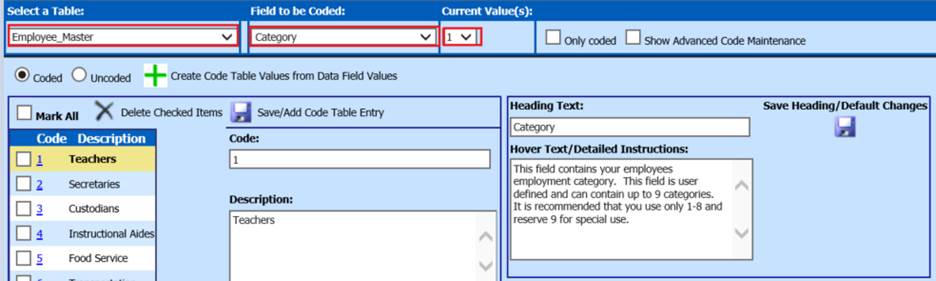
1. Select Administrative Utilities
2. Select Master Code Field Definition
3. Select a Table: Select table with field to be coded, i.e. Employee_Master
4. Field to be Coded: Select field to be coded, i.e. Category
5. Current Value(s): This will auto fill with current values from the data entered in the tables and fields selected.
a. Only coded: Select this option to only see predefined codes, in data entry

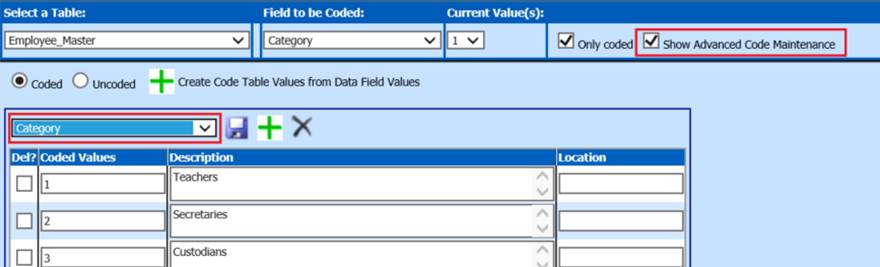
b. Show Advanced Code Maintenance: Select this option to view the Advanced code field options selections.
6. Enter/Change the “Code” and “Description”
7. Select Save/Add Code Table Entry
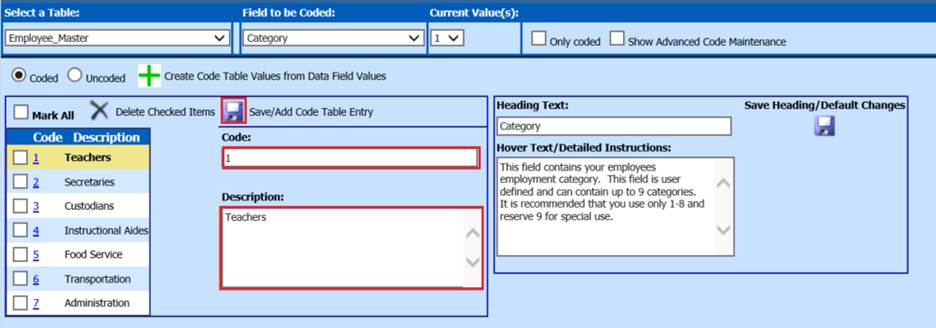
8. To add additional Codes, repeat steps 6 and 7
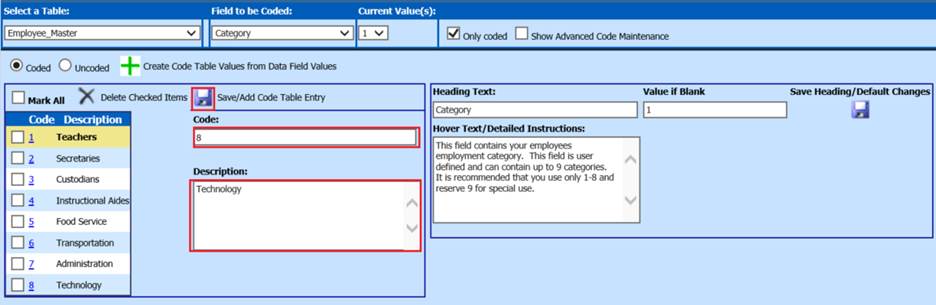
Example: Add the Categories to be selected from in the Employee Master record.
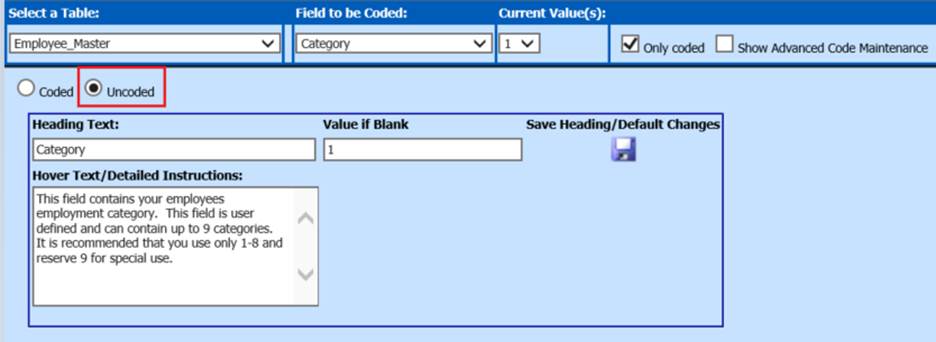
Un-code a Coded Field
1. Select Uncoded
2. The field will be un-coded, manual entries can be entered in the fields.
Delete a Coded Field
1. Place a check mark in the box beside the coded field
2.
Select the  to delete

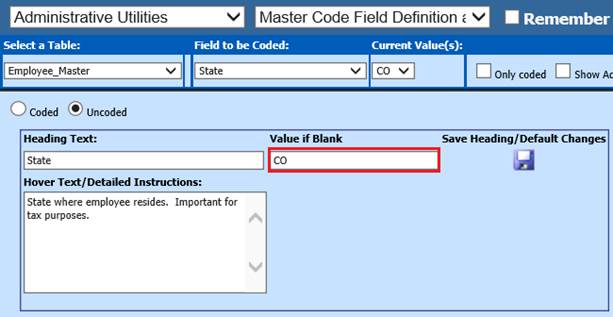
Default Field Value if Blank
Making a field a
Default value: This allows the code table maintenance area the ability to set a
default value for a particular field.
1.
Select 
2. Fill in the Value to be defaulted under the “Value is Blank field”
3.
Select  Save/Add Code Table Entry
4. The field that you made a default value will automatically be filled in when accessing the record on the screen in the table that was chosen.
5. When editing a record the value will be changed if left blank. This will happen even if the field is not in the view or on the screen.
Example: Using the table; Employee Master and Field to be Coded; State. When creating a new record for an Employee under the Employee Demographics screen the State field will be filled in on the screen.
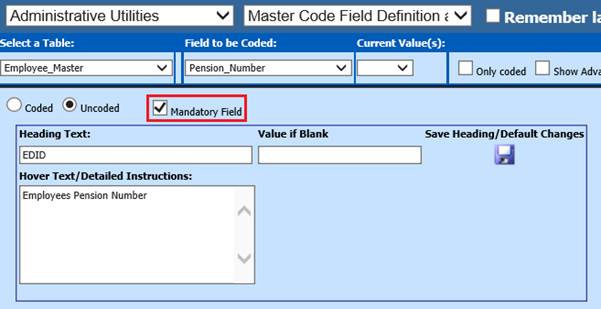
Define Mandatory Data Entry Fields
You may define
your own fields as mandatory for data entry
1. Select the table with the field you want to code i.e. Employee_Master
2. Select the field you would like to code i.e. Pension_Number
3. Checkmark the “Mandatory Field” box
4.
Click to Save Heading/Default Changes.
Change Heading Text
The
field headings for the vertical and horizontal data entry screens can be
changed.
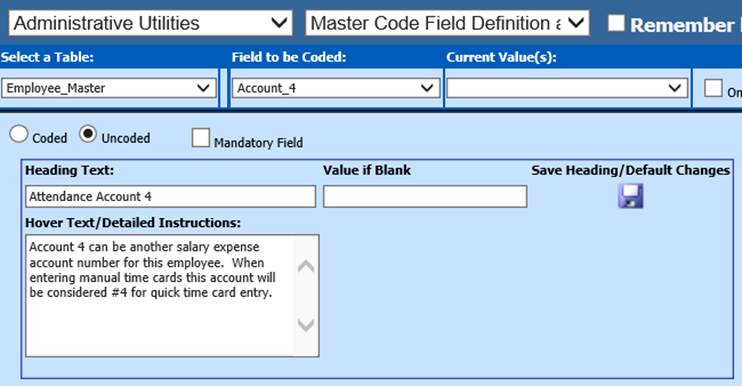
1. Select the table with the field you want to code i.e. Employee Master
2. Select the field you would like to code i.e. Account_4
3. Enter the desired “Heading Text”
4.
Click to Save Heading/Default Changes
Example: You may change the field named “Account_4” to “Attendance Account 4”.
NOTE: This does not change the actual SDS defined field name. The field will still display with the original field name for sorting and report creation.
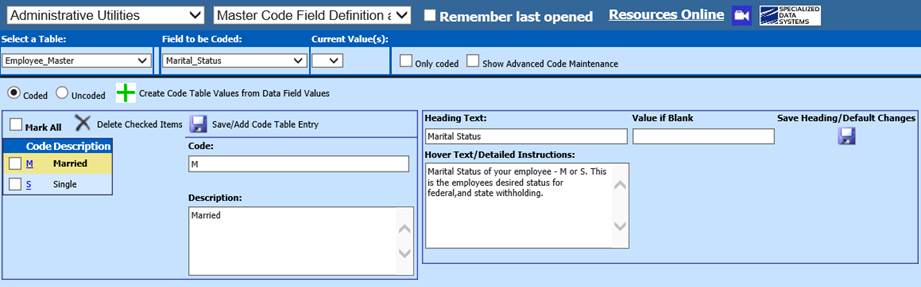
Change Hover Text
The text that appears in a pop
up box when hovering over a field in the Data Change Request screen in Employee
Information Changes can be edited as follows
1. Select the table with the field you want to code i.e. Employee Master
2. Select the field you would like to code i.e. Marital Status
3. Enter the desired text in the “Hover Text/Detailed Instructions” box
4.
Click to Save/Add Code Table Entry
Example: In the Employee Master, the hover text for the Marital Status field will display Married or Single