Revised: 12/2020
This option will display Finance Activity Reports only. The Finance Activity Reports are also available under General Accounting Reports.
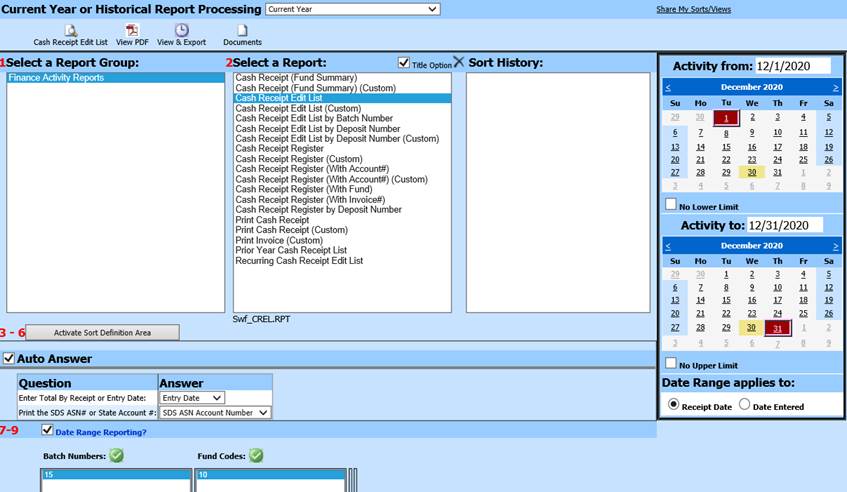
To preview and print a standard Cash Receipt report:
1. Select Cash Receipts
2. Select Print Cash Receipts
3. 1 Select a Report Group: Finance Activity Reports
4. 2 Select a Report: i.e. Cash Receipt Edit List
5. Select Date Range needed
6. Activate Auto Answer: Once you have selected your report, create any sorts you would like, answer the questions under “Activate Auto Answer” and put a check in the box next to Activate Auto Answer. By putting the check in “Activate Auto Answer” it will retain those same parameter answers the next time you run that same report and sort.
a. Question: Enter Total By Receipt or Entry Date:
b. Answer: Entry Date or Receipt Date
7. Preview Report
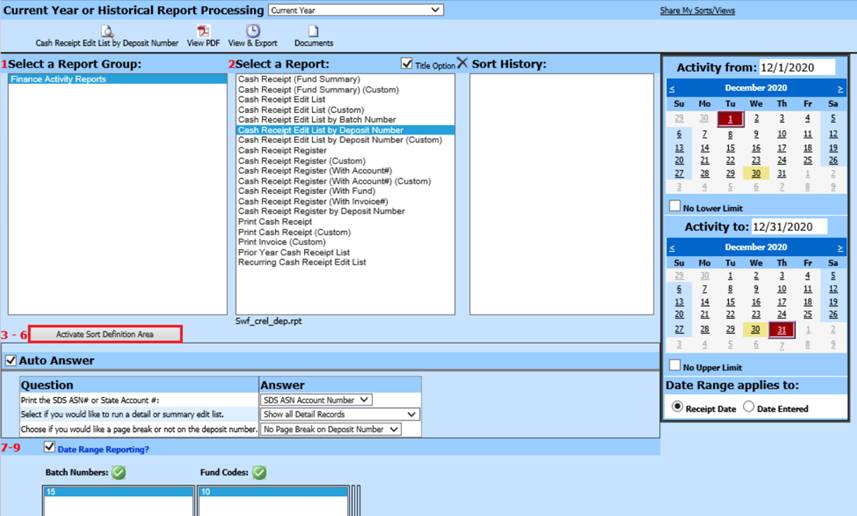
To preview a standard Cash Receipt using Activate Sort Definition Area:
1. Select Cash Receipts
2. Select Print Cash Receipts
3. 1 Select a Report Group: Finance Activity Reports
4. 2 Select a Report: i.e. Cash Receipt Edit List by Deposit Number
5. Select Date Range needed
6. 3 – 6 Select “Activate Sort Definition Area” to sort the report.
a. 3 Select Tables in selected report: i.e. Cash Receipts
b. 4 Fields in selected table: i.e. Date Entered
c. 5 Data in selected field: Select data, use
 to move to 6; i.e. 12/15/2020
d. 6 Data used for record Selection: Verify Data listed is correct
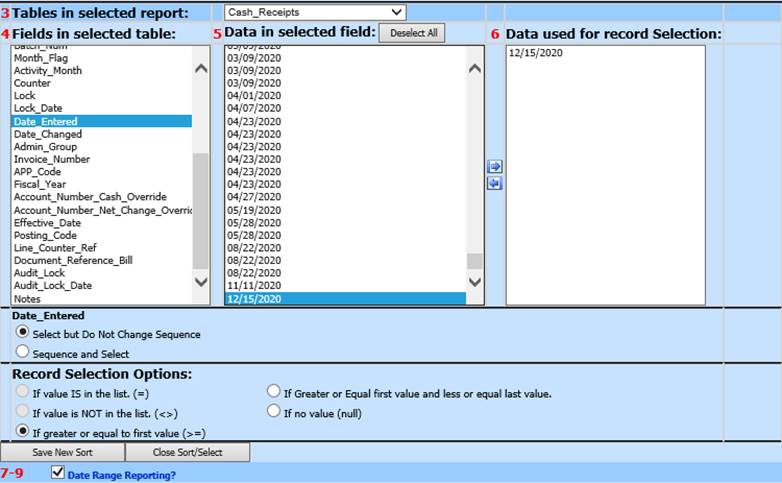
e. Select Data Field:

i. Select but Do Not Change Sequence: If this options is selected, it will not change the grouping on the report
ii. Sequence and Select: If this option is selected, it will change the grouping on the report
f. Record Select Options:

i. If value IS in the list (=): The report will show detail that is = to the data chosen under “Data used for record selection”
ii. If value is NOT in the list (<>): The report will show detail that is <> than the data chosen under “Data used for record selection”
Note: The two options above will not be active if your field is a numeric field (as opposed to an alphanumeric field)
iii. If greater or equal to first value (>=): If selected, this will display data that is greater or equal to the first value in “Data used for record selection”
iv. If Greater or Equal first value and less or equal last value: If one item is listed, this is equivalent to saying “is equal to”. If two are chosen, they allow for a lower or upper range.
v. If no value (null): When looking for a “Null” record, a normal sort will not work. You can’t ask for less than or equal to a value in a field that has no value (null). This option gives you a way to find records with no entry in a particular field.
g. Select Save New Sort
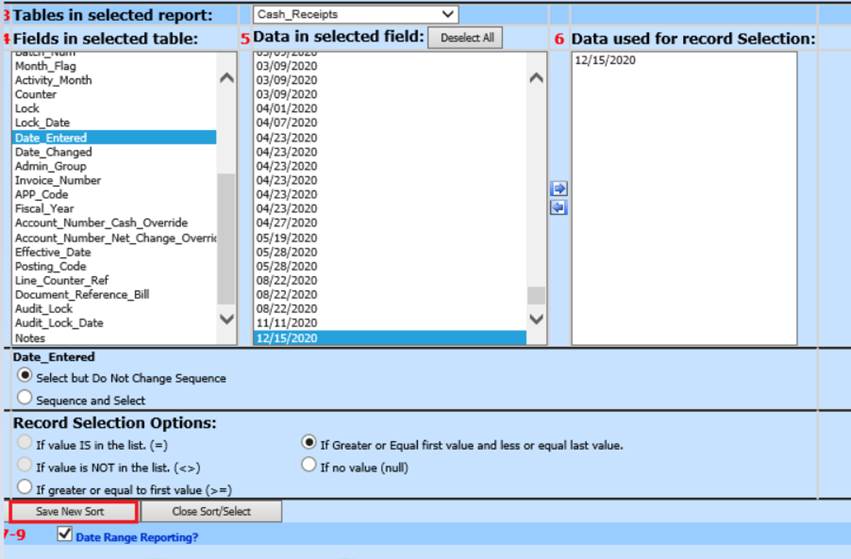
i. The formula will be added below
ii. Add any additional sorts, if needed
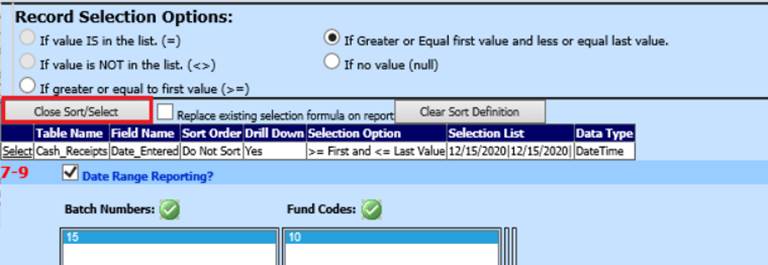
h. Select Close Sort/Select
i. You will return to the main Reporting screen.
7. Activate Auto Answer: Once you have selected your report, create any sorts you would like, answer the questions under “Activate Auto Answer” and place a check in the box next to Activate Auto Answer. By checking “Activate Auto Answer” it will retain those same parameter answers the next time you run that same report and sort.

8. Preview, Print or Export the report
9. Close Report
10. If you wish to save the sort/selection setup: Under Sort History, select Date and time stamp
11. Enter a new Title for report; i.e New CR Report
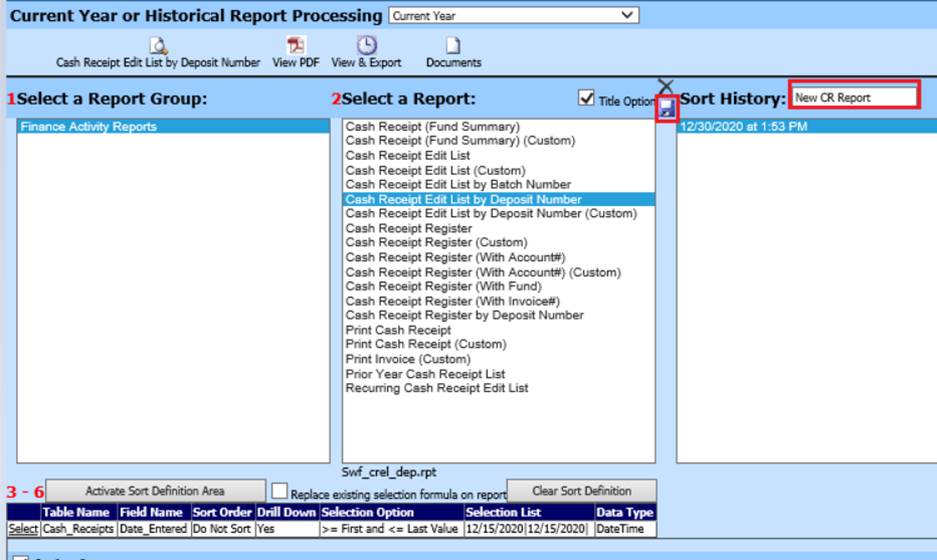
12. Select Save
a. The new Title will be saved and listed under Sort History

To delete a saved report:
1. 1 Select a Report Group
2. 2 Select a Report
a. Select Sort to delete
3. Select X to remove from Sort History list
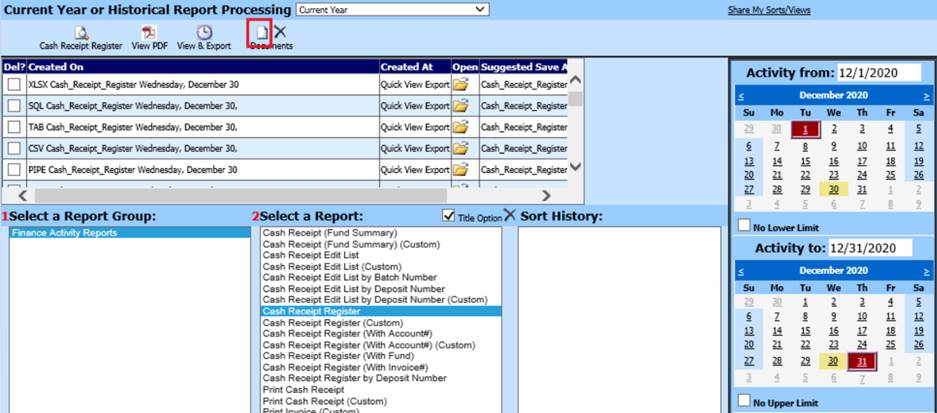
To preview a standard Cash Receipt report using View/Export:
1. Select Cash Receipts
2. Select Print Cash Receipts
3. 1 Select a Report Group: Finance Activitiy Reports
4. 2 Select a Report: i.e. Cash Receipt Register
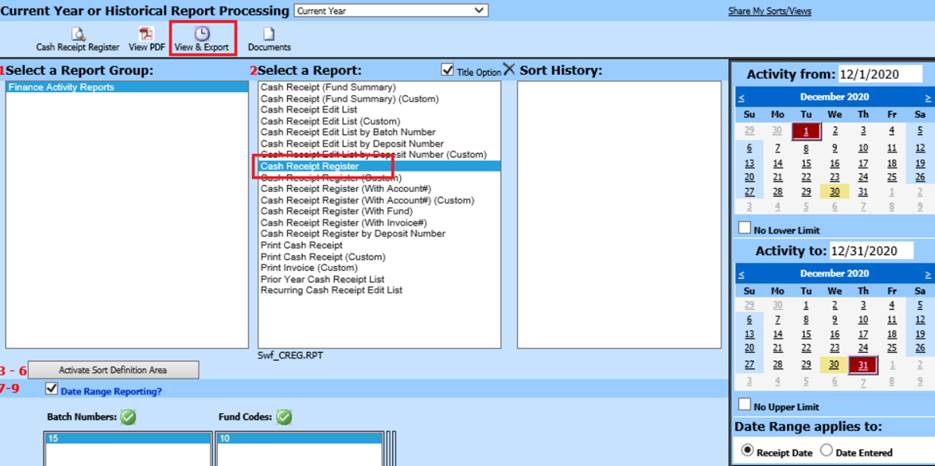
5. Select View & Export
6. A new window will display
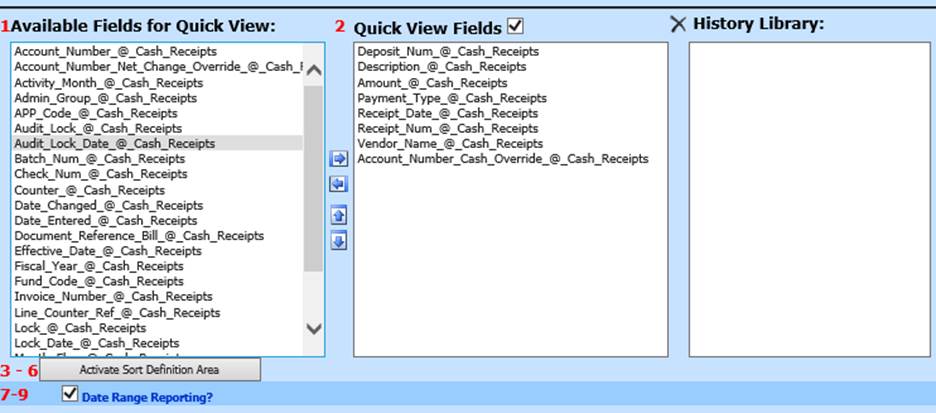
a. 1 Available Fields for Quick View:
i. All specific fields available to choose from for the report needed
NOTE: the “@_Cash_Receipts” indicates what table contains the field
b. 2 Quick View Fields
i. Fields to be listed on the report
c. History Library:
i. Reports previously created
7. Under 1 Available Fields for Quick View: Select Fields to add into report
8. Use  to move selected field into 2 Quick View Fields column
9. If you
wish to remove any fields from the standard report; highlight fields, and then
use  to move into 1 Available Fields for Quick
View.
to move into 1 Available Fields for Quick
View.
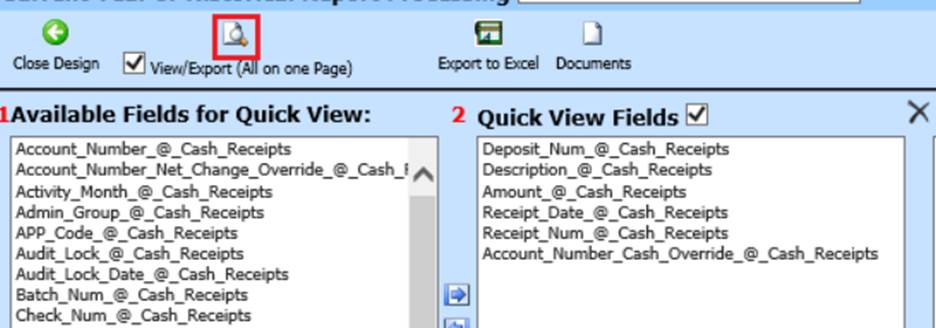
10. Select View/Export (20 per Page) to view All detail lines on one page
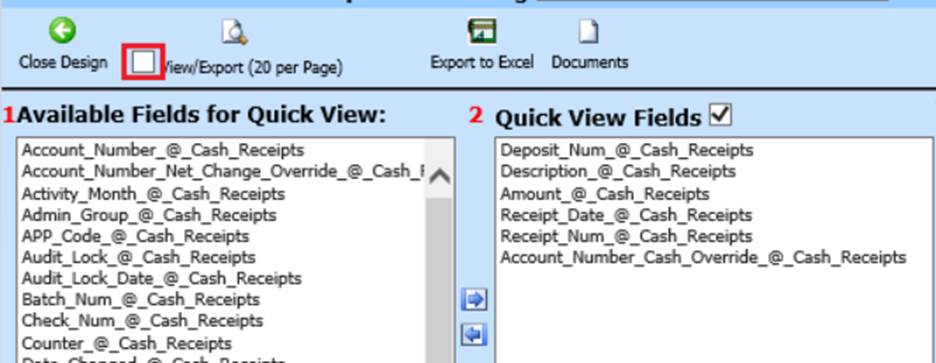
a. If unchecked, will display 20 detail lines per page
11. Preview Report
12. Select + Quick View Export to save new report
a. Determine the format you wish to save the new report
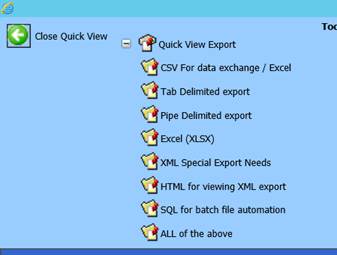
i. CSV For data exchange/Excel
ii. Tab Delimited export
iii. Pipe Delimited export
iv. Excel (XLSX)
v. XML Special Export Needs
vi. HTML for Viewing XML export
vii. SQL for batch file automation
viii. All of the above
13. Once you have selected the format needed, you will be taken back to the main page.
14. Select Documents
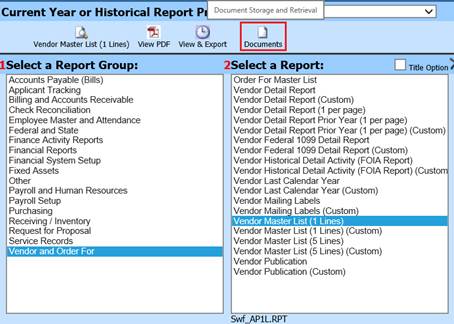
15. The report folders will be available to select from and save as needed.