Revised: 4/2021
Recurring Entry processing allows for efficient entry of accounts payable entry items that are entered each month or on a consistent basis. The system utilizes a separate storage space in each data entry area for recurring entries. These recurring entries can be accessed at any time and posted to the data entry areas to be included in the current month’s processing.
Entry of Recurring Accounts Payable
1. Select Accounts Payable from the menu and select Disbursement/Accounts Payable Entry.
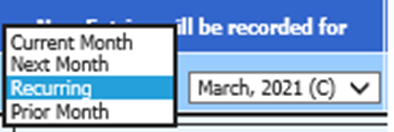
2. From “New Entries will be recorded for”, select the drop down menu and select Recurring.
3. After “Recurring” has been selected, the Accounts Payable Screen will show that the entries will be recorded in a separate “Accounts Payable (Recurring) area”.
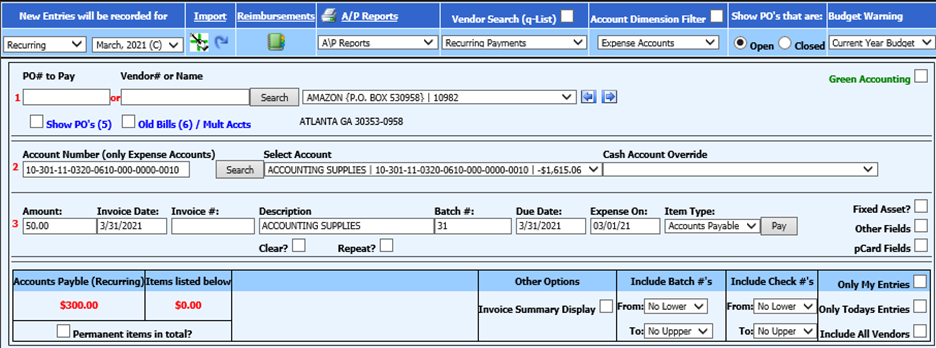
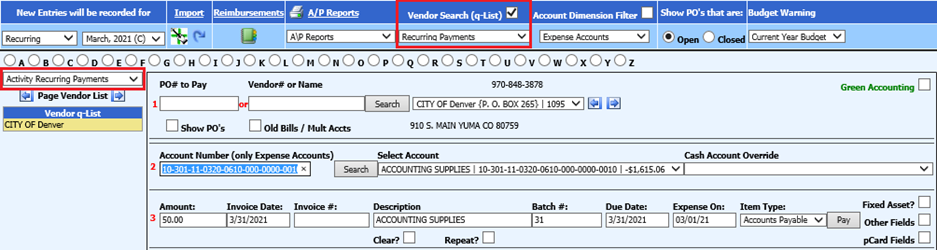
4. Enter the Vendor Information, through use of the Search Option or through use of the Q-List Vendor Selection. There is also a Vendor Search Option to display “Recurring Payment” vendors. This may be helpful after the initial recurring entries have been entered.
5. Enter the Account Number for the Recurring Invoice.
6. Enter the amount for the Recurring Entry, or if the amounts will change, enter
0.00 for the amount. (The amounts can be edited prior to transferring the
Recurring items).
7. The Invoice Date, Description, Batch Number, Due Date, and Expense On Date will default to the date the item is entered, if specific entries are not made to these fields. The Invoice Number can be entered, can be left blank, or can be entered prior to Transferring the Recurring Accounts Payable Batch(s).
8. Select Pay to record the entry. This does not record an entry for check processing but just records the entry as posted.
To Print a Report to Verify Recurring Entries
1. Select Reports/General Accounting Reports from the menu.
2. Select Accounts Payable (Bills).
3. Select Recurring Bills Payable List.
4. Select the Batch(s) to be included in the report
5. Select the view icon to display your report
6. Print the Recurring Bills Payable report.
Tips for Recurring Accounts Payable Entry and Transfer
1. Each time Recurring Data is transferred into Accounts Payable, there may be a need to edit information so it can be recorded correctly for each time period that it is transferred.
Data that can be edited each time the AP Recurring Entries are transferred into Accounts Payable:
•Due Date
•Invoice Date
•Expense On Date
•Batch Number
•Invoice Number
•Description
•Amount
2. Recurring Entries can be entered in any manner that makes sense for how you will want to process and transfer these entries.
a. Example 1: If you have several entries that you would like grouped in a specific manner, enter each group with a unique batch number. Each batch of recurring entries can be transferred separately and at different times.
b. Example 2: If you have one group of recurring entries that you will want to transfer into Accounts Payable on a monthly basis and another group of recurring entries that you may want to transfer one time a quarter, enter each group with a different batch number. There is no set time of when recurring entries will get transferred into Accounts Payable. You, as the user, have full control to determine if/when the recurring entry batches will get transferred into Accounts Payable for processing.
Transfer Recurring AP Entries into Disbursements/AP
When Recurring AP Entries are transferred into Disbursements/Accounts Payable, the entries are then ready for processing through Accounts Payable. The Transfer process saves you the time of having to manually enter each line item each time the entries need to be processed.
The Recurring Entries will always remain in the Recurring Entry area and can be transferred whenever needed.
To Transfer Recurring Entries:
1. Select General Ledger Processing and Entry Options
2. Select Transfer Payroll Data and Recurring Entries.
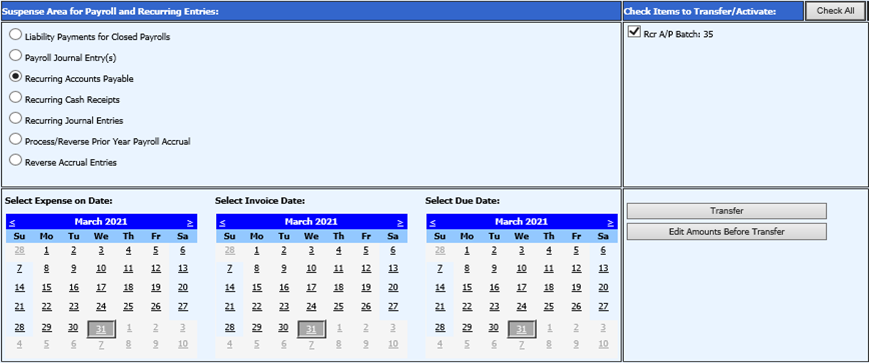
3. Select Recurring Accounts Payable
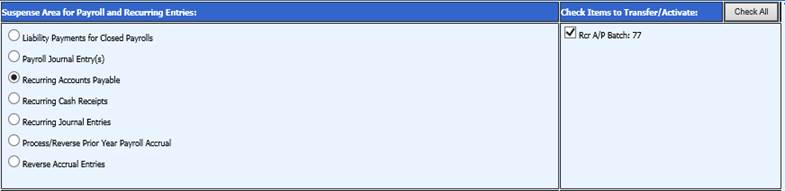
4. From the right side of the menu select the batch(s) you wish to process.
5. At the bottom left of the screen, select the “Expense On Date”, “Invoice Date”, and “Due Date” from the calendars. These dates will be entered on each of the Recurring Entries that are transferred.
6. If all information is correct and does not need to be edited prior to being transferred, select “Transfer”. If any information needs to be edited, select “Edit Amounts Before Transfer”.
7. If you select “Edit Amounts Before Transfer”, a horizontal grid will appear which will allow you to quickly edit invoice numbers, amounts, descriptions, and other information prior to transferring the entries to Disbursement/Accounts Payable.
8. If you wish to change the batch numbers on all entries to a new number, enter
the new batch number in the field “Enter a Batch # Override” and push the
button to “Change All Batch #’s”.
9. If you wish to change all Invoice/Ref numbers, enter the new Invoice Number/Ref in the field “Enter a Inv/Ref# Override” and push the button to “Change all Invoice/Ref #”.
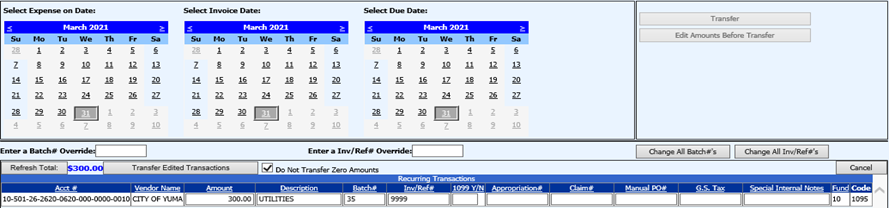
10. If you wish to edit any Amounts, make any necessary changes. You may then select “Refresh Total” to display a new/updated Total for all invoices in the Batch. This total can be used to verify the accuracy of the batch entries.
11. If there are any line items that should not be transferred, the amount should be changed to Zero and check the box “Do Not Transfer Zero Amounts”.
12. When all edits are complete, select “Transfer Edited Transactions”.
13. The Recurring Accounts Payable invoices will now be displayed in your Disbursements/Accounts Payable. If you need to make further edits on the account numbers or other fields, select Edit on the line item(s) in Disbursement/Accounts Payable and make any needed changes.