Revised: 4/2021
Entering a Requisition
1. Select Purchasing
2. Select Request for Purchase Entry and Changes
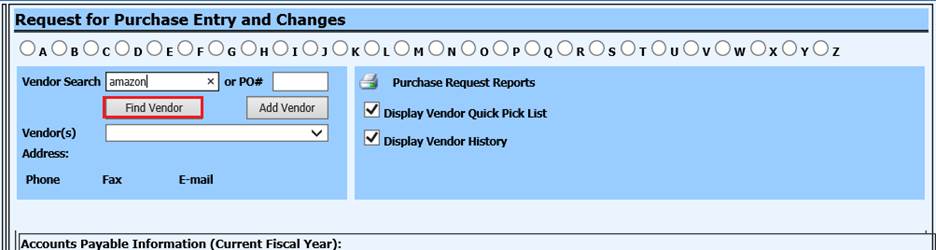
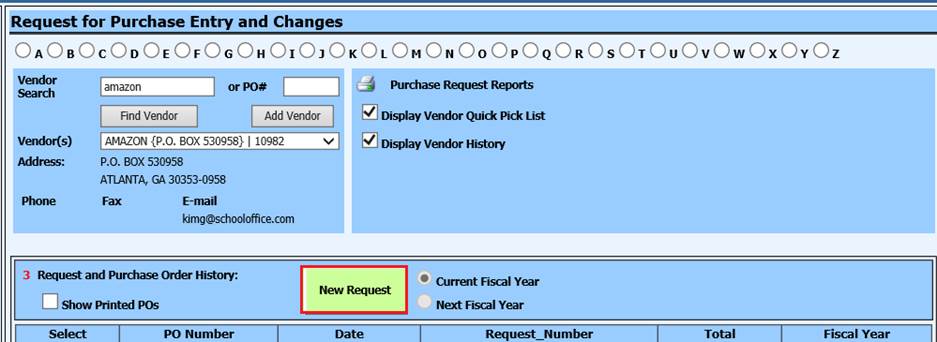
3. Vendor Search: You can use either the bullets or enter vendor name in the Vendor search field
4. Select “Find Vendor”
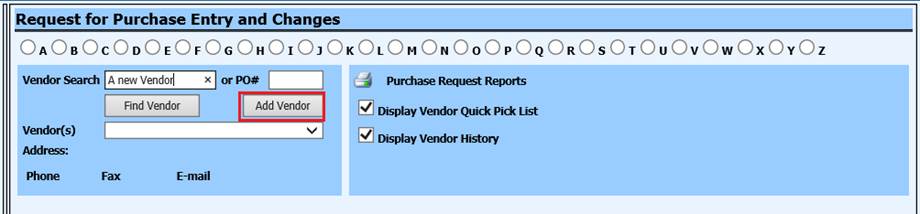
•If you need to add a new vendor, enter in the Vendor name in Vendor Search and select “Add Vendor”.
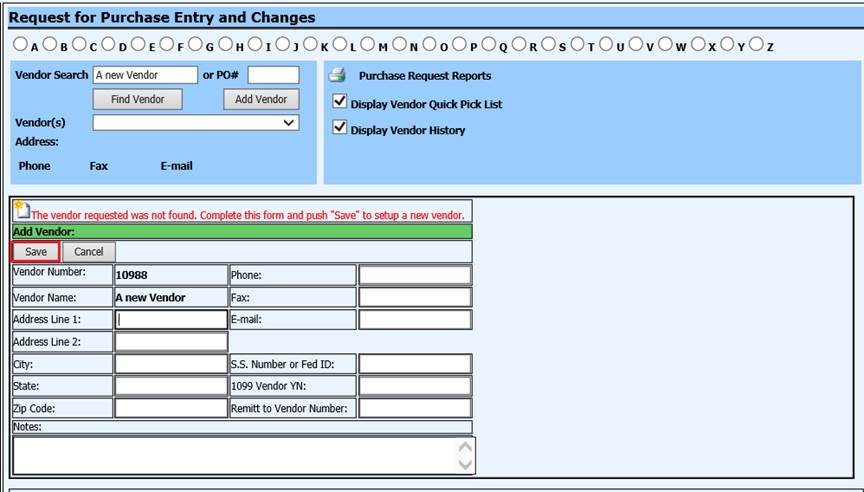
•Enter required information for the new Vendor (address, phone, email, etc.)
•Select Save
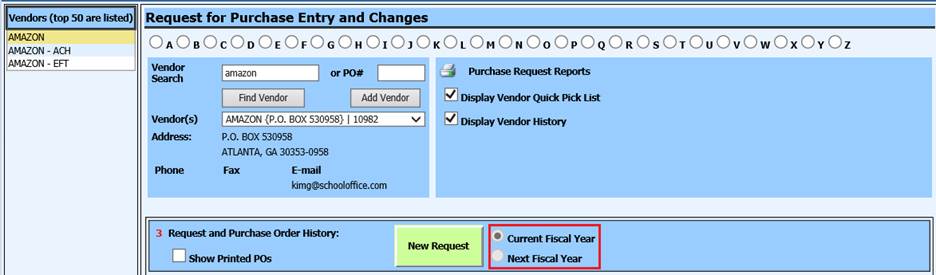
5. If applicable; select Current or Next Fiscal Year
6. Select “New Request”
•If using email notifications for approval processing, an email will be sent to the authorizer upon selection of “New Request”
7. 1. Order For: Select the person or group placing the order (fields completed under Ship to Information will autofill from Order For Master)

8. Order From: Vendor information
9. PO# (Optional) and PO Date (optional): These fields are optional. Normal processing will assign a PO number and PO date when the request is authorized.
10. Request Number: Requisition number assigned
11. Dated: Date Requisition was entered
12. Group: Authorization group required to approve Requistion

13. 2 Ship to Information: Verify the ship to information and make changes, if needed.

Detail Area Entry Options:
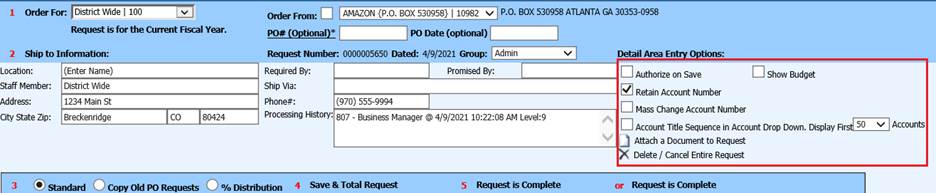
•Authorize on Save: To be used with supervisor status only; for the ability to override ALL other approvers upon Save
•Show Budget: To display Budget for line item, upon data entry of requisition
•Retain Account Number: Select to repeat Account Number for all line entries
•Mass Change Account Number: Select to mass change multiple line entries with incorrect Account Numbers
•Accout Title Sequence in Account Drop Down. Diplay First “20 Accounts: Determine the amount of accounts to select from, upon data entry
•Attach a Document to Request: Select if you have a quote or other document to attach to the Requisition
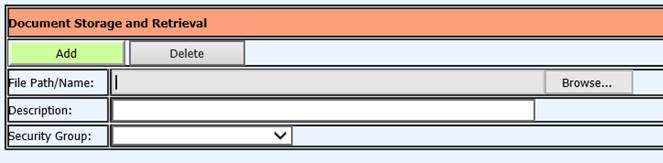
i. Click Browse to locate the document on your computer
ii. Enter a Description such as “Quote for Instruments 3/17/2021”
iii. Select a Security Group (optional)
iv. Select Add
•Delete/Cancel Entire Request: Select If you do not need the Requesition started
14. 3 Select Requisition Entry option:

•Standard: New request entry
•Copy Old PO Requests: Prior POs entered you can choose to copy from
•% Distribution: allows you to setup request by percentage. After you select how many lines you wish to use then follow the instructions in red. You can then enter the account numbers, Save and Exit
15. Enter details for the order:
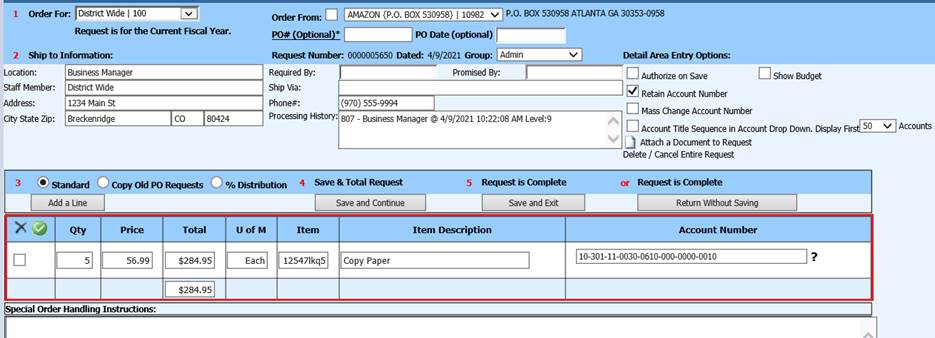
•Quantity, Price
•U of M (Unit of Measurement)
•Item
•Item Description
•Account Number. The Account Number can be added in using the Account Number or Account Description
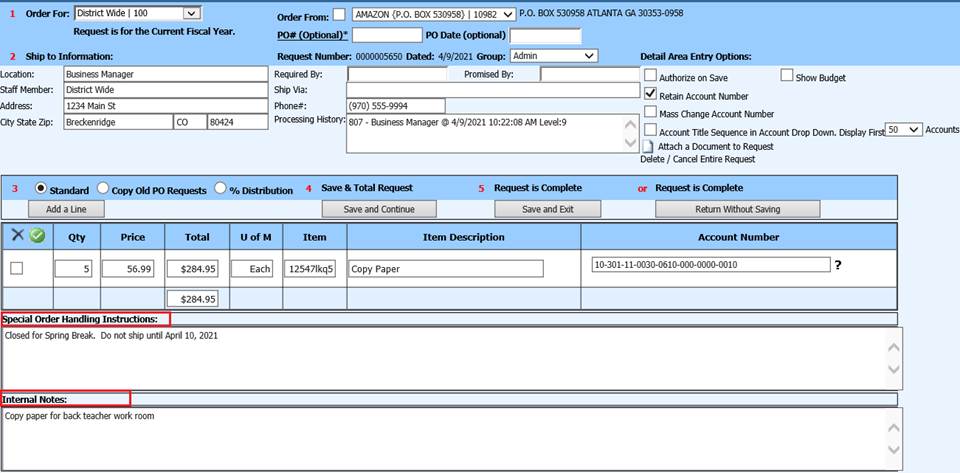
•Special Order Handling Instruction: Information to be relayed to Vendor
•Internal Notes: Information to be relayed between users, related to the requisition
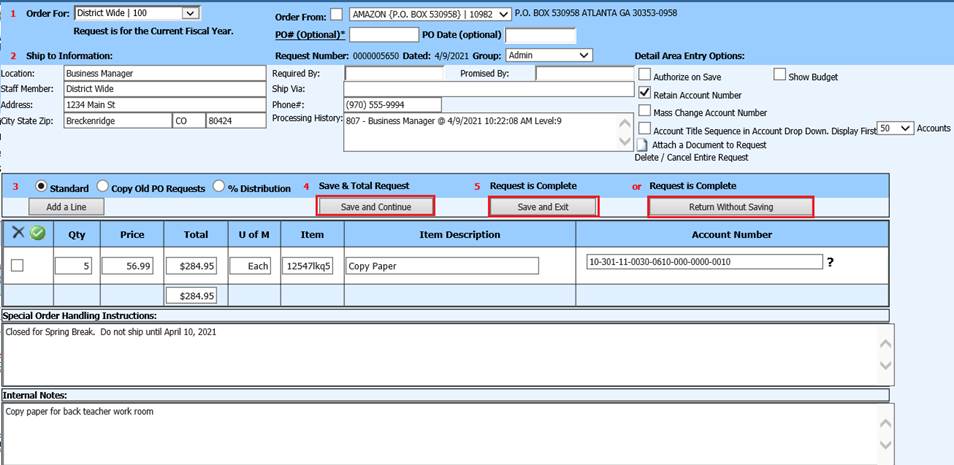
16. 4 “Save and Continue” to enter in additional entries for this request or any delivery or internal notes.
17. 5 “Save and Exit” once the request has been completed
18. or “Return without Saving” use this option if you are an approver viewing the request without making any changes.
NOTE: Entering Next Year PO’s with a July
date:
After selecting “Order For” click on PO# Optional and the program
will assign a PO number and will fill in the date of entry. Change that date to
a July date and then complete the request, Authorize on Save and then select
Save and Exit. The PO will then print with the July date. The date of the
request goes back to the entry date, but the PO will still have the July
date.