Revised: 4/2021
This area allows you to limit access to Accounts and
Budget for Data Entry, Master File Data Restrictions and Detail Data Entry and
View Restrictions of the programs from Users. Security Areas are divided into
three categories:
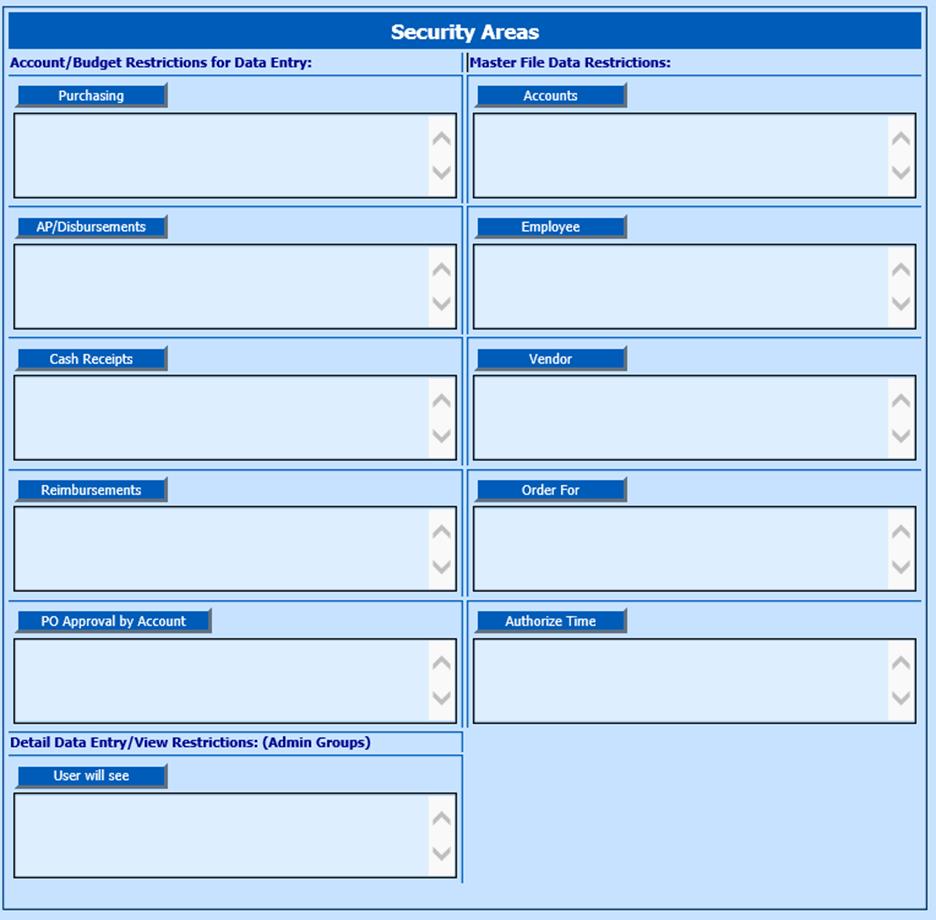
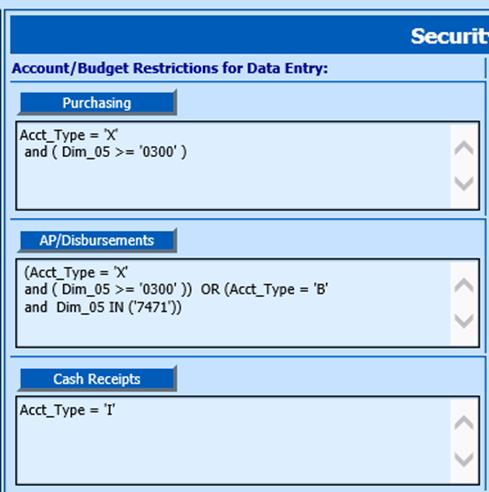
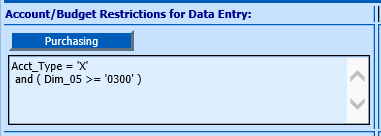
Accounts/Budget Restrictions for Data Entry:
Restrict Account Access for Data Entry by Type, Fund, Dim, Account, etc.
Detail Data Entry/View
Restrictions: Used in conjunction with the various areas of the programs,
such as, Accounts Payable, Purchase Order Request and Attendance, to set
groupings and an authorization hierarchy utilized for entry in each area.
Administrative groupings allow department/building heads to view and authorize
only the areas that pertain to them. When completing purchase order requests,
you will need to determine which groups of personnel will be involved in each
entry. 
Master File Data Restrictions: Restrict Access to
Accounts, Employees, Vendors, Order For information and Authorize
Time.
Users Area
Users listed in
the Users column have access to the Finance System. To view the data access
control restrictions of any user or user in a group, highlight the Name or
Login. All areas that have been restricted will be displayed in the various
Security Areas.
User Search Options
Alpha Search
Select the letter to search by, all Users beginning with the selected
letter will display. 
Name Search
Enter the first or
last name, or portion of a name, select Search for User or Enter, all Users
matching your criteria will display.
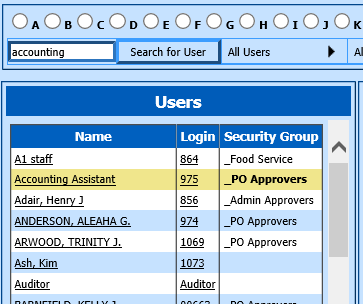
The
Users area displays the Name, Login, Security Group [if
assigned].
Users/Group Search
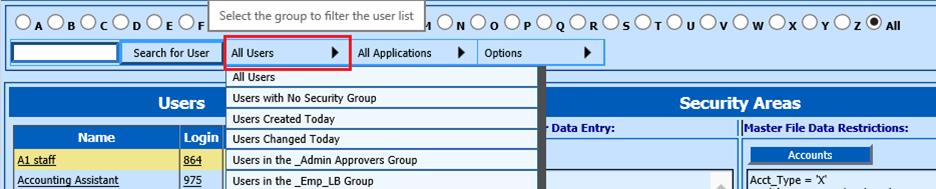
•All Users: Displays for selection All Users by Name
•Users with No Security Group: Displays for selection Users who have not been assigned to a group, that have an individual security setup.
•Users Created Today: Display any Users or Groups who have been created today.
•Users Changed Today: Display any Users or Groups who have been changed today.
•Users in the _ “Categories”: Display’s Users for selection
from Your Defined Security Groups.
Application Search
This option will allow you to
view the User or Group that has restrictions related to specific areas of the
program. Viewing breakdowns allow for easier assignment of restrictions in your
program. 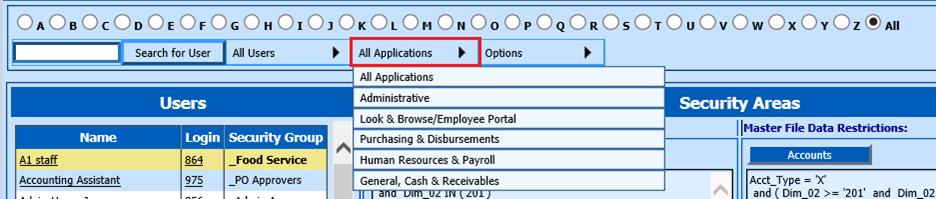
•All Applications: This option will display All Users who have access to any categories in every area of the program in Account/Budget Restrictions for Date Entry, Master File Data Restrictions and Detail Data Entry/View Restrictions.
•Administrative: This option will display all Users who have access to the Administrative areas.
•Look & Browse/Employee Portal: This option will display all Users who have access to the Look & Browse/Employee Portal areas.
•Purchasing & Disbursements: This option will display all Users who have access to Purchasing or Disbursement areas.
•Human Resources & Payroll: This option will display all Users who have access to Human Resources or Payroll areas.
•General, Cash & Receivables: This option will display all Users who have access to the General, Cash Receipts or Receivables areas of the program.
Options
Roll Back Options
This option is Very Useful
and giving you various Start Over options.
Roll Back Setting (Since
Selected)
When you are adjusting security for a user, before you move on
to the next area, you have the option to Roll Back Settings (Since Selected).
This will undo all changes you have just made.
Roll Back Setting as
of (Date)
Listed here are all dates of security adjustments for a
selected user. If the security adjustment you have made is not what you need and
you want to start over, select one of the Roll Back Settings as of date options
listed. This will Roll Back the security settings for the selected user before
any changes were made on this date.
Assigning Account Restrictions
Account/Budget
Restrictions for Data Entry
These five areas restrict the access to
accounts in the areas using the budget master fields, such as account number
and/or dimension, such as Account Type, Function, Location, etc.
•Purchasing: This selection will control accounts available to view in Entering in a Requisition or Approving a Purchase Order
•AP/Disbursements: This selection will control accounts available to view in Accounts Payable entry view.
•Cash Receipts: This selections will control accounts available to use in Cash Receipt entry view.
•Reimbursements: This selection controls accounts available to assign Employees for their submittal of employee reimbursements
•PO Approval by Account: This selection controls accounts available for approval process by specific accounts.
Highlight the User being assigned access at the left side
of the screen.
1. Select the Application tab
2. Add Account Filter Options screen is now available. Select the type of file: Expenditure, Revenue or Balance Sheet.
3. Account Selection Options:
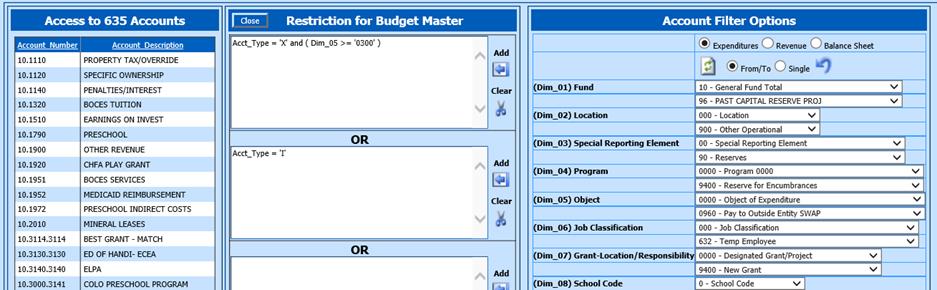
From/To Range Account Selection
1. Select From/To for a Range of Accounts to give access. This Option will allow you to select a group of Account using the drop downs. Here we have selected Objects 0300 through 0960 from the dropdown options.
2.
Select Refresh  to view accounts based on your
restrictions.
to view accounts based on your
restrictions.
3. Filtered Accounts = [number of accounts fitting your criteria] and lists them by Account Number and Account Description. Select a heading to adjust the sort for viewing by the different columns listed.
Single Account Selection
1. Select Single to select individual Funds, Functions, etc. This Option will allow you to select individual criteria using the drop downs to select the account Dim restrictions. Here we have selected Revenue Accounts
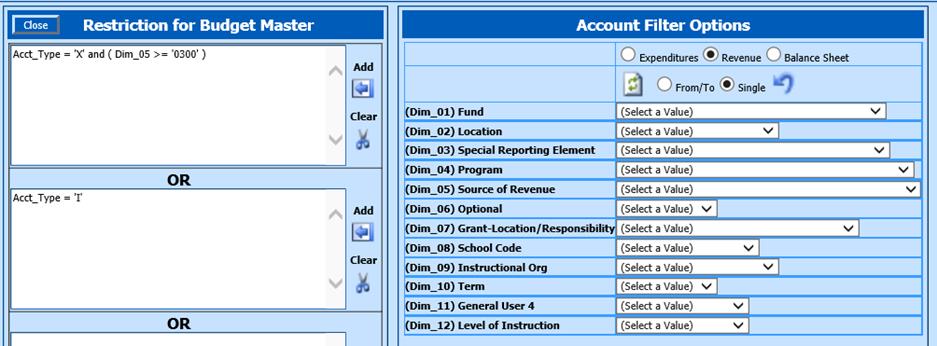
2. Select Refresh to view accounts based on your restrictions.
3. Filtered Accounts = [number of accounts fitting your criteria] and lists them by Account Number and Account Description. Select a heading to adjust the sort for viewing by the different columns listed.
4. You can expand the restrictions by repeating the above steps and adding or removing restrictions
5.
to the formula. Use Refresh to refresh Filtered Accounts.
6.
To start the Filter Process over, select the Reset Account to default From/To
Ranges arrow  .
.
7. When your Filtered Account selection is complete, select the Add Arrow. Your accounts will now be assigned per your selected Restrictions. Filtered Accounts will reset.
8.
To remove selected assigned accounts, select the Clear Scissors  . Your accounts will now be removed from the
Restrictions area.
. Your accounts will now be removed from the
Restrictions area.
9. When finished, select Close.
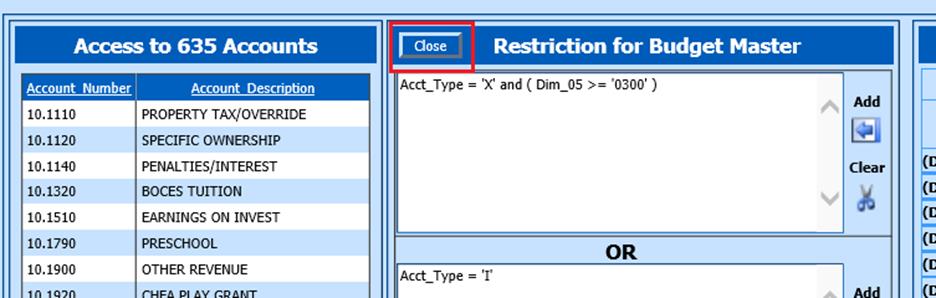
10. Account(s) will display under their respective areas in Purchasing, AP/Disbursements or Cash Receipts in Security Areas.
Detail Data Entry/View Restrictions
Used in
conjunction with the various areas of the programs, such as, Accounts Payable,
Purchase Order Request and Attendance, to set groupings and an authorization
hierarchy utilized for entry in each area. Administrative groupings allow
department/building heads to view and authorize only the areas that pertain to
them. When doing remote purchase orders, you will need to determine which groups
of personnel will be involved in each entry.
Determine the groups
of personnel who will be involved in the entries.
Assign each person to an
administrative group. (Example: Grade School, Middle School, High School, and
Administrative Office). Each administrative group will only see the information
that is entered by others within their administrative group.
User
will see
1. Highlight the User being assigned access at the left side of the screen.
2.
Click on the User will see button  under the Detail Data Entry/View
Restrictions.
under the Detail Data Entry/View
Restrictions.
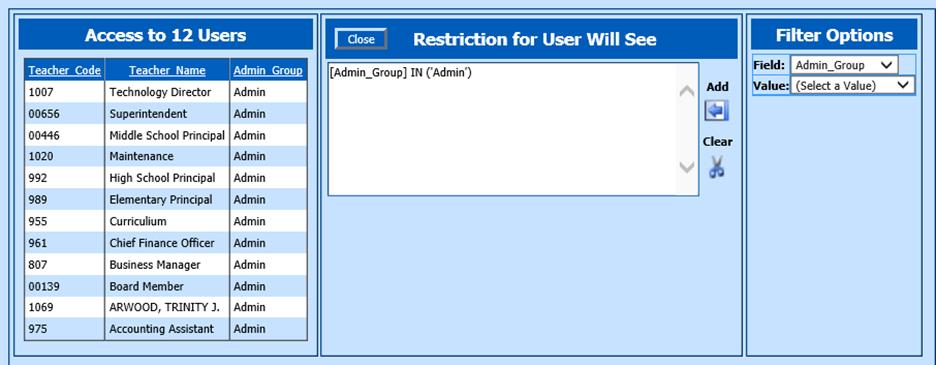
3. User Will See Options screen is now available.
4. Use the Filter Options to select Field, Admin_ Group and Value for Group Selection.
5.
Select the Add Arrow  .
.
6. View the Employees other Employees assigned to selected Group in Access to [number of] Users.
7.
To remove selected Group Assignment, select the Clear Scissors  . Your Group selection will now be removed
from Restrictions for User Will See.
. Your Group selection will now be removed
from Restrictions for User Will See.
8. When finished, select Close.
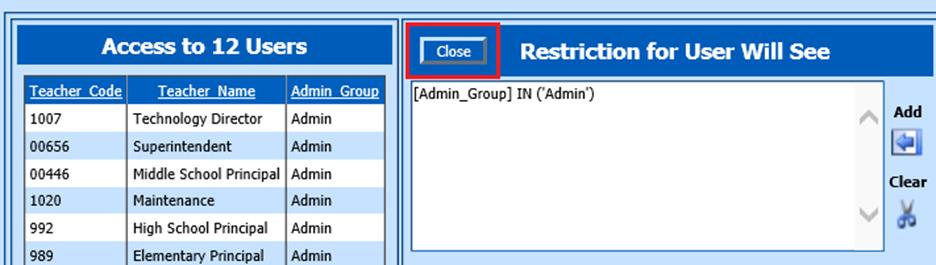
9. Group information displays under Detail Data Entry/View Restrictions in Security Areas.

Users, who will be responsible for ultimate
approval/disapproval of all the areas, printing of purchase orders and posting
of purchase orders to the general ledger, should be assigned to all groups. This
means that this user may have multiple group assignments showing in their Admin
Group Box.
NOTE: For more information on Purchase Order Security set up
with Group Authorization see: http://help.schooloffice.com/FinanceHelp/#!Documents/securityrequestapprove.htm
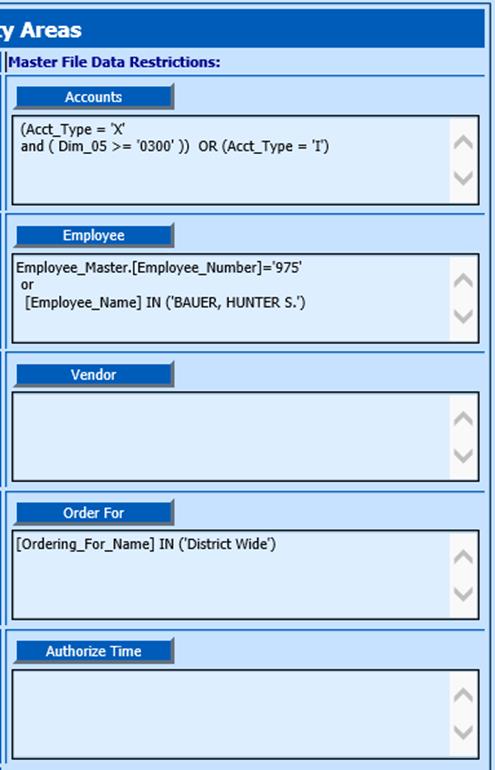
Master File Data Restrictions
This section of
the security area will set restrictions for each user for the Master Files of
Budget Accounts, Employees, Vendors, and Order for Master. By restricting the
user to specific Master File data, the user will also be restricted in the data
entry areas that utilize the Master File Data.
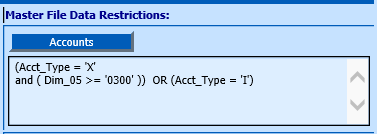
Accounts
The Accounts area is used in the same way as Purchase Orders,
AP/Disbursements and Cash Receipts.
1. Highlight the User being assigned access at the left side of the screen.
2. Select the Accounts tab
3. Refer to Account/Budget Restrictions for Data Entry above for detailed instructions.
4. Account(s) will display under Budget Master in Security Areas when process is complete.
Employees
1. Highlight the User being assigned access at the left side of the screen.
2. Select the Employees tab
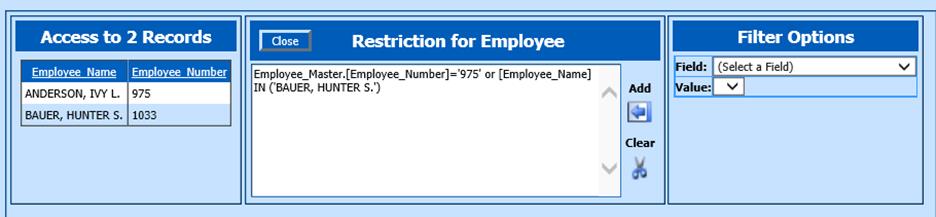
3. Employee Filter Options screen is now available.
4. Use the Filter Options, Field and Values to restrict Employee access.
5. View the Employee Selection under Access to [number of Employees] Records.
6.
When your Filtered Employee selection is complete, select the Add Arrow . Your Employees will now be assigned
to Restrictions for Employees.
7.
To remove selected assigned Employees, select the Clear Scissors . Your Employees will now be removed from
Restrictions for Employees.
8. When completed, select Close.
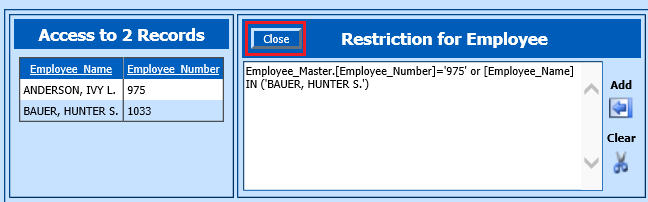
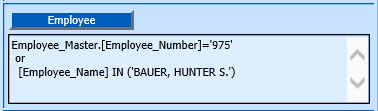
9. Employee filter display under Employees in Security Areas.
Vendor
1. Highlight the User being assigned access at the left side of the screen.
2. Select the Vendor tab
3. Vendor Filter Options screen is now available.
4. Use the Filter Options, Field and Values to restrict Vendor access.
5. View the Vendor Selection under Access to [number of Vendors] Records.
6.
When your Filtered Vendors selection is complete, select the Add Arrow  . Your selected Vendors will display under
Access to [number of Vendors] Records. To add multiple vendors from the same
Field, select and add the first Value. Then select the next Value and Add the
second value, etc.
. Your selected Vendors will display under
Access to [number of Vendors] Records. To add multiple vendors from the same
Field, select and add the first Value. Then select the next Value and Add the
second value, etc.

7.
To remove selected assigned Vendors, select the Clear Scissors  . Your Vendors will now be removed from
Restrictions for Vendors.
. Your Vendors will now be removed from
Restrictions for Vendors.
8. When finished, select Close.
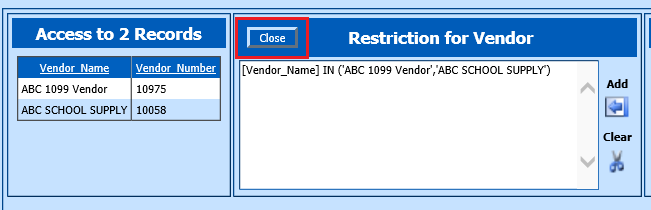
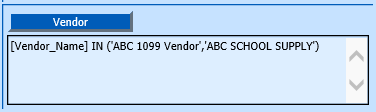
9. Vendors display under Vendor in Security Areas
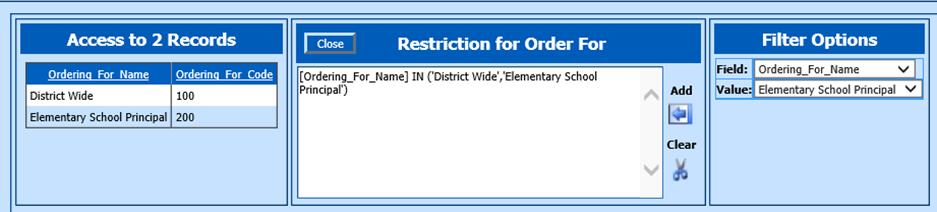
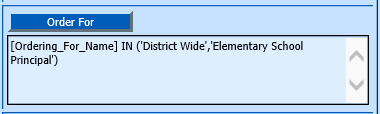
Order for Master
1. Highlight the User being assigned access at the left side of the screen.
2. Select the Order For tab.
3. Order For Filter Options screen is now available.
4. Use the Filter Options, Field and Values to restrict Order For access.
5. View the Order For Selection under Access to [number of Ordering for Name] Records.
6.
When your Filtered Order For selection is complete, select the Add
Arrow . Your selected Order For information will
display under Access to [number of Ordering for Name] Records. To add multiple
Order For options from the same Field, select and add the first Value. Then
select the next Value and Add the second value, etc.
7.
To remove selected assigned Order For Name, select the Clear Scissors . Your Order For Name list will now be
removed from Restrictions for Order For Name.
8. When completed, select Close.
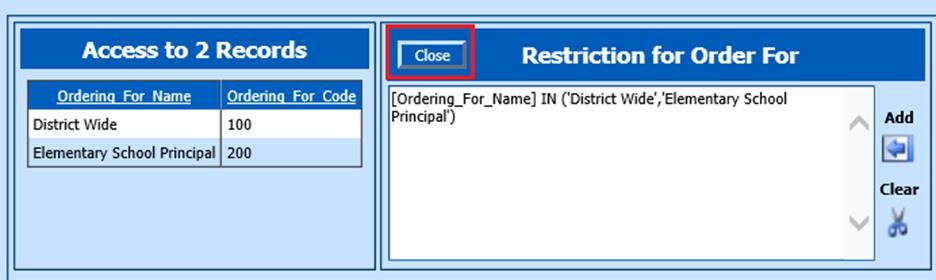
9. Order For Name information displays under Order For in Security Areas.
Note: For additional information on setting up the Order For Master, see link: http://help.schooloffice.com/FinanceHelp/#!Documents/orderformaster.htm
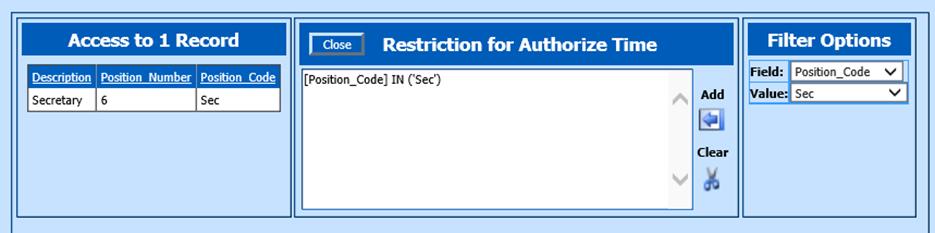
Authorize Time
1. Highlight the User being assigned access at the left side of the screen.
2. Select the Authorize Time tab
3. Authorize Time Filter Options screen is now available.
4. Use the Filter Options for selected Position Code Fields and Values to restrict who can access to the Employees to Authorize Time for.
5. View the Employees to Authorize under Access to [number of Positions] Records.
6.
When your Filtered Employees to Authorize Time for selection is complete, select
the Add Arrow . Your selected Employees information will
display under Access to [number of Positions] Records. To add multiple Positions
Codes, select and add the first Value. Then select the next Value and Add the
second value, etc.
7.
To remove selected assigned Positions, select the Clear Scissors . Your Employees to authorize time for
will now be removed from Restrictions for Authorize Time.
8. When completed, select Close
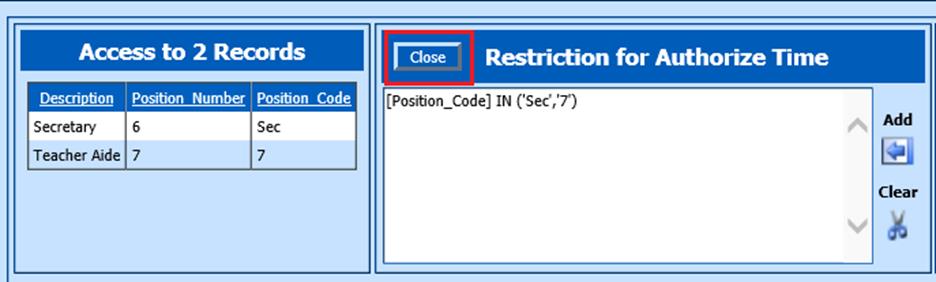
9. Authorize Time information displays under Authorize Time in Security Areas.
