Security – Request & Approve
Revised: 4/2021
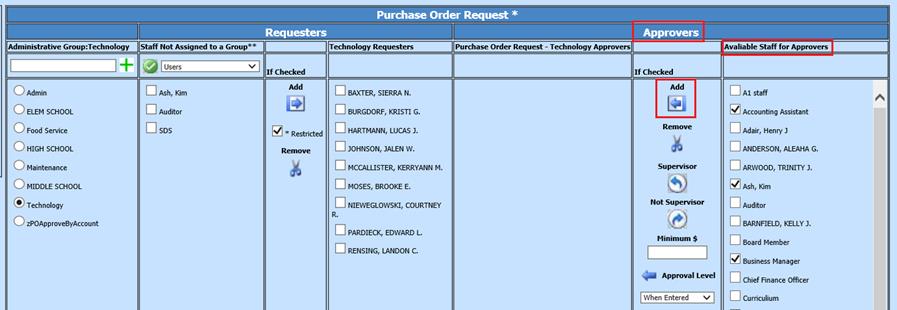
This area allows you to Add or Adjust the Requesters and
Approvers setup for available Applications areas such as Accounts Payable and
Purchase Orders. Viewing all options in grid form makes Creating, Adding and
Adjusting your Requesters and Approvers streamlined and simplistic.
Note: This area is only available if Group Authorization is set
to Y in SDS Web Office Settings under Administrative Utilities. If
Activate Group Authorization is not listed, this option is
Activated.
This area is divided into two groups: Requesters, Users who
may enter a purchase order, invoice, etc. And Approvers, Users who will Approve
or Deny a request.

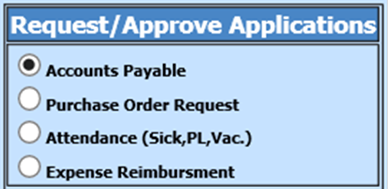
Request/Approve Applications
Select the
Application area to View. The Requests and Approvers for the selected area will
display. You will notice the titles in your display will change with your
Application Selection.
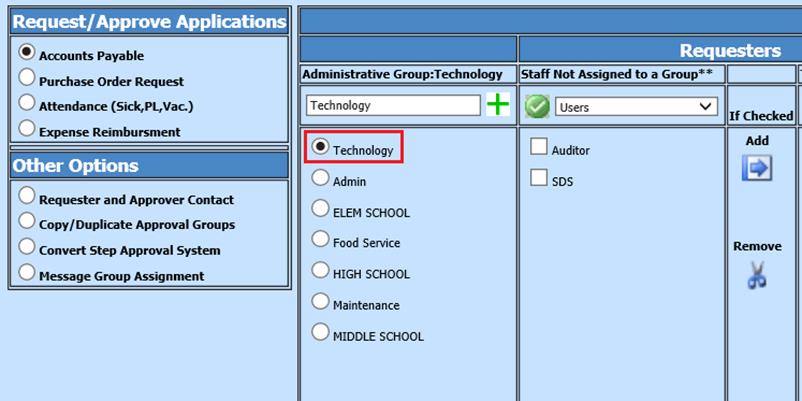
Administrative Group Selection
Select the
Administrative Group to display Users to assign to the selected Application area
selected. The Users will display and may be added to a group or removed from a
group.

To Add a New Administrative Group
1.
Enter New Group Name
2.
Select the Add button 
3.
You are now ready to assign Requesters and Approvers to the New Group

Note: The new group will
display at the top of the list.
Next time you enter User Security –
Request /Approve Applications, the new group will be in alpha order.

Selecting and Removing Requesters
To select Requesters for your selected Administrative Group
Staff Not Assigned to a Group, User selection
If you have completed the Category Field in Employee
Demographics, this option will display the employees in the selected Categories
to assign to Requester Groups.
To setup Category Codes:
1.
Select Human Resources or Payroll Processing
2.
Select Add, Change Employee Information
3.
Place a check in Payroll Control
4.
Update Work Location field to desired code
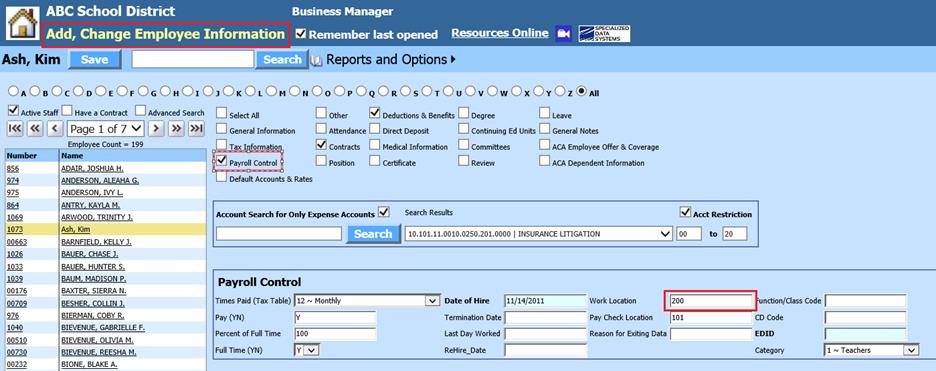
5.
This code is now available to use in Security Request & Approve to select
from
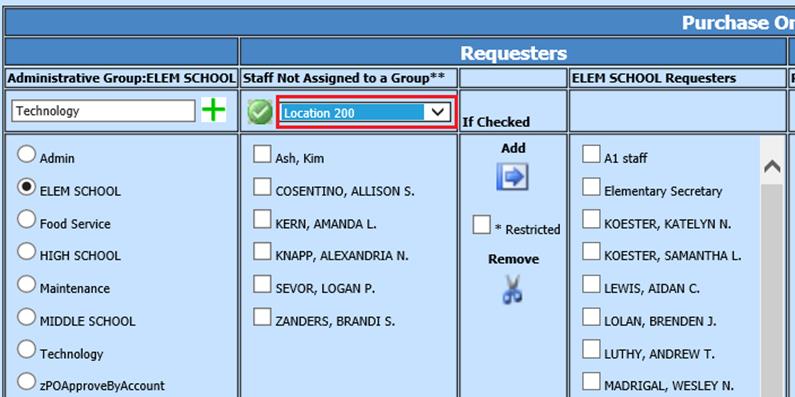
To Add/Remove individual Users in Requesters Group
1.
Select User(s) under Staff Not Assigned to a Group
2.
Select Add, to move into Requester group
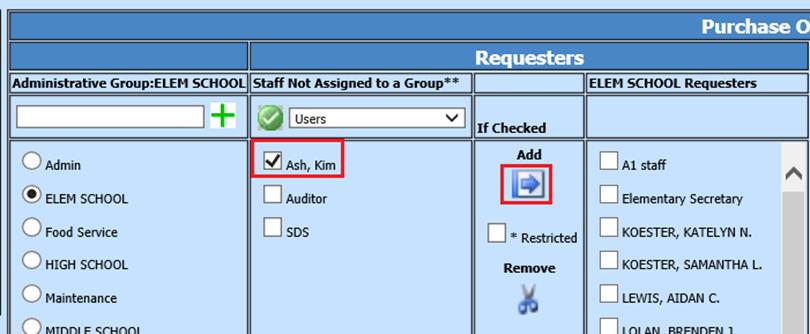
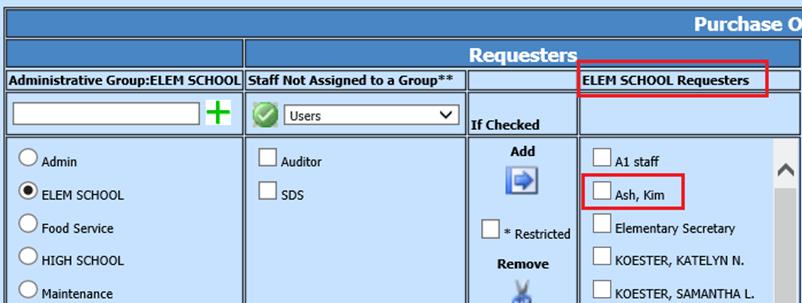
3.
Requester(s) will display under xxxx_Requesters
4.
Select Requester to remove
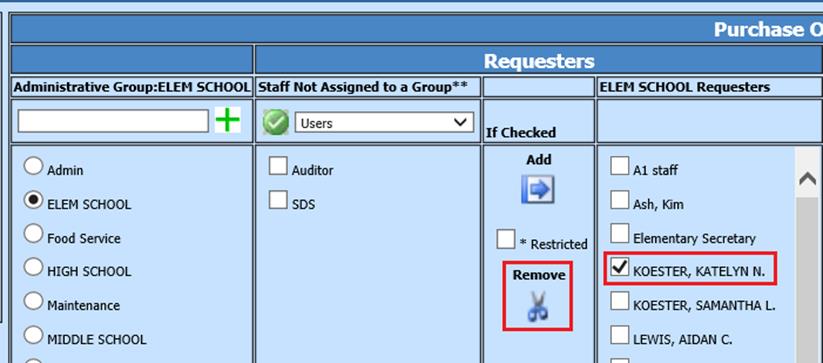
5.
Select Remove, the selected requester is removed from the list.
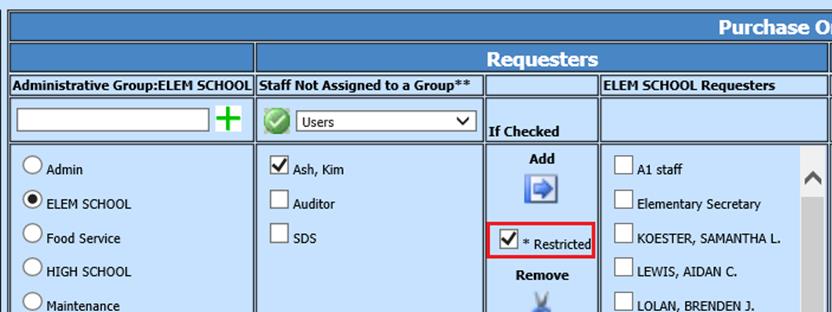
To Restrict Uers to view their specific Requistion entries,
Select *Restricted, when moving into Requester group
Selecting and Removing Approvers
To select
Approvers for your selected Administrative Group
1.
Select Users under Available Staff for Approvers.
2.
Select Add
3.
The Requester(s) will display under xxxxx_Approvers
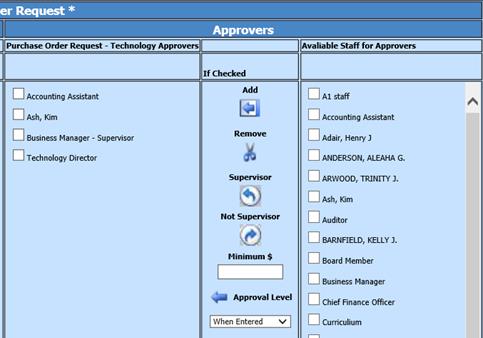
4.
Select Requester to remove.
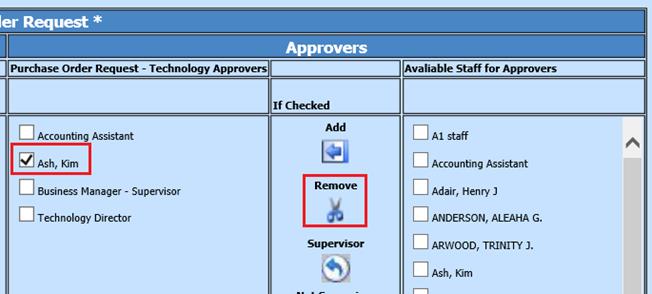
5.
Select Remove, the selected requester is removed from the list.
Selecting/Removing a Supervisor Approver
A
Supervisor approver will override any other Approvers. They may approve or deny
any request available to them. To assign a Supervisor Approver to your selected
Administrative Group:
1.
Select Users under Available Staff for Approvers
2.
Select the Supervisor left arrow button 
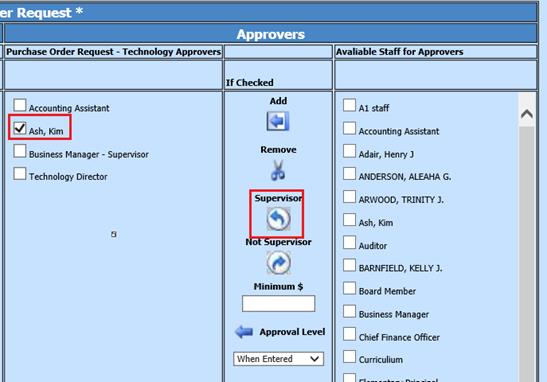
3.
Select Not Supervisor, to remove Supervisor status
4.
Select the Not Supervisor right arrow 
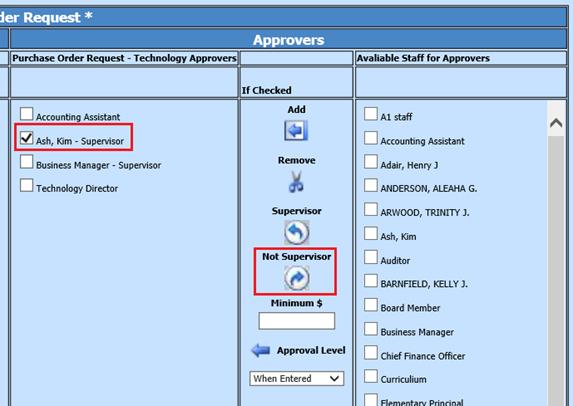
Minimum $
Set the Minimum Requistion amount for Approvers to only view
requistions by an amount.

•
Examples above: Superintendent will only see Requistions if more
than $1000. Board Member will only see Requisitions if more than $50,000
and
Approval Levels
Set the Approval Levels by order the Requisition should be
Authorized. 1 would be the first Approver and 8 would be the Final
Approver

Other Options
Select the Other Options below to
display Other Options. These are helpful procedures or display options. Select
the option to active.

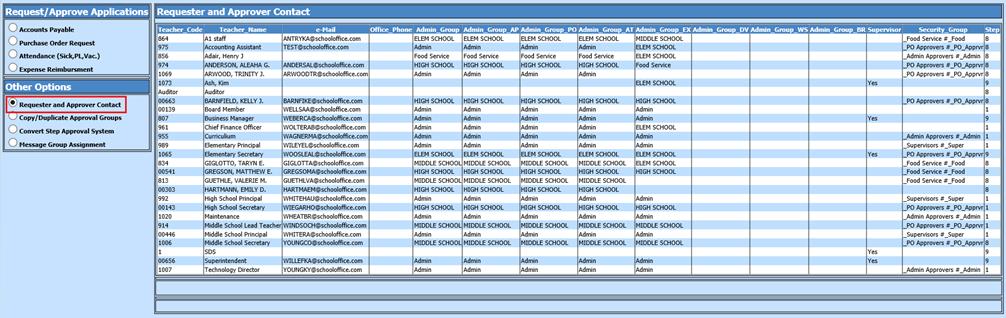
Requester and Approver Contact
This option will display in grid format information regarding the Users
information regarding their setup. From here you can check the Admin Group a
User is assigned, Supervisor status, Admin and Security Group Assignments, etc.
Copy/Duplicate Approval Groups
This option will Allow you to Copy a group of Approvers from one area to
another.
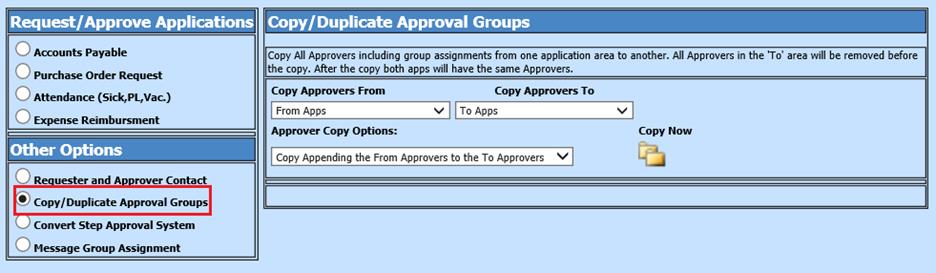
1.
Select Copy Approvers from
2.
Select Copy Approvers To
3.
Select Approver Copy Options:
(Add these Users to your Approvers)
Or
(Copy the list only, replacing the
list)
4.
Select Copy Now 
Convert Step Approval System
If you HAVE been using Authorization Levels for
purchase order processing.
1.
Select Convert Step Approval System

2.
Select to “load/create approvers by group….”
3.
Follow the rest of the instructions within the above screen shot “Now that you
have Loaded / Created Approvers from the SDS Step Approval System review and
adjust the Approvers. Select the option 'Requester and Approver Assignment'.
After you have reviewed and adjusted the Approvers proceeding to the next step
'Assign New Authorization Groups and Approvers to POs and Invoices'.”
Message Group Assignment: This area allows you
to set up Groups Assignments for the Message Center. These groups will then be
available to you in your Message Center. This is a great way to communicate
inter office with various groups you work with.
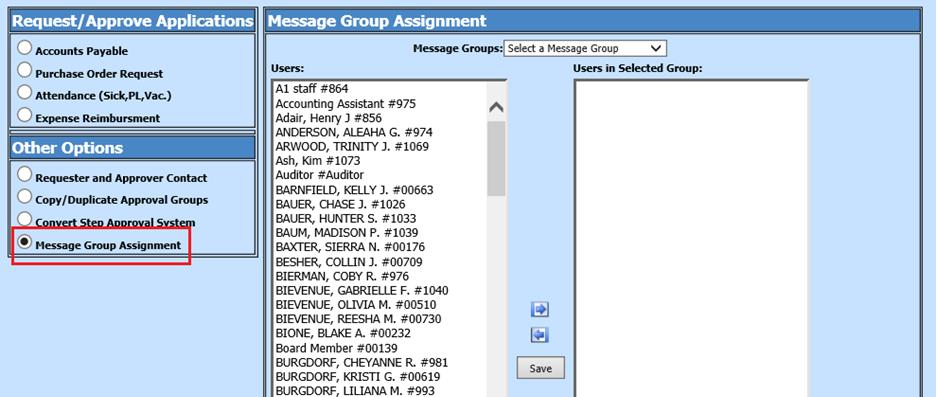
1.
Select a Message Group to display, the Users in the Group will highlight
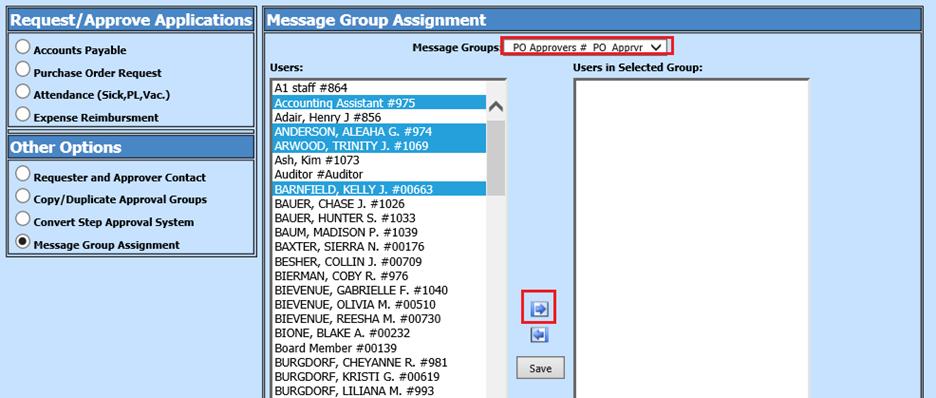
2.
Select the Right Arrow to add Users in Selected Group
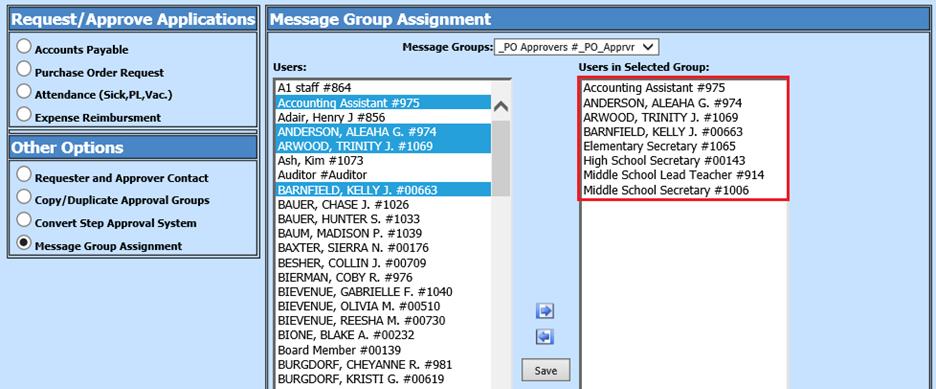
a.
Select any other Users to include in your Message Group
b.
Select the Right Arrow to add additional Users 
3.
To remove a User from a Selected Message Group, highlight the User and select
the Left Arrow 
a.
User will be removed from the group.
4.
When your list is complete, select Save .
5.
To View your new Message Group Assignment, open your Message Center under Look
and Browse or Employee Portal.
6.
Select Multiple Recipients.

7.
Select group
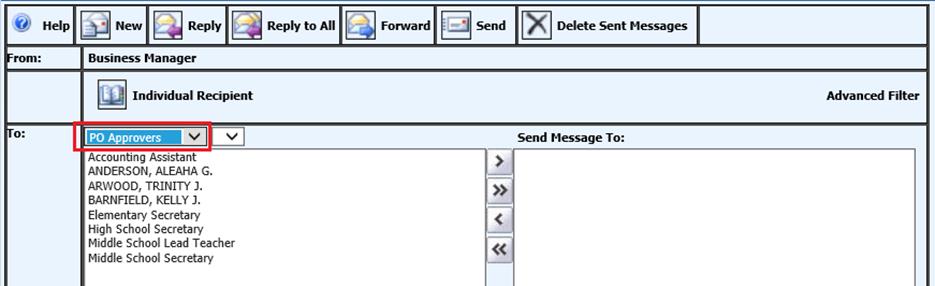
8.
Use the Arrows to move Recipients to “Send Message To:”
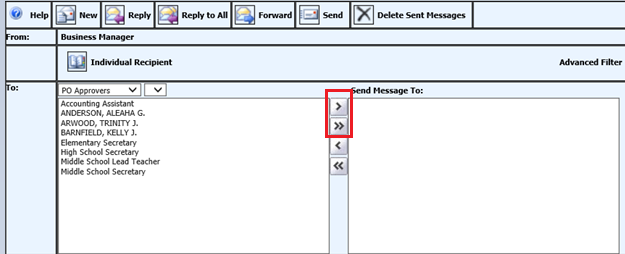
9.
Complete email, select Send