Security – Web Services
Revised: 4/2021
What is a
Web Service?
Automated Data Transfer using Web Services is for
exporting and importing information and uploading bills for Green Accounting,
see separate instructions at the end of this document.
With Green
Accounting, you can scan your bills; select your destination, application and
Send.
This will also allow a third-party or a remote user the ability to
directly access the web office data and extract or import information. They do
not need to login into the system nor access a browser. Simply deploy a “zip”
file with some controls and run the program. The best part is the remote user
can run the program manually or automate the process using a scheduling
program like Windows Task Scheduler. With a web service, the third party then
runs our supplied program and the needed data is loaded to their location
available for processing. The third party doesn’t add need to add anything. They
only need to run the supplied batch file.
Currently some third-party or remote users are pulling
exports from the ftp site at SDS – this is no longer necessary if the Web
Service option is used.
How to Set Up the Web Service to Import &
Export Data
For exporting:
1 - Create a quick report and
export it using the SQL option. Refer to this Help Console document for
instructions on creating a quick report and exporting it using the SQL option:
default.aspx?pageid=create_quick_view_for_sql_batch_file
2 – Add the quick report to the web services user (Security - Web
Services)
3 – Download “Program Distribution Zip File” and give the file to
whoever needs to run the export
For importing:
1 – Use the
standard import program, match up the fields with the file you want to use –
(the file name will need to be the same). Basically do a test import to define
the import definition. This Help Console link provides instructions on using the
standard import program:
default.aspx?pageid=import_data_from_csv_or_txt_files1
2 – Add the import to the web services user (Security - Web Services)
3 – Download the “Program Distribution Zip File”. This zip file can then be
given to whomever needs to run the import/update
Note: At any time after
you send the web service information to a third-party you want to inactivate the
automatic Import or Export capability of a user simply access security and
remove their access for the export or import you want stopped. They are then
locked out. Or you may simply Delete the User (see last page of instructions).
If you want to use an existing export (quick report), you need to “own”
the export. This is controlled in the user Application Access Security area. The
program will place any export that was previously created into security with No
Access. Any export or import you create in the future will give you access
however all other users will not have access to your definitions.

Setup for Green Accounting
If you have not begun using Green Accounting, check for your
Unique Green Accounting Product Activation Key from SDS. The key is located in
Administrative Utilities |SDS Web Office Settings | Product Activation, Green
Accounting Product Key. If you have a question, please Xconnect for
assistance in obtaining your key.
•
Purchase a Scanner - This can be an inexpensive general scanner. The
scanner is used to save supporting document images as PDF files. You might want
something that has a feed option depending on your needs.
•
Determine a drive/directory & create a folder for the scanned items
to be saved into. If you have more than one person scanning items, you can
create the folder on a network that everyone can access. You will want a
separate folder for each area you will be utilizing (Invoices, Cash Receipts,
Journal Entries, Timecards, Accounts Receivable).
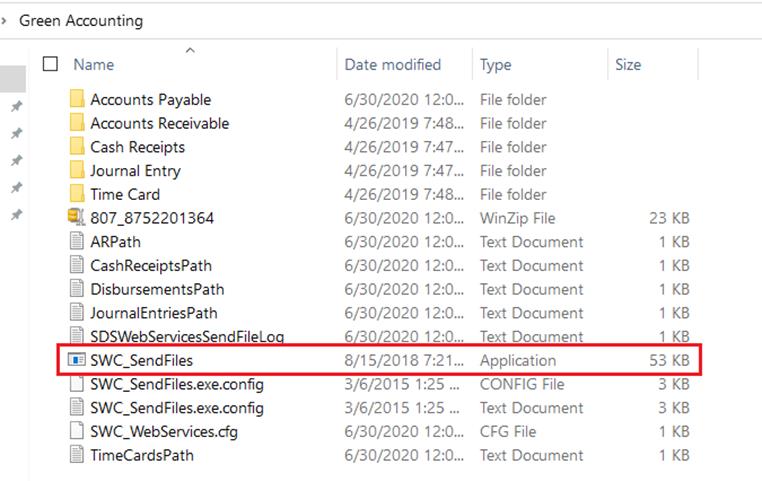
Set up a Web Services Send Files for Green Accounting
1.
Create a Web Services for Green Accounting folder on desktop. Name this
file as you wish, you will access this folder when uploading your PDF’s into
your Finance Web Office.

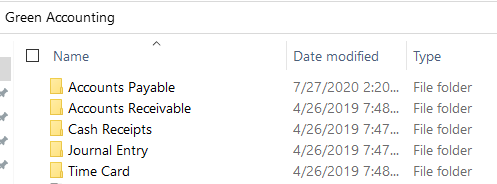
o In this Folder, set up
subfolders for each section to import images to: Accounts Payable, Cash
Receipts, Journal Entries, Accounts Receivable and Time Cards.
2.
Select Administrative Utilities
3.
Select Security - Web Services
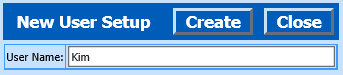
4.
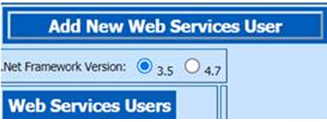
Select Add New Web Services User

5.
Type in user name
6.
Select Create
7.
A message will appear stting the user has been created
8.
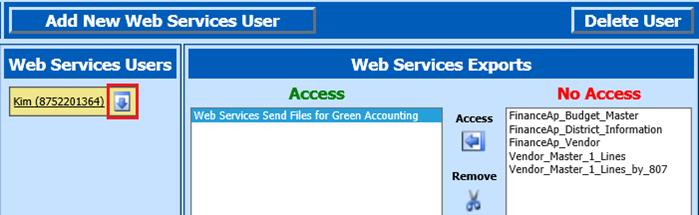
Select the new Web Services User
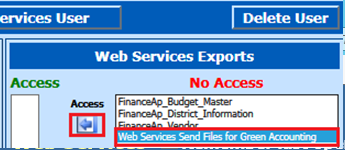
9.
Under Web Service Exports, No Access column select “Web Services Send Files for
Green Accounting”
10. Select
Access Arrow to move into Access column
11. This will
give you a unique password to access Send Files to upload your scanned PDF’s
into your Web Finance Office. This is located on the Web Services screen
next to the name of the User in Brackets (Kim (8752201364))
and will also be the last half of the zip file

12. Select .Net
Framework Version
13. Right click
on down arrow next to name
14. Select Save
Target As
15. Navigate to
the Green Accounting Folder on the Desktop
16. Select
Save
17. In the Web
Service folder right click on the saved file and select “Extract All”
18. Change
where the file will be extracted to by removing the last backslash and the file
name (  ) from the file
(you want it to be in the Web Services folder on the desktop)
) from the file
(you want it to be in the Web Services folder on the desktop)
19. Select
Extract
20. This will
place an executable application file in the folder that you will use to
send your files