Revised: 4/2021
Setting up the Accounts Payable Approval process will allow you to approve invoices prior to printing Vendor check(s)
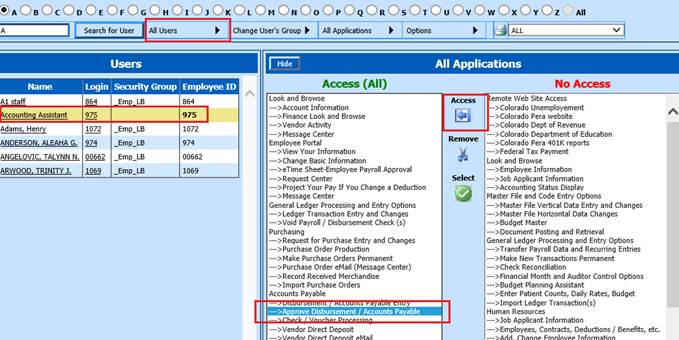
Setting up Menu Tree selection for User (s) to authorized Accounts Payable.
1. Select Administrative Utilities
2. Select Security – Application Access
3. Set up Approver to have access for Authorizing Accounts Payable
a. If User is not in a Security Group: Locate and highlight User, and then use the Access arrow to move Approve Disbursements/Accounts Payable to the Access (All) section.
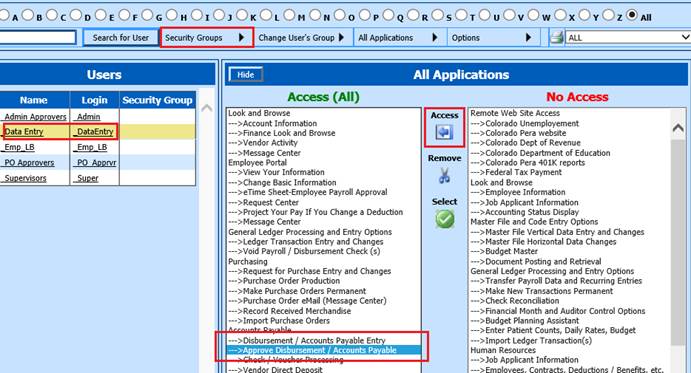
b. If multiple Users are in a Group requiring this access: Change to Security Groups, highlight Group then use the Access arrow to move Approve Disbursements/Accounts Payable to the Access (All) section.
Setting up the Authorization User Assignment Group
1. Select Security – Request and Approve
2. Select Accounts Payable
Note: If the User has ability to enter in Requisitions and should be restricted to only see their PO requests, set up Requester User Assignment Group in Purchase Order Request selection first. Using this option in PO Requests you have the ability to use the “* Restricted” option upon adding them into the Requester group.

3. Under the Administrative Group, Select your Approval Group or enter in your new Approval Group name then select the Green Plus: i.e. Admin
4. To assign the Requesters: Under Staff Not
Assigned to a Group, choose the Users for this Approval group and use the Add
 to move
them into Admin
to move
them into Admin
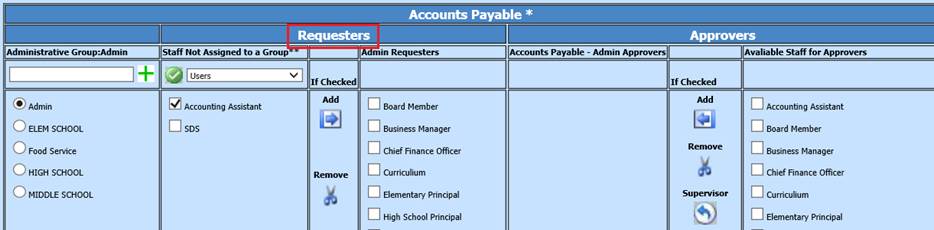
5. To assign the Approvers: Under Available for
Staff for Approvers, select the Users and use the Add 
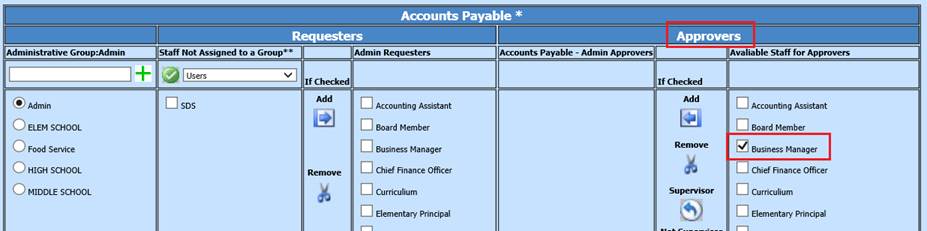
•Accounts Payable, Purchase Order and Attendance requesters use the same administrative group
•If a user is NOT assigned to an administrative group with Approvers, entries they make will automatically be process as approved.
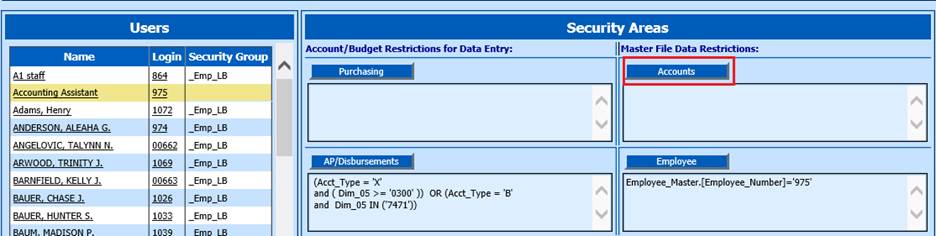
Setting up the Data Restrictions for the User
Determine what security
data restrictions are needed. Then follow the below:
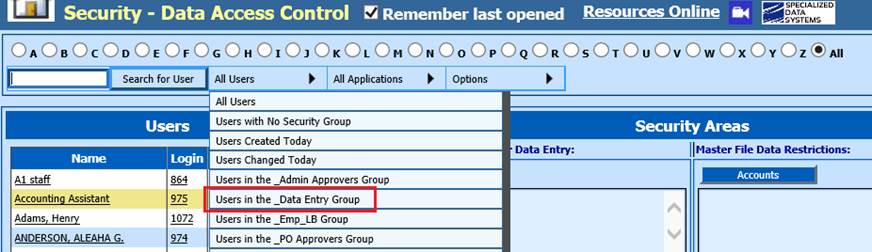
1. Select Security – Data Access Control
2. Search and select the individual User
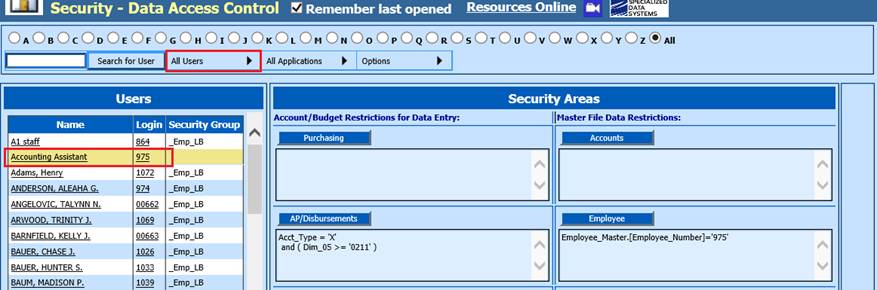
or select the Group of Users to work with
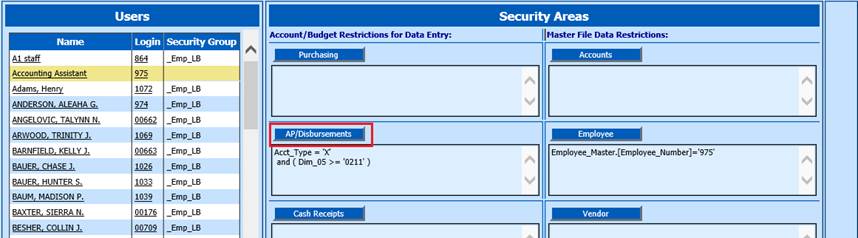
3. Under the section Accounts/Budget Restrictions for Data entry, Select “AP/Disbursements”
4. Add the Account Filter Options. Select the type of file: Expenditures, Revenues, Balance Sheet.
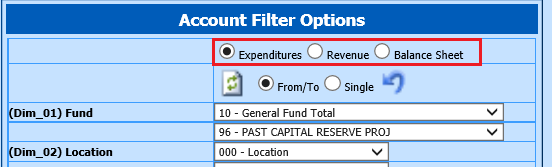
5. Select the “From/To” for a range of accounts to
add or “Single” for individual account selection. Click on  to refresh
your accounts
to refresh
your accounts
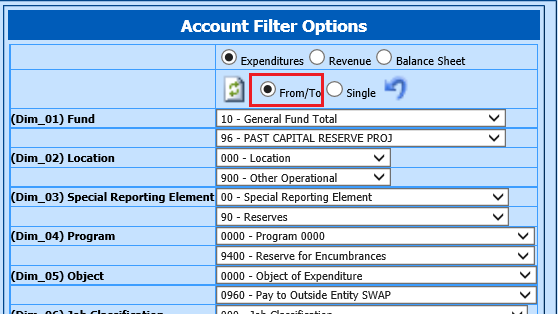
From/To selection
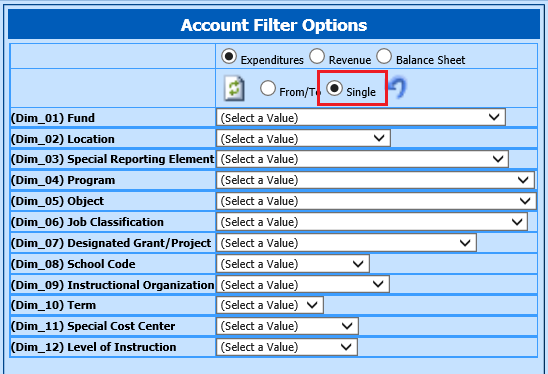
Single selection
6. After you have refreshed and verified your accounts, Select Add arrow to move the formula into the Restriction area
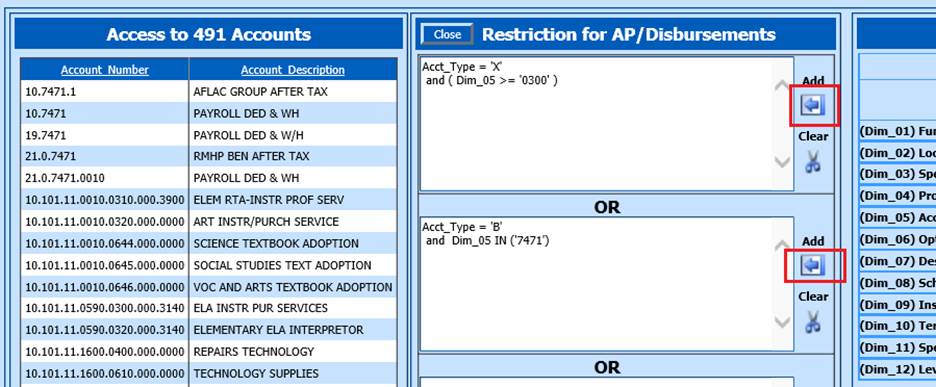
7. Continue to add additional data restrictions in the additional boxes available.
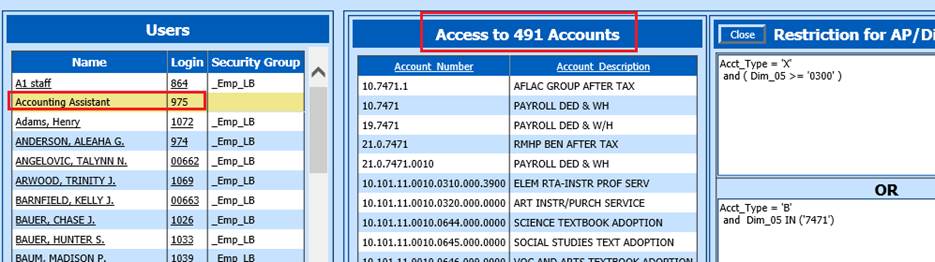
Example: First formula box has the From/To used for all expense accounts in Dim_05 greater than 0300. Additional formula box has a single account code selected for all balance sheet accounts with Dim_05 of 7471
8. Once you have completed your account
restrictions, verify the accounts the user has access to under “Access to 491
Accounts”, then select 
9. If you need to set up any Master Data Restrictions, select the “Accounts” selection and add the restrictions needed following the same steps as “Accounts Payable”