Revised: 4/2021
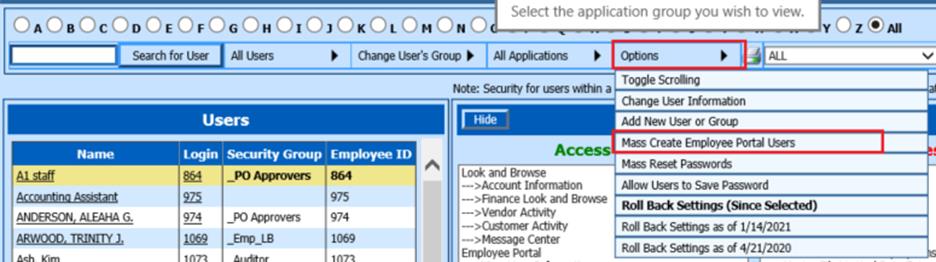
1. Select Administrative Utilities
2. Select Security – Application Access
3. Under Options, select Mass Create Employee Portal Users
This utility will create a user ID for each active Employee and set them up for Employee Portal access.
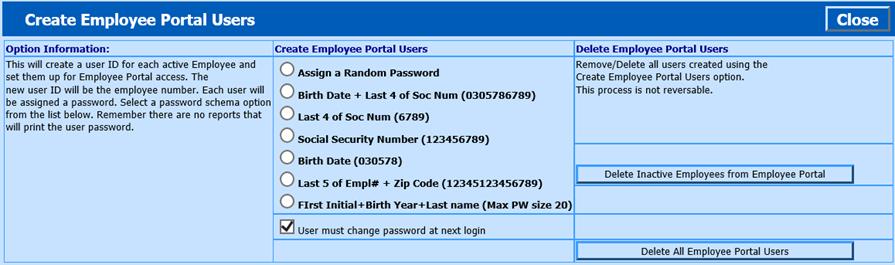
4. Create Employee Portal Users: Select a password schema option you will use to initially assign to the employees.
5. Determine if you wish the user to change their password at the next login.
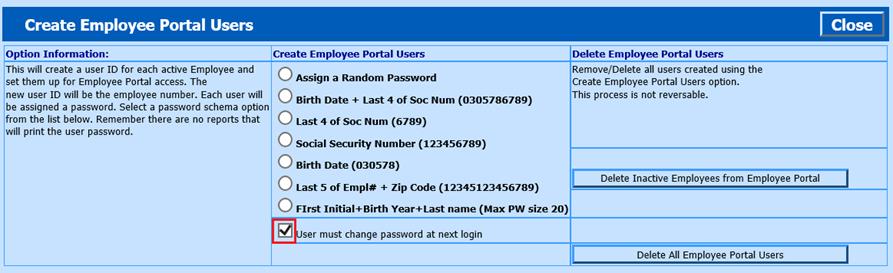
a. If checked, the users will then be asked three personal questions. If they lose their password, they can then enter in the answers to their questions to reset their password.
b. If left unchecked, their password will remain the same as you initially set up for them
6. Select Create Employee Portal Users
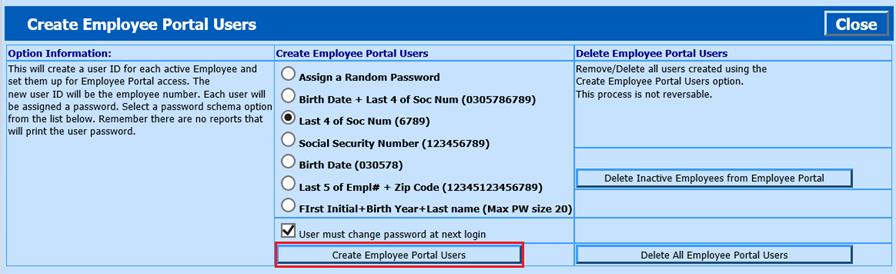
7. If you have inactivated any employees, in their Employee Master and do not wish for them to login to the system, you can use the Delete Inactive Employees from Employee Portal.

8. Once completed, select Close

Adjusting the Employee Portal Security Restrictions
To verify or adjust the Employee Portal group security restriction settings:
1. Under All Users, select Security Groups
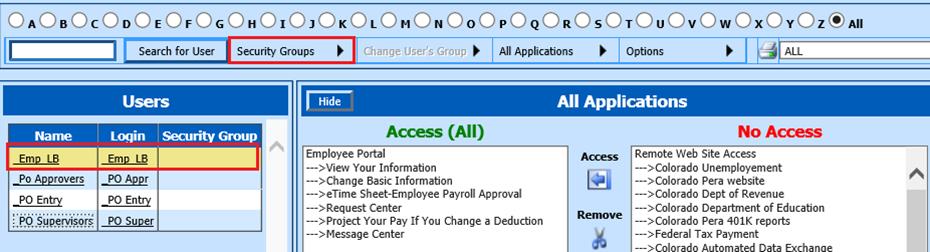
2. Select the Emp_LB group
3. Determine what Application, Report or Entry view. Use the Access/Remove icons to adjust the security restrictions. Use the green select icon to select all items available
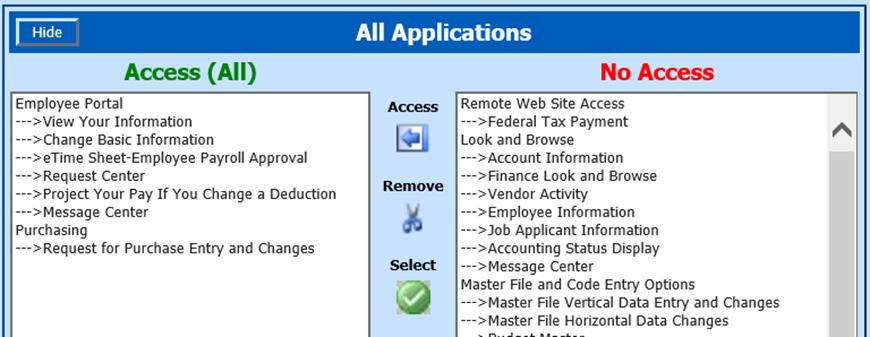
a. Under the All Applications selection, assign the Applications you wish to be available for the employee from their Menu Tree
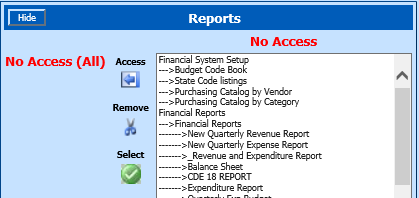
b. Under the Report selection, if you have given them access to an Application with reports, update the reports to be available (example below is for employees with no reports access)
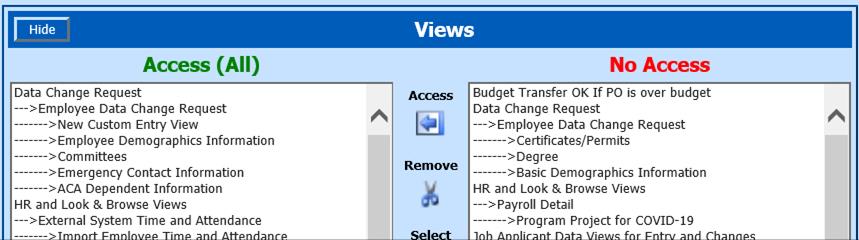
c. Under the Views selection, determine which entry views you wish your employees to have access too
i. The Data Change Request items are the entry views the employees will be able to enter in a request to make a change to their employee data.
ii. The HR and Look & Browse Views are the items available for them to view only in Look & Browse.