Revised: 4/2021
The following steps will instruct you how to create a user who will have viewing access through Look & Browse and access to view and print Reports.
1. Select Administrative Utilities
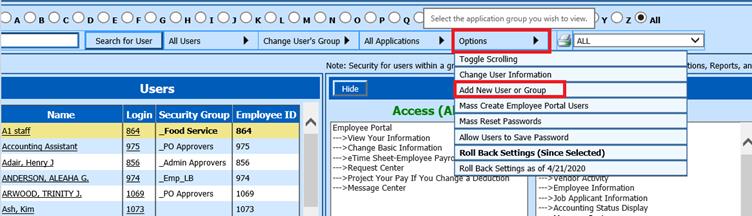
2. Select Security – Application Access
3. Under Options, select Add New User or Group
4. Under New User Setup
a. *User ID; Enter User ID; i.e. Auditor (Remember: User ID’s should not include a space, it should be continuous)
b. *Password: Enter initial Password
c. *Confirm Password: Confirm Password entered above
d. Security Group: Select No Group
e. User must change password at next login: Determine if you wish the User to change password
f. *User Name: Enter Name
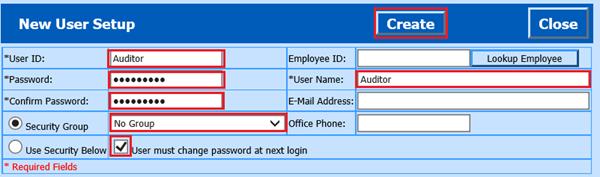
5. Select Create
6. Select Close
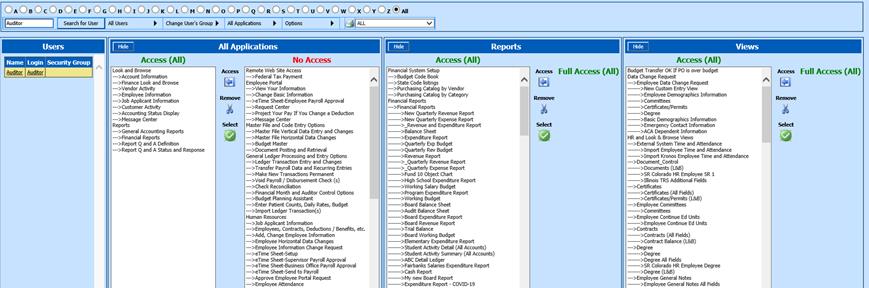
7. Determine what All Applications, Reports or Views to assign to User.

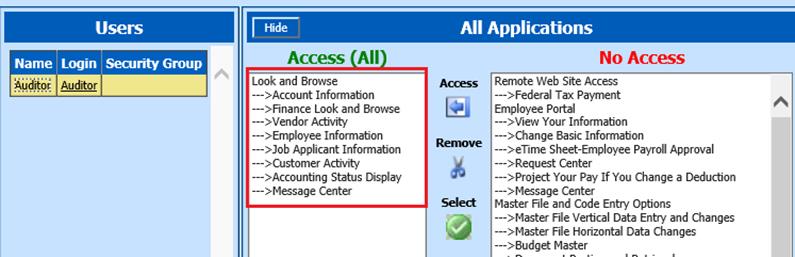
a. All Applications:
i. Select Look and Browse heading. Use the Access icon to adjust the security restrictions.
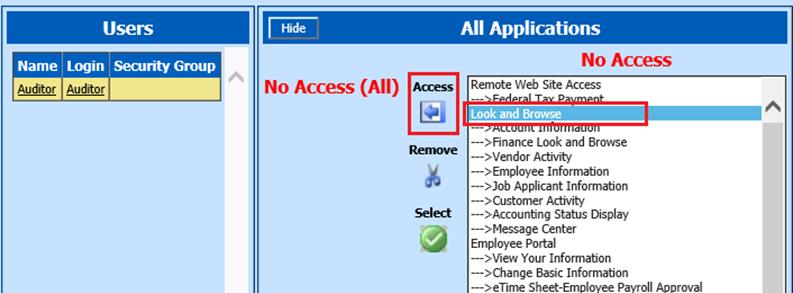
This will move all items listed under the heading to Access (All)
ii. Select Reports heading. Use the Access icon to adjust the security restrictions.
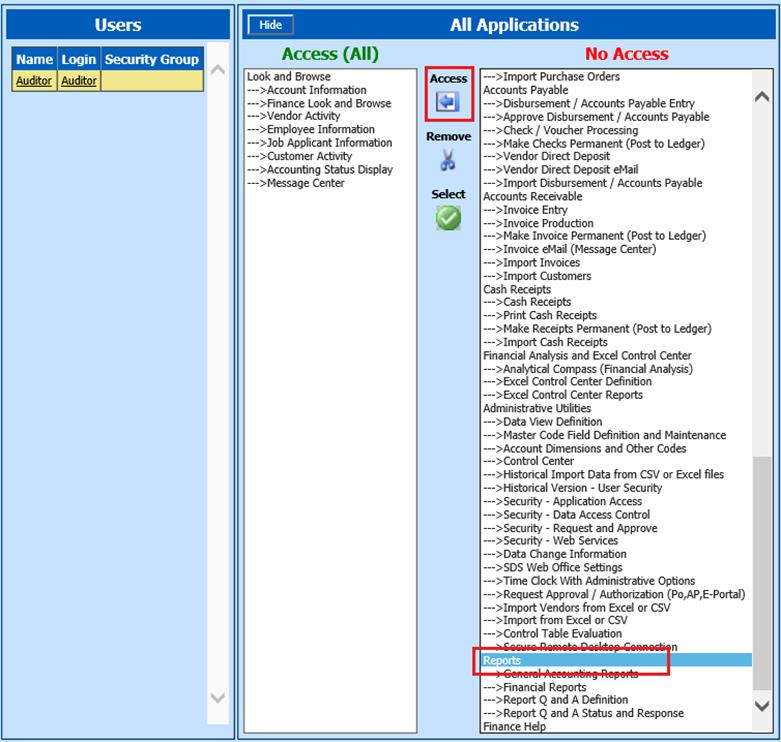
This will move all items listed under the heading to Access (All)
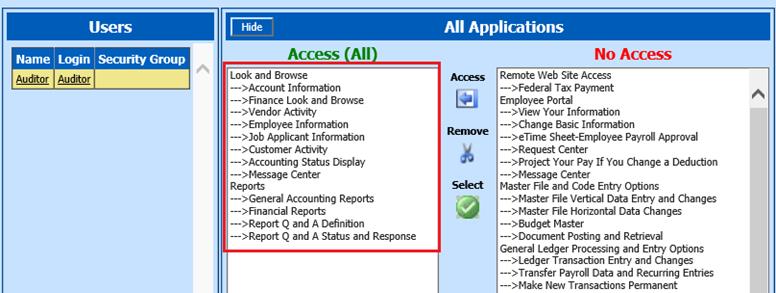
.
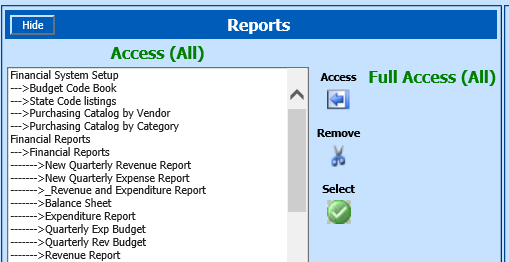
b. Reports
i. Select the Green Check to select all Reports
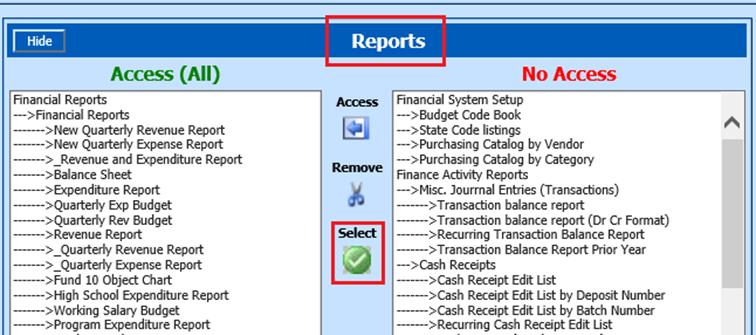
ii. Use the Access icon to adjust the security restrictions.
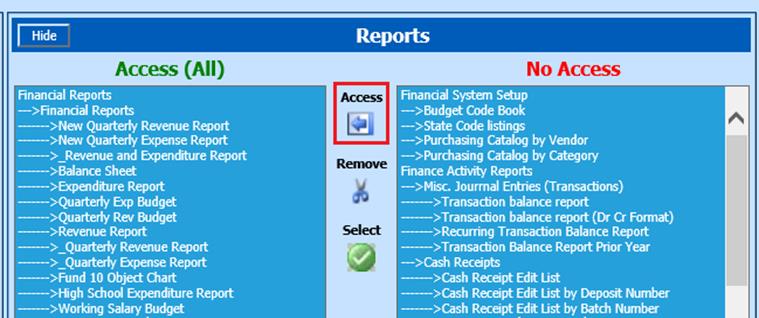
This will move all items listed under the heading to Access (All)
c. Views:
i. Select the Green Check to select all Views

ii. Use the Access icon to adjust the security restrictions
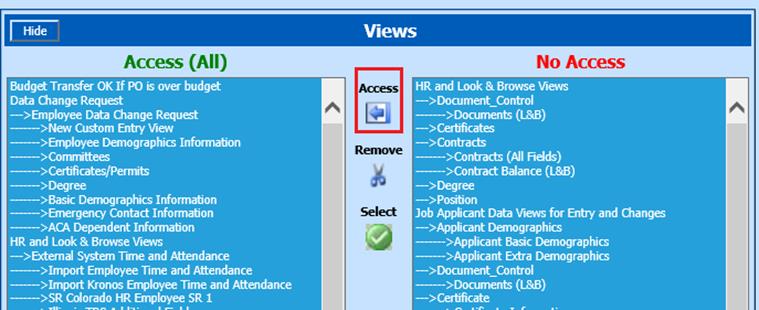
This will move all items listed under the heading to Access (All)
8. This user will have all rights to see all accounts and employees with View only security access