Revised: 3/2021
The following instructions will enable you to reset the
starting check number for accounts payable checks.
1. Select Master File and Code Entry Options
2. Select Master File Vertical data Entry and Changes or Master File Horizontal Entry view (example below)
3. Entry Options: MICR Accounts Payable Bank Account Information
4. Select the check type the starting check number should be setup for. Example: Accounts Payable, Impress, Payroll Liabilities.
5. Enter the starting check number in the “Starting Check Number” field. If this field is left blank, the program will look for the largest check number that has already been assigned in the system and will continue the numbering process from that point.
6. Enter the Ending check number in the “Ending Check Number” field.
7. Select Save
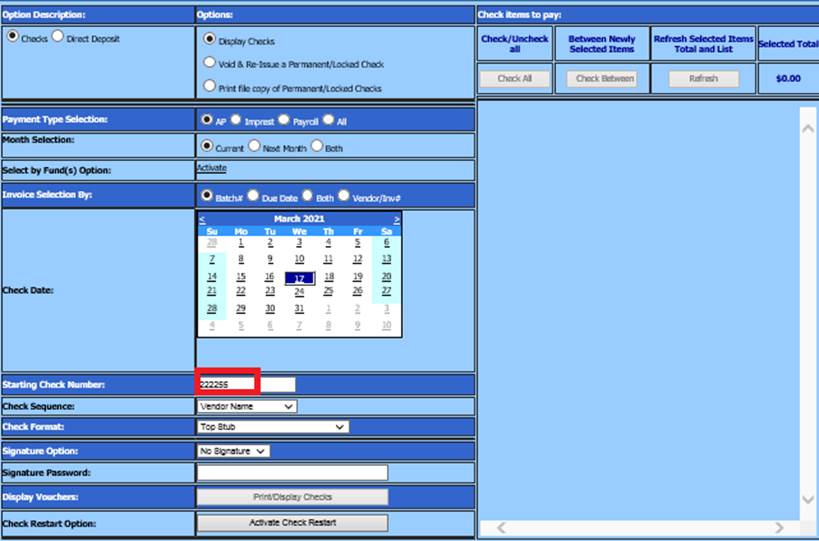
NOTE: The first time processing checks for any check type that has been changed you will also need to define the new staring check number in the “Starting check number” field in the check/voucher processing area.
1. Select Accounts Payable
2. Select Check/Voucher Processing
3. Select the Payment type Selection: A/P, Imprest, Payroll, ALL
4. Select the Batch(s) or Invoice(s) to pay
5. Enter the new starting check number into the field “Starting Check Number”.
6. Once you have entered the new check number for this check run the system will automatically assign the check numbers based on the new settings.