Revised: 4/2021
A Direct deposit file will be available once the vendors have been set up to receive their payments electronically. Review the following steps to setup this process.
Setup IP addresses and Return Email Address for District
1. Select Administrative Utilities
2. Select Web Office Settings
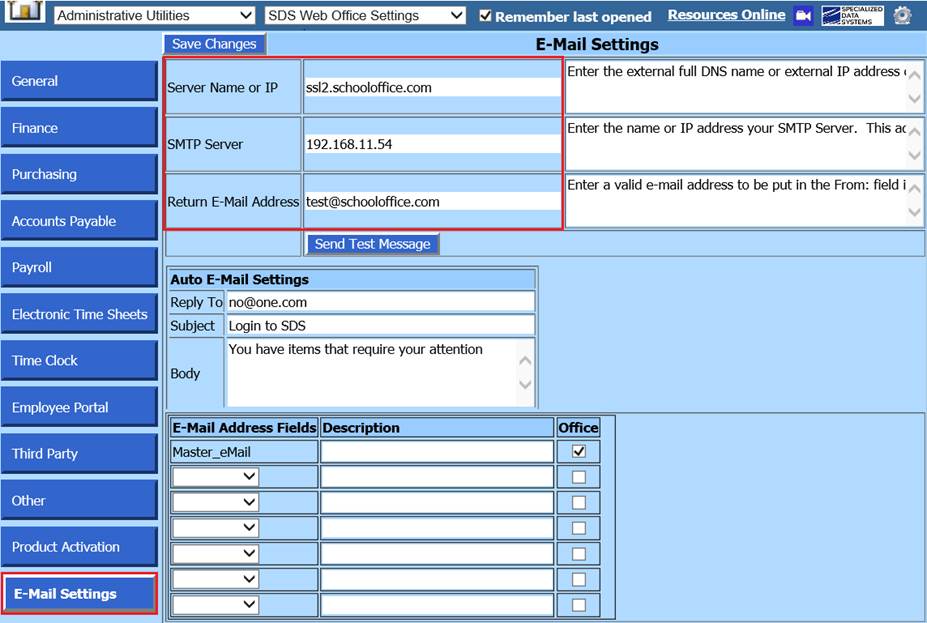
3. Select the E-Mail Settings tab
4. Fill in the IP addresses. If you are hosted by SDS please contact support for both the IP address and the SMTP Server information. If you host your own database you can get this information from your technology department. Then fill in the return email address.
•Send Test Message: This process will send a test message to the specified Return E-mail Address listed and verify your settings are correct.
•Auto E-Mail Settings: You can personalize your message that is sent to users. This is the email that will be sent to those who must do approvals for AP, PO, Attendance, Reimbursements and more.
•E-Mail Address Fields: This is used to store more than one e-mail address on an employee in the system. Select link below for more information on this process: http://help.schooloffice.com/FinanceHelp/#!Documents/addremovefields.htm
5. Select Save Changes
Setup Email for SDS the user that will be sending vouchers
1. Select Master File and Code Entry
2. Select Master File Horizontal Data Entry Changes
3. Entry Options: Select Users
4. Choose the user that will be sending vouchers
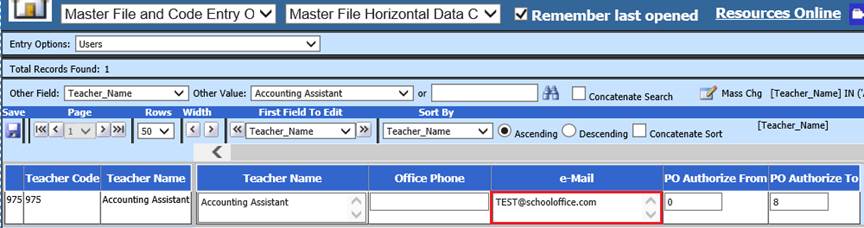
5. Verify or enter email address for user.
6. Select Save.
Enter Banking information for Vendors to receive Direct Deposit
1. Select Master File and Code Entry
2. Select Master File Vertical Data Entry and Changes.
3. Entry Options: Select Vendor (Direct Deposit)
4. Choose the Vendor from the list.
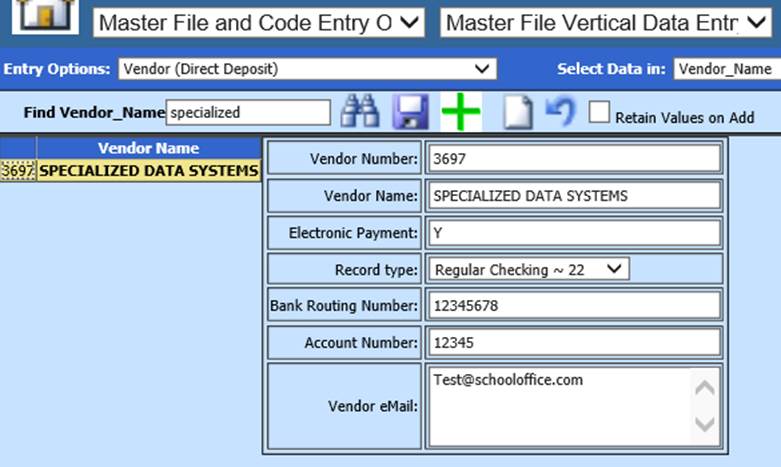
5. Enter a Pre-Note Code for the Vendor.
a. 22 – Regular Checking
b. 23 – Pre-note Checking
c. 32 – Regular Savings
d. 33 – Pre-note Savings
e. 99 – Electronic Payment (EFT)
NOTE: Electronic payment field should b a “Y” if using the Vendor Direct Deposit option.
6. Enter bank routing number, bank account number and Vendor e-mail address, provided from the vendor.
a. If setting up the vendor with “99 – Electronic payment”, enter in a fictitious bank routing number and account number. The vendors with this Electronic payment code will not display on the direct deposit file you create to send to the bank.
Complete Invoice entry and create direct deposit vouchers. See below links for additional details on entering an invoice, creating direct deposit vouchers or making them permanent.:
•AP Invoice Entry: Disbursement/Accounts Payable Entry Processing (schooloffice.com)
•AP Direct Deposit Voucher Processing: Check / Voucher Processing – Direct Deposit (schooloffice.com)
•Make Direct Deposit Vouchers Permenent: Make Checks Permanent (Post to Ledger) (schooloffice.com)
Once direct deposit vouchers have been exported and posted, you can now create the file to submit to the bank for vendor payments.
1. Select Accounts Payable
2. Select Vendor Direct Deposit
3. Select the invoices for the direct deposit file
4. Select Create File
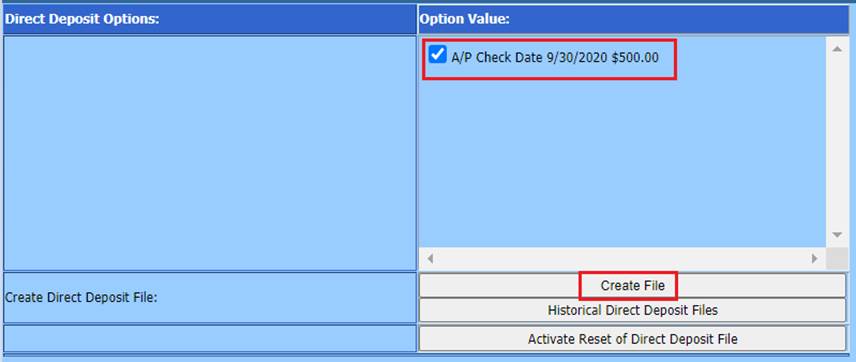
Note: to setup the settings needed to produce an ACH file, select the “Create File” option. This setup will only need to be done one time as the system will retain the following information for future accounts payable direct deposit files.
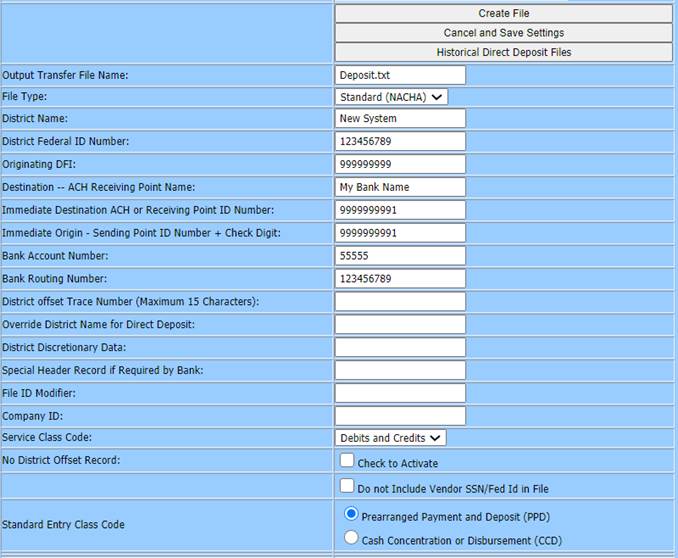
•Output Transfer File Name: The name of the direct deposit file that will be created. The system default is deposit.txt.
•File Type: Select from the drop down the file type your bank requires. Standard (NACHA), Saving (NACHA), CSV or Citibank.
•District Name: The school name is the default and is retrieved from the District Data master.
•District Federal ID Number: Enter your school’s Federal ID number.
•Originating DFI: Your bank will provide you with this information.
•Destination – ACH Receiving Point Name: Your school’s bank’s name.
•Immediate Destination ACH or Receiving Point Number: This information is provided by your bank.
•Immediate Destination Sending Point ID# + Check Digit: This information is provided by your bank.
•Bank Account Number: Your school’s bank account number.
•Bank Routing Number: Your school’s bank routing number.
•District Offset Trace Number: This information is provided by your bank. Some banks request that it be left blank
•Override District Name for Direct Deposit: This field is normally not used, however if your school name exceeds the characters allowed by ACH standards, you may enter an abbreviated version here.
•District Discretionary Data: The default is ‘Direct Deposit.’ This can be changed to comply with the bank's required information.
•Special Header Record if Required by Bank: This information is provided by your bank. Some banks request that it be left blank.
•File ID Modifier: This information is provided by your bank. Some banks request that it be left blank.
•No District Offset Record: Verify with your bank if they wish you to send the file with:
i. Check to Activate the Offset Record
•Standard Entry Class Code: This information is provided by your bank.
i. Prearranged Payment and Deposit (PPD)
ii. Cash Concentration or Disbursement (CCD)
Note: If any changes are made, select “Cancel and Save Settings”
5. Select the Effective Date for the file from the Calendar.
6. Select Create File.
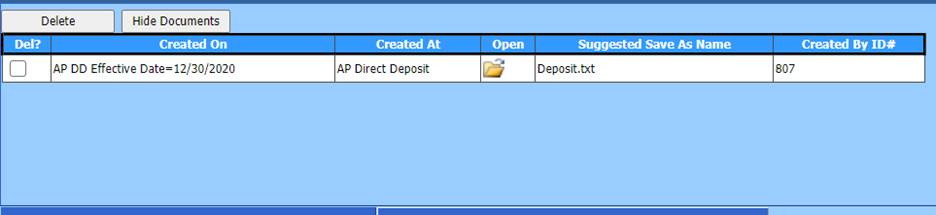
7. When the file is created, right click on the Open Folder and select “Save As” to save the file on your desktop for submittal to bank.