 to Add a New Report.
 Revised 1/2/2019
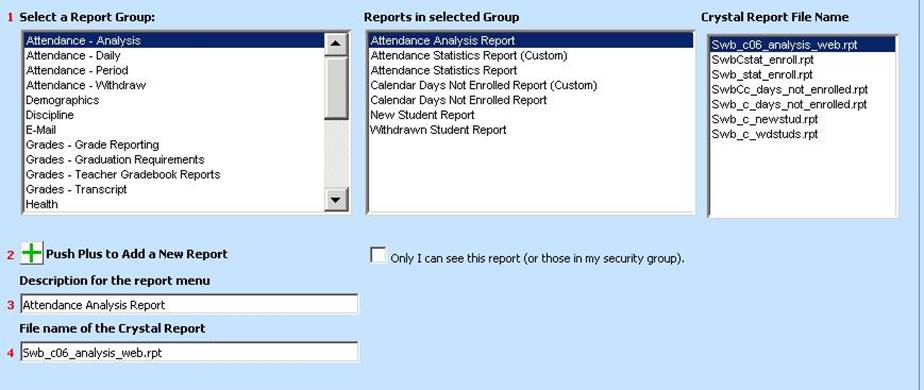
In Administrative Utilities|Control Center, this area gives you the ability to add a report that was created or customized at your school to the list of reports in a specific report group (i.e. Demographics).
Add a Report to a Report Group
•Select Administrative Utilities |Control Center |Add Report to a Report Group.
•Select a report group.
•In box #2, click on the  to Add a New Report.
•Optionally, you may check the box "Only I can see this report (or those in my security group)" so that others will not see this report.
•In box #3, type in a Description for your report.
•In box #4, type in the Crystal Report name.
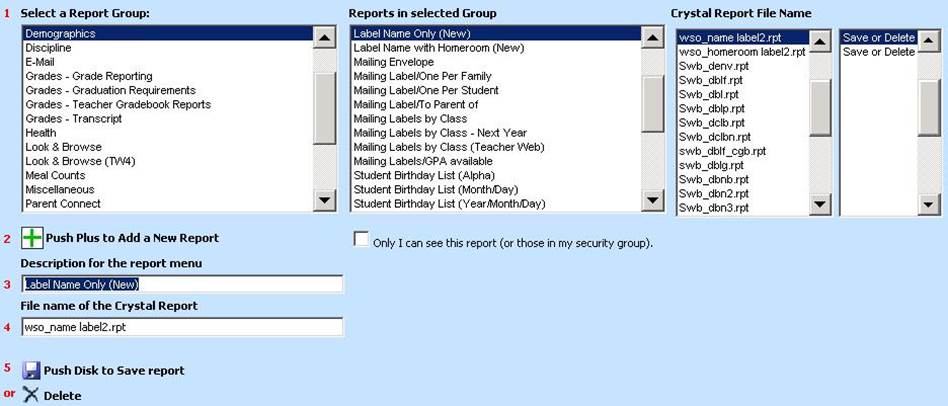
•Next to #5, click  to save.
•To run the newly added report, go to Reports |Student Reports and select the Report Group to which the report was added.

Note: You can add reports to Teacher Web 4 by clicking on the Look & Browse (TW4) Report Group and following the instructions above.
•When adding the report to this report group, keep in mind that you may want to adjust the user security.
•Any report added to this area will be available to everyone in Teacher Web 4 Look and Browse unless it is turned off in security or the box "Only I can see this report (or those in my security group)" was checked when the report was added .
•Any report can be turned off for a user even if they have access to the Look and Browse tabs.
Delete a Report from a Report Group
Follow these instructions to
delete a report you added to the system. You cannot delete standard
reports.
1. Select Administrative Utilities |Control Center
2. Select the report group the report you want to delete was added to (i.e. Demographics).
3. On the right select the report you want to delete (i.e. Detail Demo Custom Report).

4. Once
you have the report selected, click on the  button to delete the report.