Revised 9/11/2019
Video Demonstration of Civil Rights Data Collection Utility, to assist in creating the CRDC report. https://recordings.join.me/aXLUwEFTPU6_un2Z5X_Xtg
A tool to assist in completing the Civil Rights
Data Collection report is available in Web School Office in the Processing
Center.
Starting the Report
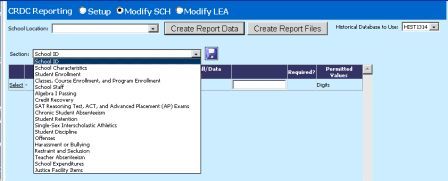
1. Blacken the Setup button next to the CRDC Reporting title.
2. Select your School Location from the drop box.
3. On the far right side of the screen, select the historical database from which you want to retrieve the data. For example, the submission of the CRDC for 2014-2015 is to be taken from data from the 2013-2014 school year. Therefore select the HIST1314 database for this submission.

4. Enter a date to be used for the collection of the enrollment data items. See official report documentation for the date range for the year's report. Important: The “Report Date” must be an active date in the calendar of the historical database you are using. As example, if your CRDC report is using the 2017-2018 data, then the report date must be an active date in the 2017-2018 school year’s calendar. If you do not use a valid school date, the report will not populate.

5. Along the left side of the screen is a long list of “Select” icons. Use this to select the criterion for which you want to create the selection statement. For example, one item is “Gifted and Talented Students Enrollment”.
6. On the right side of the screen is a record selection formula builder. Depending on the item you are defining, you will select Basic Information (demographics), Discipline, or Courses to build your selection statement. In this example, we want to use the Demographics Gifted_Talent_Prog_YN field to distinguish those students to report.
7. Using the filter options area, build the selection statement, much like you do for any reports you run. Once you have selected the correct field and value, click the “Add” button to move the selection to the Area Filter box. You may add multiple selections in the Filter Options box if necessary. As you build your filter statement, below this box it will list a student count along with the student id numbers, last name, first name and middle name. This will be helpful to you in identifying if you are “on the right track.”

8. Once you have completed building the filter, click the Add button to the right side of the large white box (shown by the red circle). Click on the next item in the list to build its selection statement. Some of these have been completed for you; others you will have to complete.
9. Blacken the Discipline dot above the Area Filter to build the selection statements for the discipline reporting section of the CRDC. The items on the left list will all be discipline related questions. The filter options will only pull from the Discipline table in the database.
10. Blacken the Courses dot above the Area Filter to build the selection statements for the courses reporting section of the CRDC. The items on the left list will all be course related questions. The filter options will only pull from the Course Codes or Course Master tables in the database.
11. Complete all of the selection statements for all of the elements on the left side of the screen as best as you can. If you do not have fields in which you store the related information, on another screen there is an opportunity to complete this data via manual entry.
Completing the Report
Once all of the selection statements for the elements
have been completed, click the Create Report Data button. This will
cause the program to execute all of the selection statements you just built and
do the appropriate counts. Once this process is complete, blacken the dot
for Modify SCH. The new screen will contain a drop box to select different
sections of the report. This allows you to verify the information that is
calculated from your filtering statements you created earlier and hand
enter any data that might not have been calculated.

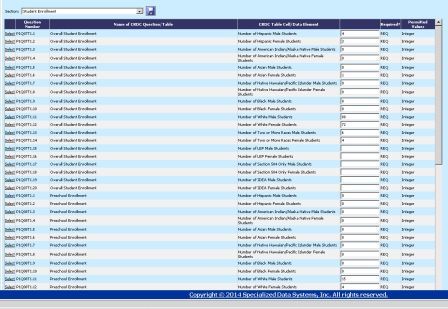
For example, select the Student
Enrollment option. You will see the results of the computer’s data
gathering process. If you have empty data boxes as are shown for the LEP
and Section 504 questions below, you can manually enter that data. When
finished reviewing a section, be sure to click the  icon before moving to the next section.
Note that some fields are required (REQ) while other fields are optional
(OPT). There are other fields that require a Yes or No answer, and these
fields will have a drop box with the available options.

Once all sections for the SCH portion of the report are completed, blacken the dot next to “Modify LEA” to address the items in this section of the report.
Submitting the Report
The last step is to click the Create Report Files
button. Once your screen refreshes, you will have two links appear on your
screen.

Right click on either the “CRDC SCH File” or the “CRDC LEA File” link to save the file to your computer. It will be in an Excel format. You can make further edits as needed before sending the data on to the next level. Note: older versions of Excel will not be able to open the file properly due to the large number of columns.
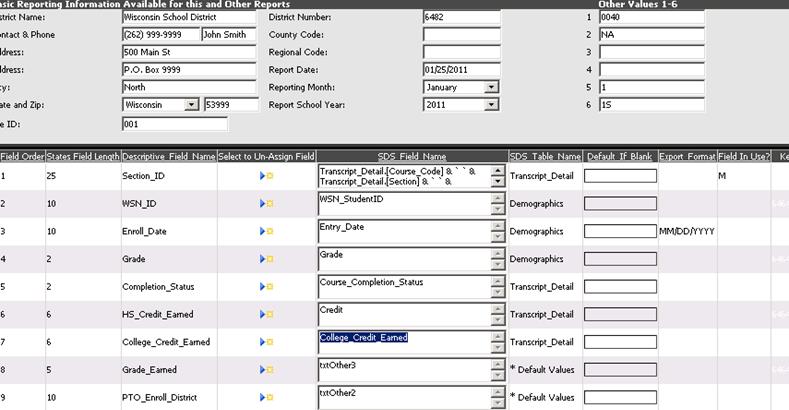
The screen
below shows the preset field matches. 