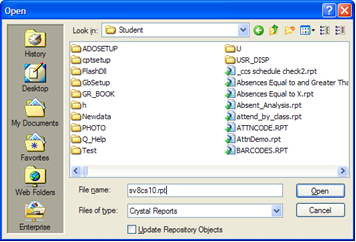
These instructions will
guide you through how to convert your reports from V7/V8.5 to Web School Office.
Please keep in mind you must have Crystal Reports 9, 10, XI or 2008
(Standard or Professional) to perform this task.
Step 1 - Open Custom
Report
1. Enter Crystal Reports 9/10/XI/2008.
2. Click on File and go down to Open.
3. Type in the custom File name you would like to convert. (i.e. sds_s10.cus (V7), or sv8cs10.rpt (V8.5).

4. Click Open.
Step 2 - Setting Datasource Location
1. Click on Database on the top tool bar
2. Scroll down to Set Datasource Location
3. Click Create a New Connection
4. Click on OLE DB (ADO)
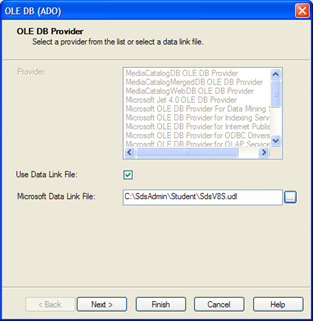
5. Click in the box next to “Use Data Link File:” so there is a green check mark.
6. Click on the … box that is next to the ‘Microsoft Data Link File’ white box.
7. Then browse for the student UDL sdsV8S.udl (i.e. c:\sdsadmin\student\ sdsV8S.udl).
8. Click Next
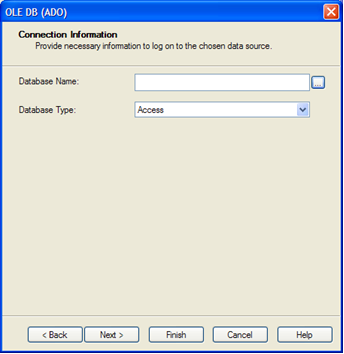
9. Click on the … box that is next to the Database Name white box.
10. Browse to your student directory and located sdsxplan.mdb (i.e. c:\sdsadmin\student\sdsxplan.mdb).
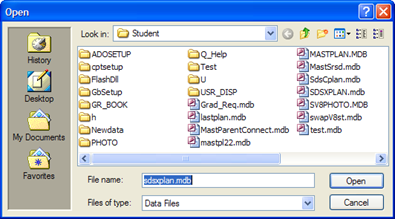
11. Click on ‘Open’ after you browsed for your database.
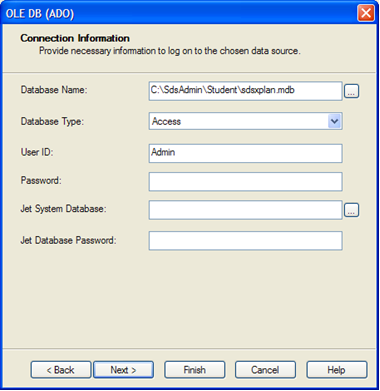
12. In the database name box (i.e. c:\sdsadmin\student\sdsxplan.mdb) should appear.
13. Click on Finish
Step 3 - Table Verification
1. While you are still in Set Datasource Location we now need to update each of your tables that are being used in the report.
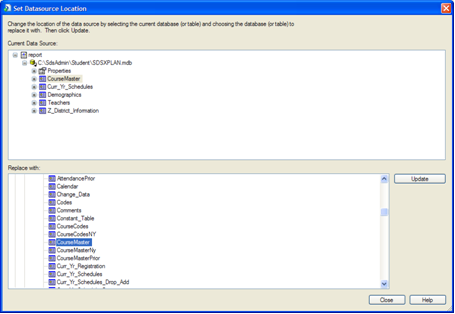
2. In the Current Data Source box at the top highlight one table that is used in your custom report (i.e. CourseMaster). Then go down to the Replace with box and click on the same table (i.e. CourseMaster) used above.
3. Click on the Update button on the right.
o Note: When updating the tables if a Map Fields screen appears click OK and continue to update your tables.
4. Update each table until all tables are updated then proceed to the next step. Please do not click on Close just yet.
Step 4 - Set Location Same as Report
While you are still in the Set Data Source Location precede with the following:
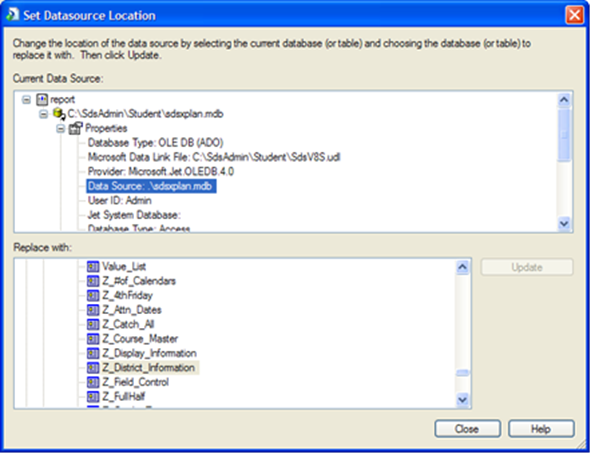
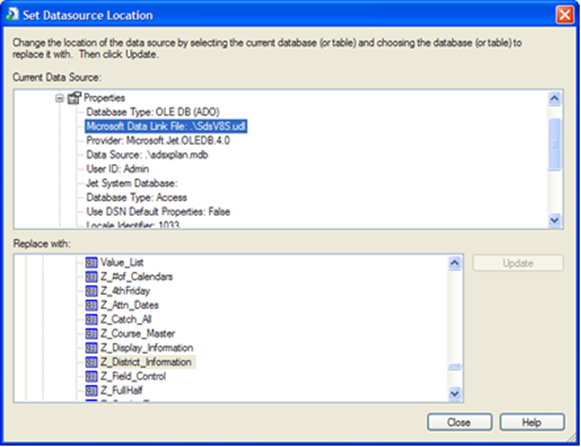
1. In the Current Data Source box, click on the + next to Properties
2. Right click on the Microsoft Data Link File (i.e. c:\sdsadmin\student\ sdsV8S.udl) and select Same as Report.
3. Right click on the Data Source (i.e. c:\sdsadmin\student\sdsxplan.mdb) and select Same as Report.
4. Click Close.
Step 5 - Linking
This is a VERY IMPORTANT step. If
this is not done your report could take minutes to display on the screen. You
will only have to complete this step if you have more than one table used in
your report. If you only have one table on your report please proceed to
#7.
1. Click on ‘Database’ on the top tool bar.
2. Scroll down to ‘Database Expert…’
3. In the ‘Database Expert’ click on the ‘Links’ Tab.
4. Right click on one of the links (Looks like an arrow ---------------->).
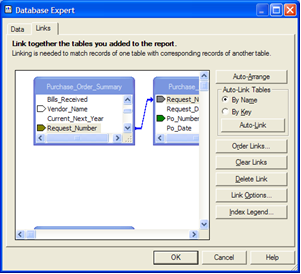
5. Scroll down to ‘Link Options’ or click on the ‘Link Options…’ button once you have highlighted the link.
6. Make sure that each link has ‘Left Outer Join’ selected. If it is not selected please change the link so that the Join Type is ‘Left Outer Join.’
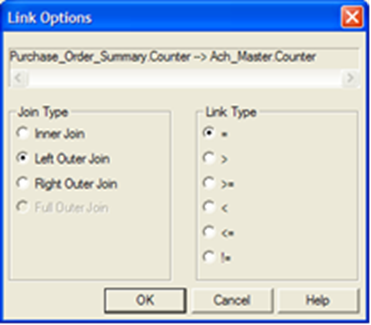
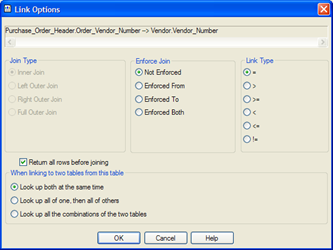
7. If this screen displays take the ‘check mark’ out of the box ‘Return all rows before joining.’
8. Change the ‘Joint Type’ to ‘Left outer Join.’
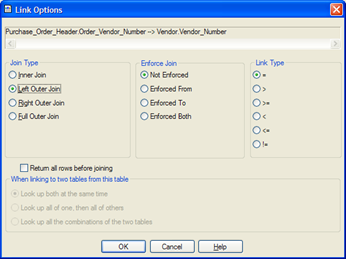
o Note: This screen may look a little different depending on the version of Crystal Reports you are currently using.
9. Click ‘OK’.
o Note: You receive the following message, “Your current link configuration contains multiple starting points. Please be aware that this is generally not supported.” Click ‘OK’
10. Repeat this step with each link. Completing this step for just one link will not change the link option for every link.
11. Once you have checked each link and made the proper changes click ‘OK’ to exit out of the Database Expert.
Step 6 - Replace the report name (V7) or File Path and Name (V8.5) with a Formula
1. In the lower left corner of the report in the ‘Page Footer’ section of the report, click on the text field (i.e. sds_s10.cus) that contains the V7 report name or the special field File_Path_Name V8.5 Report and hit your delete key.
2. Then open up a standard SDS report for the web (i.e. swb_dbnm.rpt).
3. Copy @rptfootname and place it in the page footer of your custom report.

Step 7 - Save Standard Custom Report
You have just completed all of the converting steps. Now save your custom report to run on the web.
1. Click on File on the top tool bar.
2. Scroll down to save as.
3. Save this report as (i.e. swbcs10.rpt)
o Note: If you save your custom report not with the standard naming structure (i.e. Student Schedule.rpt) then you must add the report to a report group by following the instructions in this Help Console document “Add a Report to a Report Group”.