Revised 10/10/2018
1. Enter WSO |Data Entry and Changes |Master File and Code Entry and Changes
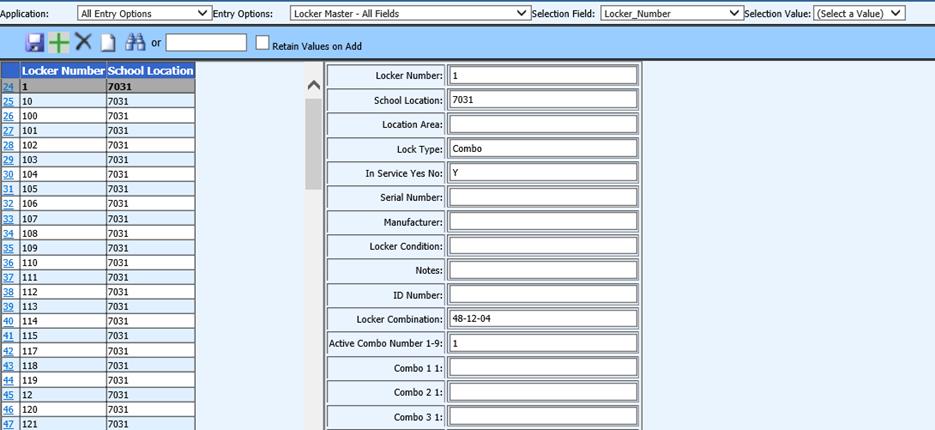
2. In the application drop down box, select “All Entry Options”
3. In the
entry options drop down box, select “Locker Master - All Fields”.
4. Click
 to add locker information.
5. Locker master field descriptions:
1. Locker Number: The number assigned to the locker.
2. School Location: The school location in which the locker is located.
o Location Area: If desired, you can create zones or areas of locker locations (i.e. for each hallway). There might be locations numbered 1 through 10 for each location.
§ Enter the Area Location for each Locker in the Locker Master area.
§ Enter the Area Location in the Room master for each Homeroom.
§ You will then be able to sort the lockers and students by Area Location.
§ The lockers will then be assigned in close proximity to the student’s homeroom. This will reduce the possibility of a student with a homeroom and locker on opposite sides of the building.
o Lock Type: Indicate the type of lock.
o In Service YN: Y=the locker is in working condition; N=the locker is not working.
§ By indicating this, the program will not assign a student to a broken locker.
o Serial Number: Enter a serial number if applicable (optional).
o Manufacturer: Enter a manufacturer if desired (optional).
o Locker Condition: Enter a short description of the locker’s condition (optional).
o Notes: Enter any type of note (optional).
o ID Number: Leave this field blank; the locker assignment process will complete this field.
o Locker combination: Leave this field blank; the locker assignment process will complete this field and move the information to the appropriate demographics field when the process is run
o Active combo number 1-9: Leave this field blank; the locker assignment utilities will complete this field later.
o Combo 1 1: Enter the 1st number of the 1st combination of this locker (assuming the locker has more than 1 set of combinations).
o Combo 2 1: Enter the 2nd number of the 1st combination of this locker.
o Combo 3 1: Enter the 3rd number of the 1st combination of this locker.
o Combo 1 2: Enter the 1st number of the 2nd combination of this locker.
o Combo 2 2: Enter the 2nd number of the 2nd combination of this locker.
o Combo 3 2: Enter the 3rd number of the 2nd combination of this locker.
o Keep repeating for up to 9 different locker combinations for each locker.
o Leave the previous student ID number fields empty – used by the program.
6. Click
 to save the information for this locker.
7. Continue until all lockers are added.