The main concept of the process is to link data entry screens together into a specific sequence.
When entering information for a new student you need to display several entry screens. Possibly student demographics, parent contact information, emergency contact, health, and class schedule.
With this option, after you have completed one screen the system will save your work and automatically display the next data collection screen you need to complete your work.
These screen groups are under your complete control. You can create a group of entry screens for your use or one that can be shared by other users in your school or all users in the district. This can also greatly improve the quality of entry. In the past it was easy to forget to display a screen. These screen groupings act as a reminder to enter required data.
Your original entry screen simply has an icon
 before the locations where you select the
view you are working with. Push and the groups you have access to will
become available as shown below.
before the locations where you select the
view you are working with. Push and the groups you have access to will
become available as shown below. 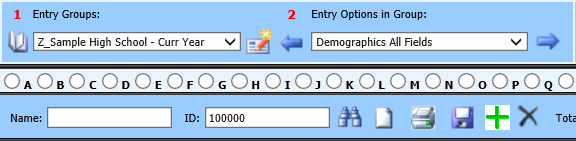
Note: You have a selection for “Entry Groups” and “Entry Options in Group”. When you select an “Entry Group” from the available list the “Entry Options in Group” will display the data entry views which are a part of the selected group.
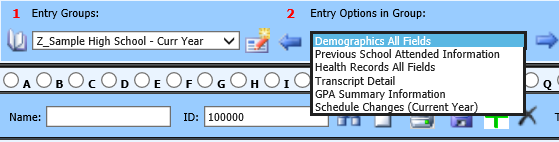
If you select the predefined sample for a High School student being entered for the next school year the Entry options will change.

When you first select a group the system will position to the first “View” of data in your entry options. After verifying or entering the needed information push the button to the right of the view. This will automatically save your changes and advance to the next “View” of data in the selected group. A back button is also provided to move to the previous view. You may also select the view desired from the drop down provided.
If a view is a special option such as, scheduling, registration, attendance, tuition, or look and browse, a secondary screen will display providing the ability to enter required information. After you have completed those secondary screen changes save you work. You can then close the secondary screen or simply switch back to the main screen using the system control Alt/Tab option.
If you wish to exit the group processing option, push the
icon to the left of the Entry Group
area. This will close the group option and return you to normal processing.
If you would like to create or change a group simply push the
 button to the right of the Entry Group
selector. This will display the “Entry Group” design options.
button to the right of the Entry Group
selector. This will display the “Entry Group” design options. 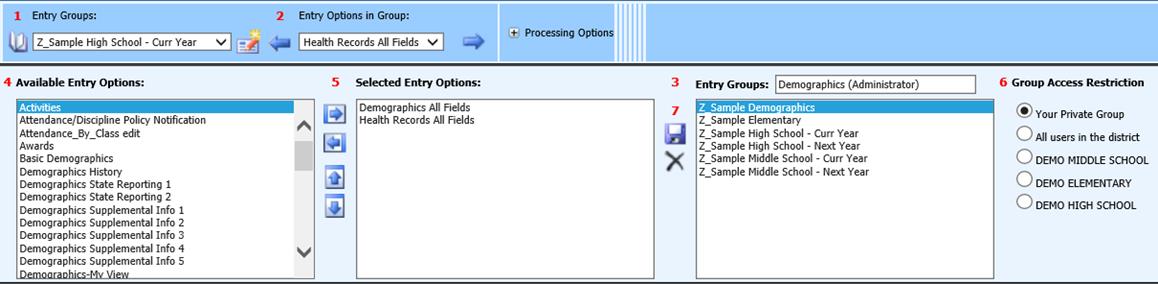
 to save then you can return to normal
processing by again pushing the
to save then you can return to normal
processing by again pushing the  design option to the right of the Entry
Groups, pushing the
design option to the right of the Entry
Groups, pushing the