Revised 7/20/2020
Step 1 – Enter Email Addresses
Make sure that you have
e-mail addresses entered in Data Entry and Changes |Student Information |Entry =
Demographics All Fields. SDS provides a default field named Master eMail.
You may use a custom field(s) for e-mail addresses, if desired. However, all
fields for e-mail addresses must have the word email in the field
name. For instructions on adding custom fields, |topic=Add
Field Control;displayasbutton=true
If you have not yet
entered e-mail addresses in demographics and would like to create a new view
with just the e-mail fields for faster entry, you can do this in Administrative
Utilities |Data View Definitions. For instructions on using Data View
Definition,
Step 2 – Setup E-mail Settings
After you have
entered in all the master emails, enter into |Administrative Utilities |SDS Web
Office Settings. Select the E-Mail Settings circle. There are three areas that
must be filled out at the top of the screen.
1. Server Name or IP = Enter the external full DNS name or external IP address of the SDS Web Office Server. This address will be used for the URDL in the e-mail that is sent (if applicable) (i.e. 11.11.11.111).
2. SMTP Server = Enter the name or IP address of your SMTP Server. This address will be used by SDS Web Office to send e-mails. Make sure the SDS Web Office Server has permissions to relay e-mail through this server (i.e. 11.11.11.111).
3. Return E-mail Address = enter a valid e-mail address to be put in the “From:” field in the sent e-mail (i.e. jdoe@yourschool.com).
4. In the bottom part of the screen, choose the E-Mail fields from the dropdowns that you want available for selection in the E-mail Center
•Enter a Description for each of them.
•Checkmark Office if you want the e-mail field available in the Web School Office E-mail Center.
•Checkmark Teacherweb if you want the email field available in the Teacher Web E-mail Center.
5. Click the Save Changes button
Step 3 – User Security
To turn access to the E-Mail Center on or off
for an office user:
•Open Administrative Utilities |Security-Application and Data Access.
•Search for a user (or user group). For detailed information on searching for a user or group,
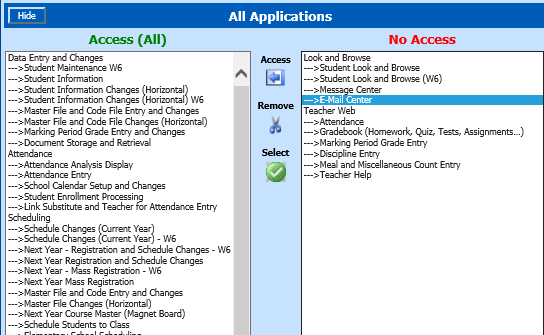
•In the No Access column of the All Applications area of the screen, click
on E-mail Center and click the  button to move E-mail Center to the
Access column.
button to move E-mail Center to the
Access column.
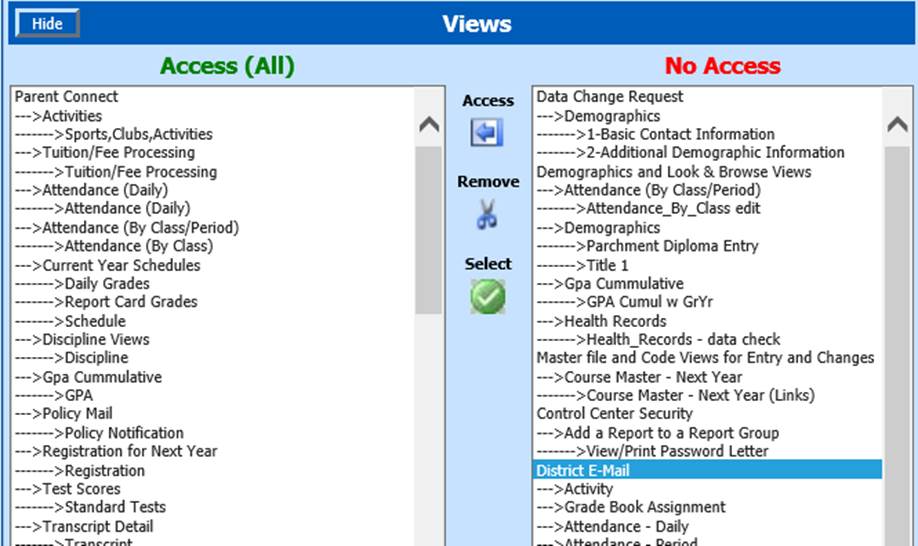
•In the No Access column of the Views area of the screen, click on
District E-mail and click the button to move District E-mail to the
Access column.
To turn access to the E-Mail Center on or off for a teacher:
•Open Administrative Utilities |Security-Application and Data Access.
•Search for a user (or user group).
•In the No Access column of the Views area of the screen, click on
District E-mail and click the button to move District E-mail to the
Access column.

NOTE: If District E-Mail is removed from Access for a teacher or teacher group, the E-mail Center will still be listed in the Entry Options in Teacher Web for the teacher(s) but when it opens, the options will not be available for use.
 Loading...
You can use logical operations: AND, OR, NOT. Examples: football OR hockey, sports AND NOT baseball