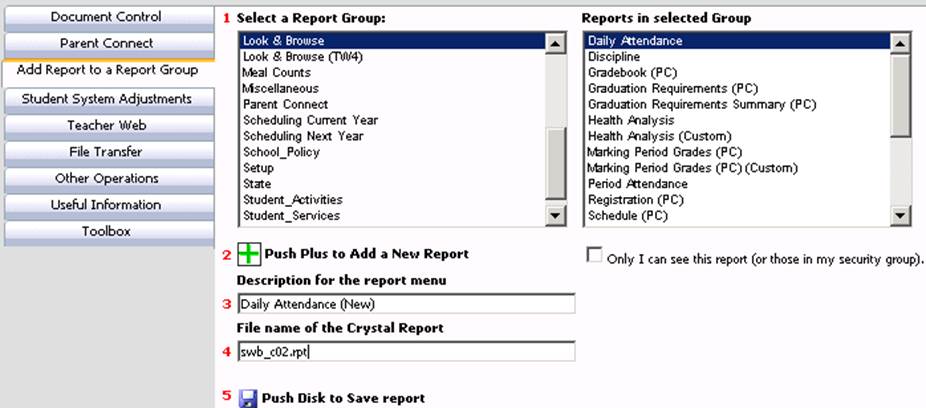
These instructions will help
you add a report to Look and Browse and set security for the report.
Please note: the Look and Browse reports security area is
separate from the security for Look and Browse. For example,
if you add a new Student Schedule Report, all users will see this
report in the Student Reports |Look and Browse group even if they don’t
have access to schedules in Look and Browse.
These are the
steps to follow to add a report to Look and Browse and set the
report security.
•Log into Web School Office.
•Click on Administrative Utilities.
•Click on Control Center.
•Click on Add Report to a Report Group.

•#1 Select Look & Browse.
•#2 click on the  to add a new report.
•#3 Type in a description for the report for example "Daily Attendance".
•#4 type in the file name of the report.
•Save by clicking on the  button.
•Your report has been added. Next, set security for the report.
•On your menu tree click on Administrative Utilities |User Security.
•To adjust the report security, first select the appropriate security group or user.
•On the menu tree, find the "Web Look and Browse Reports" folder and check the box next to the report you added. The selected group/user will NOT have access to the report.