Revised 6/12/2018
Office staff can enter/edit marking
period grades and post gradebook grades to the office by going to Data Entry
& Changes |Marking Period Grade Entry and Changes. In this screen, you can
either enter grades by course or by student.
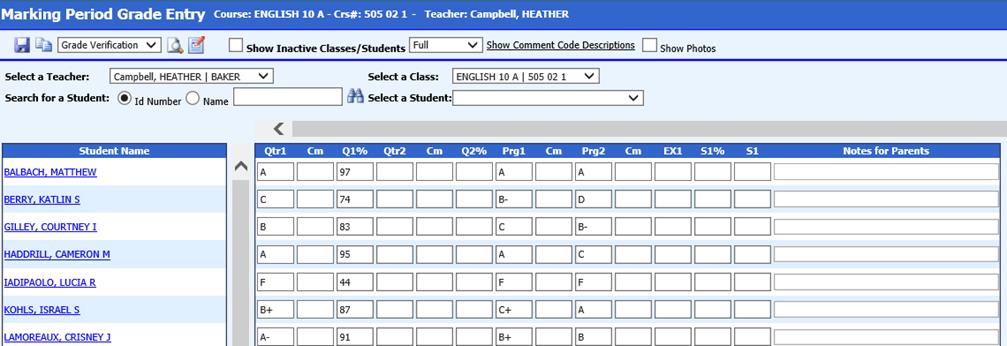
To enter grades by
course:
1. Select the Teacher
2. Select the Class
3. The class list will display. Enter grades/comments on students as necessary
4. Click the floppy disk button to save the changes.
To enter grades by student:
1. Choose to search for the student by either ID Number or Name
2. Enter the student’s ID Number or last name in the box and either press the Enter key on your keyboard or click the binoculars button
3. Choose the student from the dropdown on the right
4. Edit the grades/comments on the student’s classes as necessary
5. Click  to save
changes or new entries.
to save
changes or new entries.
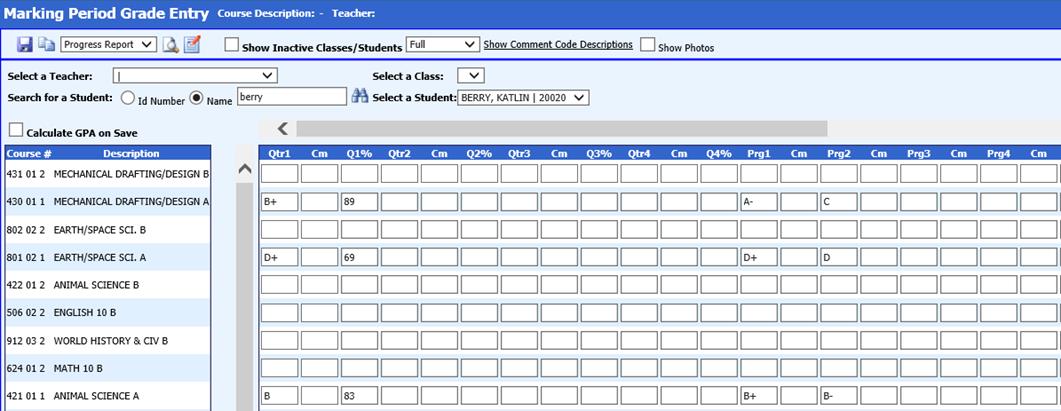
Note: If you changed grades that affect the
student’s GPA, you can select the option to Calculate GPA on Save before you
click to save your entries.
Other options
available on the Marking Period Grade Entry screen are listed
below.
1.  Copy Grades – This button allows the user to copy
grades between columns and also to copy grades and convert them to letter
grades.
Copy Grades – This button allows the user to copy
grades between columns and also to copy grades and convert them to letter
grades.
2.  Reports – This button allows the user to select
either the Grade Verification or Class list to print for the selected class or a
Progress report for the selected student.
Reports – This button allows the user to select
either the Grade Verification or Class list to print for the selected class or a
Progress report for the selected student.
3.  Calculate Final Grades
Options – If setup for
grade averaging is done in Grade Area Setup, this button will average grades to
the column selected in the dropdown.
Calculate Final Grades
Options – If setup for
grade averaging is done in Grade Area Setup, this button will average grades to
the column selected in the dropdown.
4.  – Select this to display inactive
students in the teacher’s class list or inactive classes on a student’s
schedule.
– Select this to display inactive
students in the teacher’s class list or inactive classes on a student’s
schedule.
5.  Adjust Size of Grid – Allows the user to adjust the grade
entry grid.
Adjust Size of Grid – Allows the user to adjust the grade
entry grid.
6.  – Displays a list of comment codes and
descriptions.
– Displays a list of comment codes and
descriptions.
7.  --Select to display selected student
photo.
--Select to display selected student
photo.
To Post Gradebook Grades to the Office:
1. This works for the selected class or the school location. In this area the user does NOT have to have a school location specified on their login. It uses the location on the selected class.
2. Click on Data Entry & Changes |Marking Period Grade Entry
3. Click the Select a Teacher dropdown and choose a teacher.
4. Click the Select a Class dropdown and select a class.
5. Click the
Activate/Transfer Grades  button.

6. Select the Grade Area you wish to post to from the dropdown.
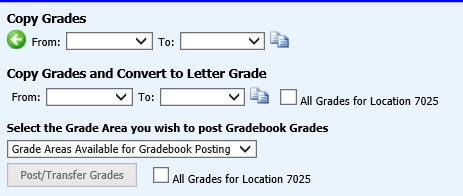
7. If posting for all classes in the displayed school location, checkmark the All Grades for Location X box. If only posting for the selected class, leave this box unchecked.
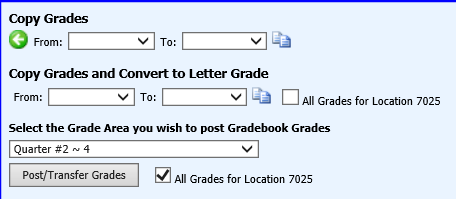
8. Click the Post/Transfer Grades button to post grades.