MSDS Early Childhood Report
Revised 11/28/2018
First Steps:
•
Get the latest Web School Office build and the Control Center update.
•
Run a full evaluation (u22_evct.exe) from the SDS control center.
•
This process will create new MSDS fields in your database,
sdsxplan.mdb.
•
The below fields will now be available for data entry in
Demographics_SR_1. If any of these fields were already in Demographics, the
evaluation program copied the data from Demographics to the new field in
Demographics_SR_1. The report has matched field SRSD_UIC from DEMOGRAPHICS. If
you do not have this field in demographics, you can change the match to the
appropriate field/table.

The fields entered to the
Services table relate to the Early Childhood Programs. The evaluation has also
added the appropriate program codes to the SDS database if needed.
These
are:

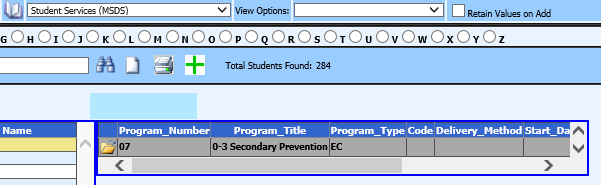
Students in these programs
must be entered into SDS through the Student Services Data Entry screen.
Instructions
for Creating the Early Childhood Report
Enter WSO |Select Processing
Options |State and Federal reporting |MSDS Early Childhood |XML Format.
The top of the screen should look the below screen shot:

Most of the report fields have been
matched for you to SDS fields. Report fields 1, 2, 9 and 10 needs to be matched
to default values. Use this screen as a guideline.


Make any changes to the matched
fields and then press “Create Export File”.
Note: Some report
fields (those with ‘M’ in the Field in Use column) are matched to multiple SDS
fields. If you need to change the preset matches for these fields, there is a
new check box, “Combine Fields”, in Step 3. When this is checked, you can select
each field, one at a time, and click the yellow marker to match after each
selection.

Notes:
•
Select “XML” in the drop box for “File Export Format.
•
If you want to submit current year students:
o Click  and set a sort.
o Click the icon to Create
Export File.
o To the right of the second
drop box in the very top line, a piece of paper should appear.
§ If it does not, leave this screen
and then return to it.
o Click the piece of paper icon
to show your files previously created for submission.
o When the file is displayed,
select the output file that was just created.
o Right mouse click on the
yellow folder of the file created and “Save Target As”.
•
Name the report appropriately.
o For a district submission: The
file name should start with “D” followed by the ISD/ESA number, followed by the
district number.
§ SDS does not provide the number;
the District/Building should know their numbers.
o For a building submission: The
file name should start with “B” followed by the ISD/ESA number, followed by the
building number.
§ SDS does not provide the number;
the District/Building should know their numbers.
•
Save the file to your desktop.
•
Submit the file to the state through the state web site.
The first six fields of the report are MANDATORY and
data must be entered for each student in the matched SDS field. The rest of the
fields are OPTIONAL but all data submitted should follow the Business Rules
posted on the CEPI website for this report. Check all date fields for accuracy
and make sure that name fields include only state allowed punctuation (period,
comma, apostrophe and hyphen).