Revised 1/2/2019
This section allows for the creation of new passwords or
resetting of passwords for parents, non-custodial parents or students.
To Access Parent Connect
Password Setup
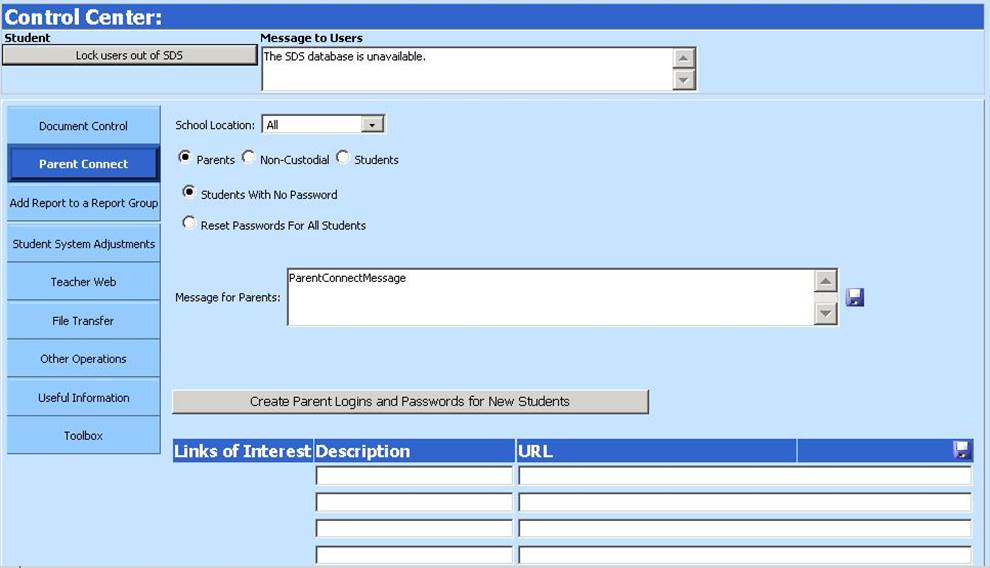
•Select Administrative Utilities |Control Center |Parent Connect.
•Select a specific School Location from the dropdown or “ALL” for all locations.
Create or Reset Passwords for Parents
•Select “Parents” as the group to receive passwords.
•Select option “Students with No Passwords” to create passwords for parents of this group.
•Select option “Reset Passwords for all Students” to recreate passwords for all parents.
•Enter a “Message for Parents” if you wish to post a message on the ParentConnect site for the group selected. Press the save icon.
•Click the button “Create/Reset Parent Logins and Passwords”.
Create or Reset Passwords for Non-Custodial Parents
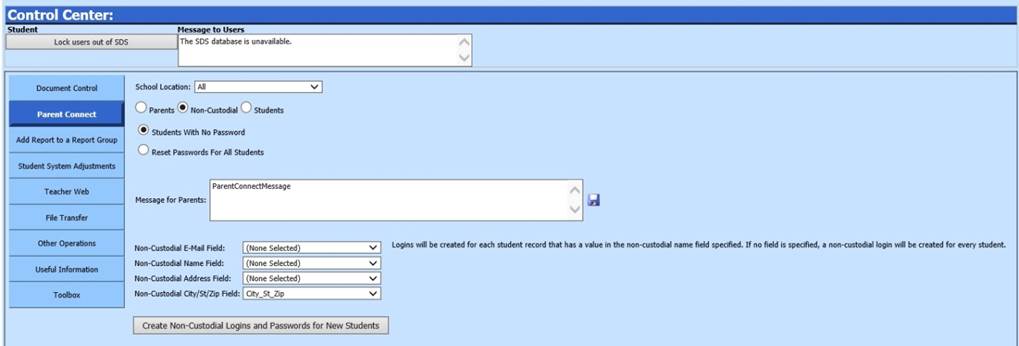
•Select “Non-Custodial Parents” as the group to receive passwords.
•Select option “Students with No Passwords” to create passwords for non-custodial parents of this group.
•Select option “Reset Passwords for all Students” to recreate passwords for all non-custodial parents.
•Select the “Non-Custodial Name Field” (second dropdown on the screen) from your database. This field must be 21-50 characters in length to appear as a selection in the dropdown. Logins will be created for each student record that has a value in the field selected.
•Select the Non-Custodial email, address and city/state/zip fields from the other dropdown lists for email and mailing purposes.
•Enter a “Message for Parents” if you wish to post a message on the
ParentConnect site for the group selected. Press the save icon.
icon.
•Click the button “Create/Reset Non-Custodial Logins and Passwords”.
Create or Reset Passwords for Students
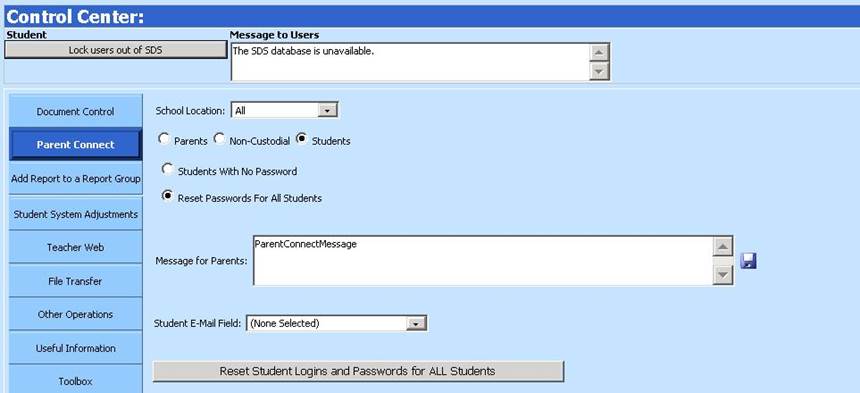
•Select “Students” as the group to receive passwords.
•Select option “Students with No Passwords” to create passwords for students in this group.
•Select option “Reset Passwords for all Students” to recreate passwords for all students.
•Select the “Student Email Field” to have an email sent to the address in that field. This is usually the standard SDS field called Master_email.
•Enter a “Message for Parents” if you wish to post a message regarding the
passwords on the ParentConnect site for the group selected. Press the save
icon.
•Click the button “Create/Reset Student Logins and Passwords”.
Links of Interest
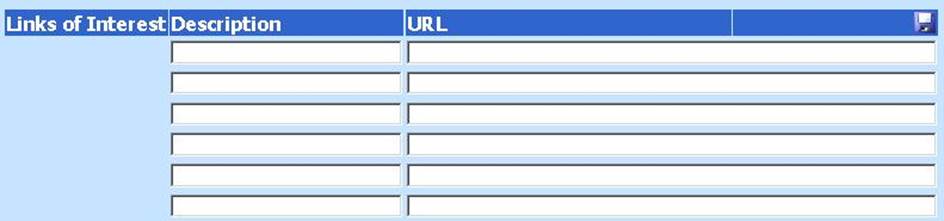
•You have the ability to add your own hyperlinks to the Parent Connect page.
•To add the link, select Administrative Utilities |Control Center |Parent Connect
•Enter a Link Description and the full URL.
•Once you enter the link and click save, the link will show on the left of the Parent Connect page.
Parent Connect Security
You may want to restrict what student areas will be visible to parents on Parent Connect. A security group allows you to assign users that share the same security rights to a group instead of individually assigning their security rights. Parents can ONLY be assigned to groups with "_ParentConnect" at the beginning of the group name.
To control Parent Connect security, do the following.
•Go to Administrative Utilities |Security – Application & Data Access
•Click on All Users|Security Groups
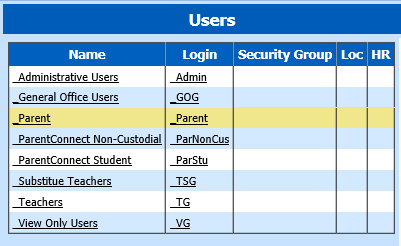
•In the Users column, click on the parent group, i.e. _Parent
. 
•Remove Applications, Reports, or Views for this parent group by
highlighting the Applications, Reports, or Views in the Access column and
clicking the  button.
•Add Applications, Reports, or Views for this parent group by highlighting
the Applications, Reports, or Views in the No Access column and clicking the
 button.
