Period Attendance Entry
Click on a blue class link under the Course Description
column to select the class to work with.
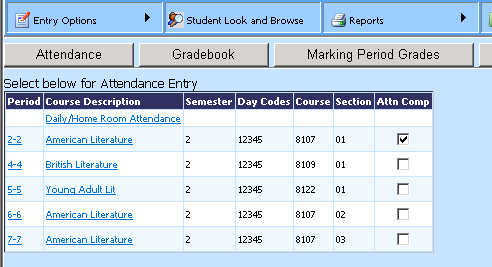
Note: Check the “Attn Comp” box
ONLY to notify the office that there was no attendance to enter for this class.
This box does not have to be checked if attendance is recorded for the day.
Make a Selection
from the Toolbar: Entry Options

Class List Option
The list of classes you are scheduled
to teach today will appear on the screen as seen above.
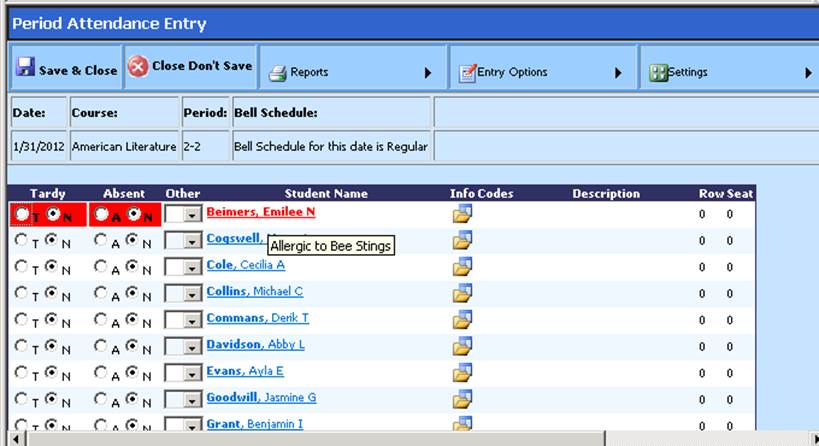
Mark your students absent or tardy by clicking the
appropriate circle (A for Absent, T for Tardy, N for No Absence or No Tardy)
next to the student name then click the  Save and Close button. This will return
you to your list of classes.
If you do not wish to save your entries,
click the  Close Don’t Save button and you will be
returned to the list of classes. No attendance will have been recorded.
NOTE: You have the option to mark a student both absent and tardy for
the class period.
NOTE: If a student’s name is listed in red, a message
entered by the office will display in a dropdown box. See the first name in the
class list screen above. This student appears in red and a message that she is
allergic to bee stings displays
for the teacher’s reference.
Seating Chart
Option
If no seating chart has been created for this class, this
option will open a Seating Chart Definition screen.
Define your
seating chart by indicating how many rows and seats your chart will have.
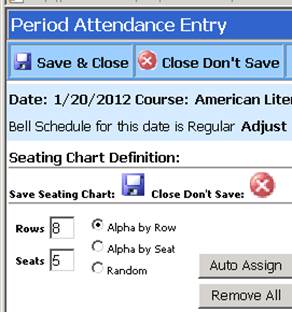
Click  to save.
You will now see a visual
display of your chart.
Choose the method of assigning seats then click
on the “Auto assign” button.
Options include:
•
Alpha by Row, alphabetically from top to bottom
•
Alpha by Seat, alphabetically from left to right
•
Random
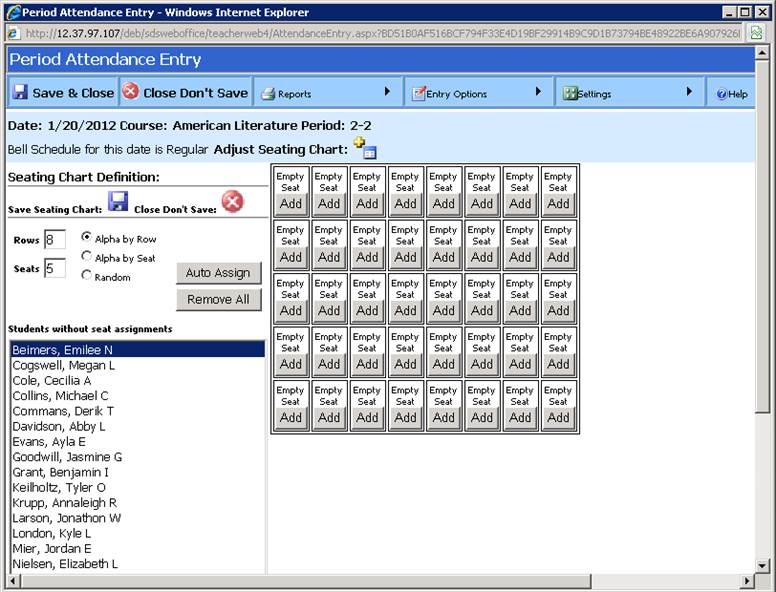
Manually assign a
student to a seat by clicking on a name from the “Student without seat
assignment” box and then clicking the Add button on the seat to be assigned. You
can manually assign all or some of your students and then choose another method
for the remaining students that will fill in around your manually entered
students.
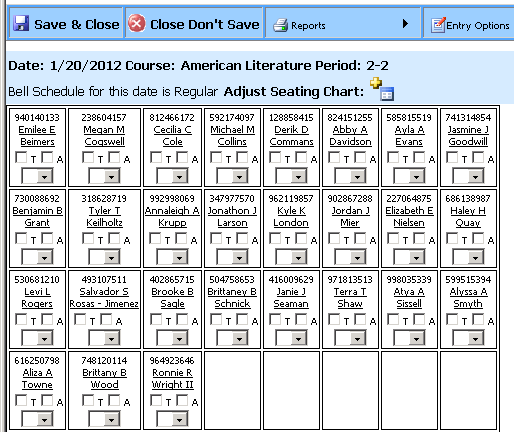
If a seating chart has been created for this class then you
will be ready to take attendance. If you select the option “Adjust Seating
Chart”  it will take you to the Seating Chart
Definition screen that was used to create the chart (see preceding
instructions). Make necessary changes and save your work.
Mark your
absent/tardy students by clicking the appropriate circle (A for Absent, T for
Tardy, N for No Attendance) next to the student name then click the Save and
Close button.


 Save and Close button. This will return
you to your list of classes.
  Close Don’t Save button and you will be
returned to the list of classes. No attendance will have been recorded.


 it will take you to the Seating Chart
Definition screen that was used to create the chart (see preceding
instructions). Make necessary changes and save your work.