Define E-mails
Revised 1/11/2019
Although the intention is to use this area to notify
administrators more about student attendance, it WILL work with any
policy definition you create.
Setup
A first step in the setup of the Policy
Notification System is adding e-mail addresses to the administrators' teacher
codes. Go to Data Entry and Changes | Master File and Code File Entry and
Changes. Set the Application drop box value to General
Information, and set the Entry Options drop box value to
Teachers. For each administrator, be sure the e-mail field
is completed with the correct e-mail address.
The email settings must
also be completed. For instructions on email settings,
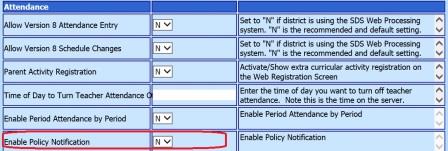
The third step is the policy notification system must
be turned "on" first before this area is visible to use. To find those
directions, and look in the Attendance
section.

Define
E-mails
Once the policy notification system has been turned on,
this menu option, Notification Setup, is available in the
Administrative Utilities area. At the top of the screen, blacken the dot next to
Policies. On the left is a list of all users (teacher codes) in the
system. Place a check mark next to the people who are to receive the
notifications for policy notices. Note: The intent is to notify the
administrators (principal, assistant principal, dean of students, etc.).
The middle column allows you to select which policy code(s) will
send a notification to the administrators. Place a check mark in front of
the appropriate policy/policies about which you want the
administration to be notified.
When all selections have been made, click
the  next to "Notify" so your selections are
saved.
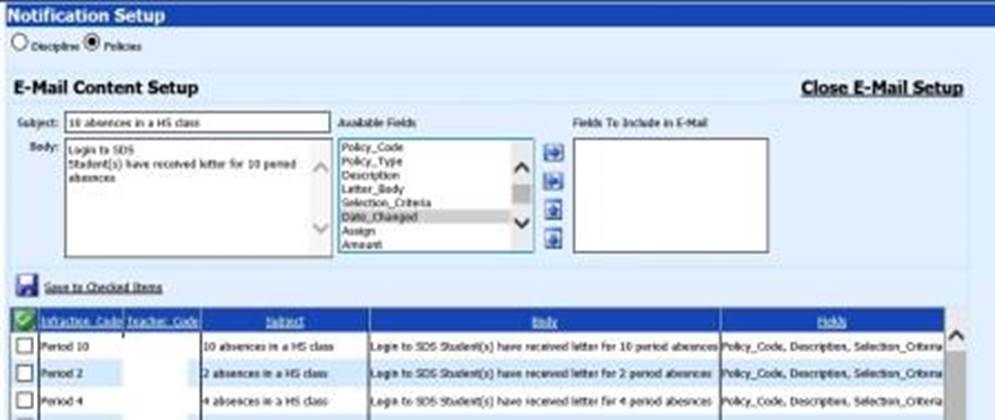
The last step to the setup of the Notification System
for Policies is to create the wording of the actual e-mails sent to the
administrators chosen above. Click the E-mail Setup link above the
column of infraction codes.
Subject: Customize
the subject line of the e-mail being sent to the
administrator(s)
Body: Customize the body of the message being sent to
the administrator(s)
Available Fields: Select fields from
the policy area to display in the email being sent to the administrator(s);
use the  button to move the selected field(s)
to the Fields to Include in E-mail column.
Click the  button to save your setup of the
e-mail.
As shown below, essentially each policy could have its own
subject, message body, and selected fields associated with it.

When finished with the
setup, click the Close E-mail Setup link in the upper right hand
corner of the screen.
What Happens Now
Enter your attendance data as normal in the Attendance Entry area. When you have completed the attendance for the morning or the day, click the envelope icon at the top of the screen.

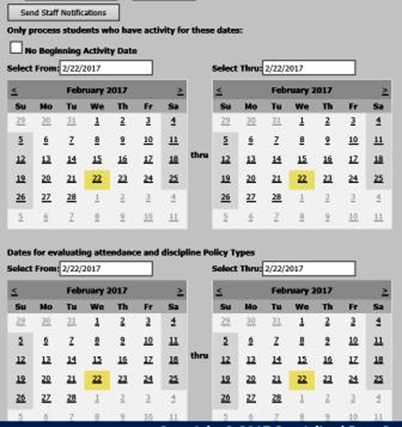
Your screen now contains a set of calendars to use in
creating your notifications to the administrator(s) about student
absences. For more detail on how to use the calendars,.

Once the dates have been setup
correctly, click the button Send Staff Notifications. The
administrator(s) will be notified with the appropriate e-mail. This will help
the administrator know which student(s) need(s) his/her immediate
attention regarding attendance.
Automation
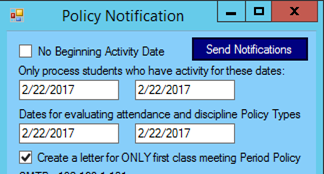
Note: This process may also be set up to run as
an automated process. For example, on the computer of the person who
processes attendance the most, a "task" to run the program
swc_policynotification.exe can be set up to run at 9:10 AM (approximate
time the user normally completes attendance entry for the morning). The user
will see this new window and have to select the date boxes just like on the
screen above but without the calendars.
