 If multiple course numbers are
desired, select another and repeat for each desired course number.
If multiple course numbers are
desired, select another and repeat for each desired course number.
Revised: 4/23/2018
Note: During a scheduling run the scheduling operation will take about one (1) to two (2) minutes per 100 students being sent through the scheduling operation. The schedule run will be making changes to your registration records. Your staff must not work in Next Year Registration and Scheduling during this process. You may want to notify your guidance department that a schedule run is being performed.
Access WSO | Scheduling |Schedule Students to Class.
Student Selection Options
Mark
desired options in this area to select the students to process:
1. School Location (In example below, the Middle School was selected from the drop down)
2. Place a check in “Students that are not fully scheduled” to view only those who are not fully scheduled or remove the check to include all students.
3. Grade Year (In the example below, the Next Year Grade/Year selected is “07”
o To select more than one grade/year, select and push the right arrow, select another and repeat.
4. Data Element (In the example below, the Data Element selected is Female)
o To select more than one data element, select and push the right arrow, select another and repeat.
o To select students registered for a
specific course(s), choose Course Number from the very top of the Data Element
dropdown list. Choose the desired course number from the dropdown list to
the right and push the right arrow. If multiple course numbers are
desired, select another and repeat for each desired course number.

Scheduling Run Options

1. Overload Control - The “Overload Control” option allows for overloading a given value of “Do not overload” or select from 1 to 10 or unlimited number.
2. Ignore Options – The “Ignore" options are useful when your school gets to the final scheduling runs and is trying to fit in the last students. There are four options.
o Student Requested Section Demands, Student Requested Semester Demands, Student Requested Teacher Demands and Course Code NY Schedule Priority.
o By default, Ignore Course Code NY Schedule Priority is check marked and in most cases should be left checked.
3. Activate Test Only Mode – This “Activate Test Only Mode” option will run the students through a scheduling run, but will not change any schedules or the course master.
o It will simply inform the user as to the number scheduled or rejected. This process will run in 5 to 10 seconds for each 100 students.
4. Show reject matrix for selected student –
selecting this box will display a reject matrix to the right of the student list
when clicking the  button on a
student. (More information on the reject matrix is available at the end of this
document.)
button on a
student. (More information on the reject matrix is available at the end of this
document.)

5. Show 25 students at a time – check marked by
default. 25 students will display at a time and page numbers will display
above the list. Clicking on a page number will move to that page. 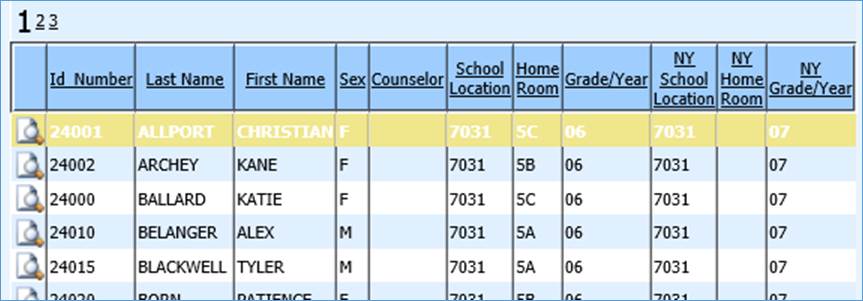
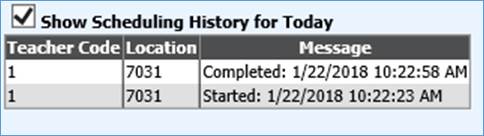
6. Show Scheduling history for today – check marking this will display the scheduling run history for today.
Schedule Students to Class
1. Make desired selections in the Student Selection Options area at the top of the screen to select the group of students you wish to schedule.
2. Make desired selections in the Scheduling Run Options area.
3. Based on your selections at the top of the screen, a button will display showing the number of students selected.

4. Click the button shown to schedule those students.
5. Read the message that displays and click OK.
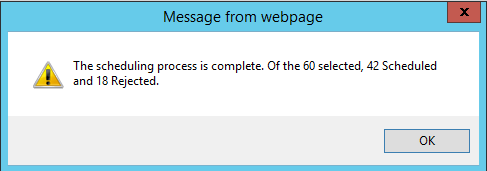
6. Wait for the scheduling run to complete. When complete, a message will display indicating the number of students successfully scheduled and the number of students rejected. Click OK on the message.
7. If you would like to review the reject matrix
on the rejected students, select the Show Rejected Matrix for Selected Student
option in the Scheduling Options area and click on the button to display the reject matrix for
the selected student.
8. Below is an example of coding for the reject
matrix on the Algebra II A
course.
Example:
<631-03-1
T12_D1_Seats:30>
Course Section Semester:
631-03-1
Marking period(s):
T12
Day Code(s):
D1
Assigned Seats when
students was scheduled or
rejected:
Seats:
30
9. If a link course is associated with a class
in the Period area for the originating course/s each link class will be coded as
follows:
Example:
LP:
1-1_LT34_LD1
Period
the link course is in: LP:
1-1
Marking period(s):
LT34
Day Code(s):
D1
