
Revised 2/1/2019
This area allows you to
easily Add or Adjust Users and Group Security for the Program Applications,
viewing all security options in grid form.
•Applications – Displays selected areas of the program.
•Reports – Displays the selected Report options in Student Reports and Student Assessment Management Reports.
•View – Displays the selected Views [entry and view only] within the Applications.
These areas are divided into two columns each: Access and No
Access, making assigning and checking security a snap. 
List of Existing Student System Users
Users that are listed in the Users column will have
access to the Student System. To view the rights of any user, highlight the Name
or Login, all rights that have been assigned [Access] and not assigned [No
Access] for this user will be displayed in the various areas of the security
screen.
User Search and Adjusting
Options
Alpha Search
Select the letter to
search by, all Users beginning with the selected letter will display. 
Name Search
Enter the first or last name,
or portion of a name, select Search for User or Enter, all Users matching your
criteria will display. 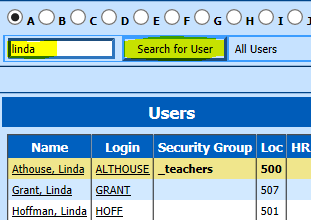
The Users area displays the Name,
Login, Security Group [if assigned] and Employee ID when viewing Users.
Security Groups
Search 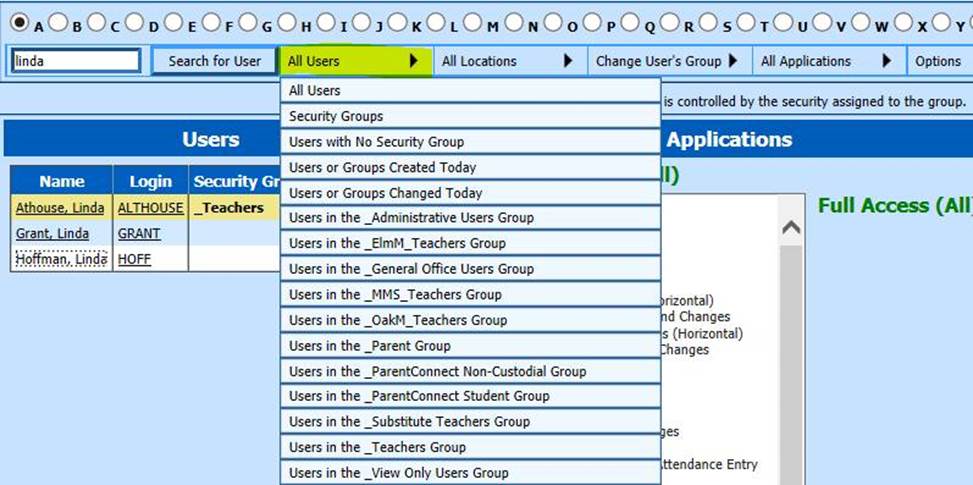
All Users – Displays for
selection All Users by Name.
Security Groups – Displays for selection
Your Defined Security Groups.
Users with No Security Group – Displays
for selection Users who have not been assigned to a group, that have an
individual security setup.
Users or Groups Created Today – Display any
Users or Groups who have been created today.
Users or Groups Changed
Today - Display any Users or Groups who have been changed today.
Users
in the _ Categories listed will display Users for selection from Your Defined
Security Groups.
Locations
Search 
All Locations – Displays for
selection All Locations by Name.
Users with No Location – Displays for
selection Users who have not been assigned to a Location.
Users at
Categories listed will display Users for selection from Your Defined Location
Groups.
Change User’s
Group
This option will
allow you to move a User to a new security group and displays all possible
options to move the User into.
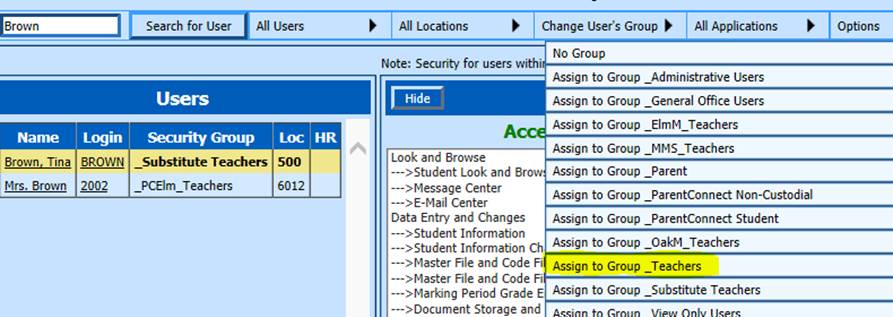
1. Select User to be moved [Tina Brown]. This can be done by searching Under All Users, select the Group to which the User to be moved is presently assigned [Users in the _substitute Teachers Group] or by Alpha or Name Search.
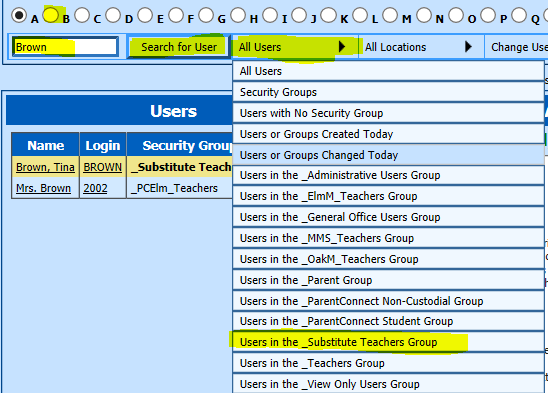
o Under Users, select the User to be moved to a New Group [Tina Brown]
o 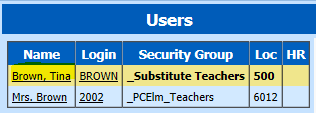
2. Under Change User’s Group, select the Group to move the selected User into [Assign to Group _teachers]
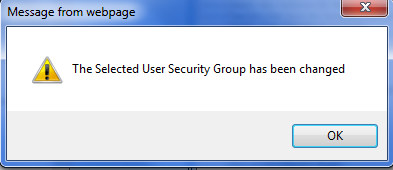
3. While processing, the system will generate a Please Wait message. When the process is complete, an information message box will display. Read the message to confirm the process status. Select OK.

All Applications
This option will
allow you to view the areas of the program a selected group or user has access
to. 
All
Applications will display every area of the program. The security area is
divided into three groups:
By selecting the different options under All
Applications, you can pinpoint your view to work with within the Applications,
Reports and Views. 
All
Applications – Displays all areas of the programs.
Administrative –
Displays only Administrative areas [Processing Center, Administrative Utilities,
etc.].
Look & Browse – Displays only Look & Browse areas.
Student Entry & Changes – Displays only Student Entry & Changes
areas.
Teacher Web – Displays only Teacher Web areas.
Parent
Connect – Displays only Parent Connect areas.
Options
This area allows you to Change
User information, Add New User(s) or Group(s), Mass Reset Passwords with an
option to force users to adjust to strong passwords, and Roll Back Settings.

Toggle Scrolling
Allows you to use toggle scrolling to scroll up and down each
individual Access/No Access column within groups. With this display option your
screen can remain in place while you scroll through the available columns making
comparisons easy. 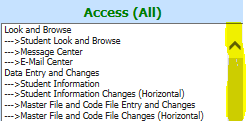
Change User Information
This area
allows you to change basic information regarding a User, or Delete a User from
Security. 
Select User: Select User to Change.
Change User Information. Adjust a User Name, E-Mail Address, School
Location or Home Room number, Select Save. When the process is complete, the
Change User display will close, an information message box will display. Read
the message to confirm the process status. Select OK.
Password - Assign
a new Password, Confirm Password. Option: Check User must change password at
next login if you choose to force a password change. Select Save. When the
process is complete, the Change User display will close, an information message
box will display. Read the message to confirm the process status.
Delete
– Delete User from Security. Select User. Select Delete. Read the message to
confirm the process. Select OK to continue. Select Cancel to Exit the process
without deleting. Read the message to confirm the process status.
Close to Exit.
New User Setup
Allows
you to Create a New Security User.
Enter the User ID, User Name 
Add Password and Confirm
Password. 
Security Group Option – Select a
Security Group from the dropdown to assign this User. 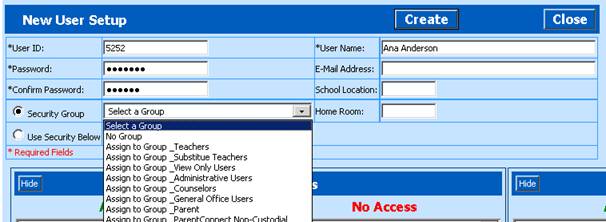
OR
User Security Below
– Select a User with the same security access as your New User [This would need
to be done before entering the New User area]. Or Adjust the Security to your
New Users needs [for more information on adjusting the security, see the Adjust
User Security section below] 
Option: User must change password at
next login [Prompts User to change password on first login]. 
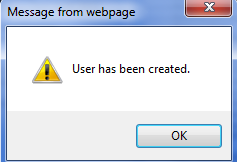
Select Create  when the process is complete, an information
message box will display. Read the message to confirm the process status. Select
OK.
Select Close  to Exit New User or Group Setup.
New Group Setup
Security Groups allow you to easily organize user security
access for various groups of Users, such as, Teachers grouped by Location.
Enter the User ID: _New Group [The Underscore in the first character
designates it as a Group].
Enter the User Name: New Group Name
Security Settings:
Security Group Option – Select a Security Group
from the dropdown to assign this User. 
OR
User Security Below –
Select a User with the same security access as your New User [This would need to
be done before entering the New User area]. Or Adjust the Security to your New
Users needs [for more information on adjusting the security, see the Adjust
User Security section below] 
Note: The password options are
ignored for Group creation. 
Select Create  .
.
When the process is complete, an
information message box will display. Read the message to confirm the process
status. Select OK. 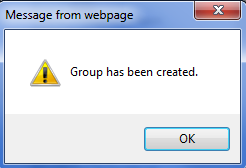
Select Close  to Exit Add New User or Group Setup.
Mass Reset Passwords
This is especially useful to ensure a more secure data
environment. In this area you can reset all passwords for a group and initiate
the use for Strong Passwords for ALL Users. The maximum password age option
allows for an added depth of security.
To Mass Reset Passwords for an
Entire Security Group or Users not assigned to a group, select the Group to
adjust from the Security Group drop down. 
Reset
Passwords
This will reset passwords for the group. Read the
message carefully, select OK or Cancel to Exit. 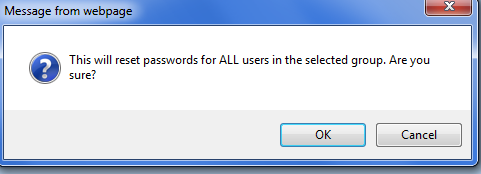
Force
Password Change
This option will force ALL users in
the selected area to change their passwords on their next login.
Select
Force Password Change. Read the Message carefully, select OK to proceed, Cancel
to Exit. 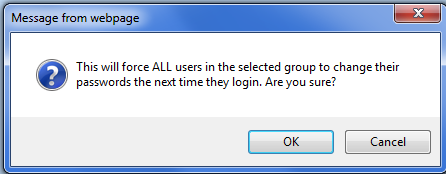
Force all users to have strong
passwords options Checkbox 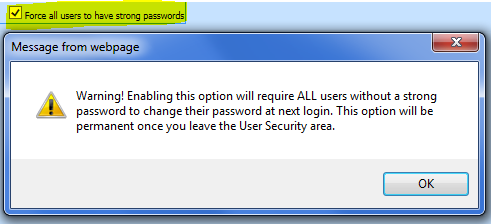
Force all users to have a strong
password, read the Message carefully. Select OK, all users will be required to
adjust their passwords to a secure password at their next login.
NOTE:
This option can be un-checked but once you leave the security area, if the
option is selected, it is PERMANENT.
Uncheck and read confirmation
message. 
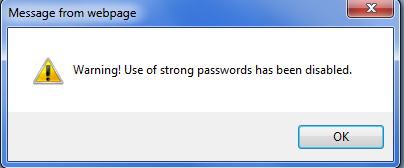
Users will receive this message when
the Strong Password option is initiated. 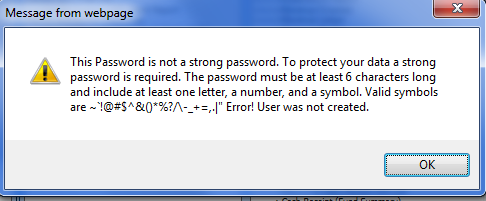
DO NOT select this option if you do
not want all Users to be required to have strong passwords;
however this
option is STONGLY RECOMMENDED for added Security.
Setting a Maximum Password Age
(Days)
This allows you to set mandatory password age.
This feature adds to your security and will force password changes for the user
based on the value entered. 
Select Close to Exit Mass Reset
Passwords
Roll Back
Options
This gives you
various options to Start Over.
Roll
Back Setting (Since Selected)
When you are adjusting security for a user, before you move
on to the next user, you have the option to Roll Back Settings (Since Selected).
This will undo all changes you have just made for the selected User in the
Access/No Access area. 
Roll Back Settings as of [Date]
After you have moved to a different
user, the Users will have a list of available dates to Roll Back to. Listed here
are all dates of security adjustments for a selected user. If the security
adjustment you have made is not what you need and you want to start over, select
one of the Roll Back Settings as of date options listed. This will Roll Back the
security settings for the selected user to the date you select.
Keep in
mind, the Roll Back by date will roll back EVERYTHING – including changes to
name, email, etc. to BEFORE any changes were made on the selected
day.
To Roll Back Security Settings
for a User or Group:
1. Select User or Group from the Users list
2. Select Options
3. Select the Roll Back Settings as of (date). When the date is selected the system will immediately Roll Back the user to the selected date.
4. Select the OK message confirming the Roll Back.
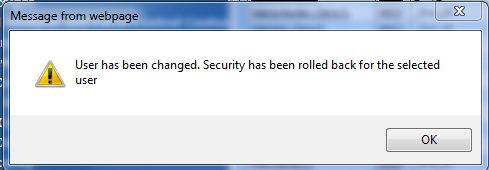
Adjust User Security
This area makes
adjusting user security clear and concise. All areas of the program can be
displayed or you can view sections. Adding and removing security is simple and
streamlined.
Adding Security
Areas
Select the User
or Group to adjust [Stella Adams], Stella’s security will display. Note: When
selecting a group to adjust, all Users in the selected Group will be
adjusted.
You will notice we have All Applications selected. This
will display every possible security option.
•The security area is divided into three groups:
1. All Applications – All menu areas of the program.
2. Reports – All report options in Student Reports and Student Assessment Management Reports.
3. View – All Views [entry or view only] within the Applications.
Within the security areas are
listed the areas the User or Group has Access to or has No Access
to. 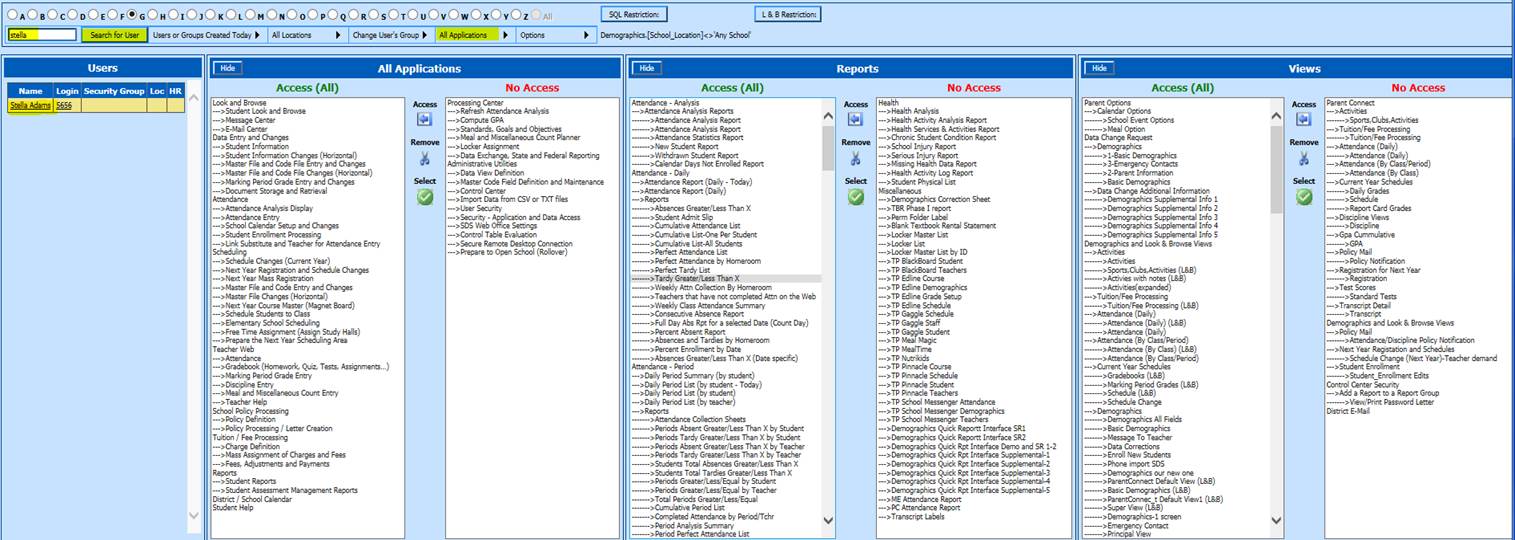
For a more specific view of
Stella’s Security, select All Applications and your area of choice
[Administrative] 
You’ll notice your list is
now only related to the Administrative areas in Applications, Reports and Views.
The Applications area will update its title with your changing Application
selection.
To give access to a selected
new area:
Highlight the area to give access [under No Access, under
Processing Center select all except Data Exchange, State and Federal Reporting.
•To select multiple areas in a block, select your first choice, hold down the Shift key and select the last choice. The block will highlight.
•Click and Drag, you may click and drag to select multiple items. Select your first choice and drag the mouse up or down to select multiple items.
•To pick and choose security options, select your first choice, hold down the Ctrl key and make the rest of your selections.
•To Select All Areas, select the Green Checkmark button  this will select All areas under Access or
No Access.
•Click the List box to unselect All Areas.

Select the Access Arrow
button  to move the selected security additions to
the Access column. The user now has access to all area of the Processing Center
except Data Exchange, State and Federal Reporting.
To give access to a complete area [User has Access to All
of Administrative Utilities]:
1. Highlight the title or the area to give access to under No Access, select the title of the area to give complete access to [Administrative Utilities].
2. Select
the Access Arrow Button 

3. User now has Access to the entire Administrative Utilities area

To Restrict Access to a Selected Area:
Highlight the area to be removed from
access [under Access, Processing Center, select Refresh Attendance Analysis]
•To select multiple areas in a block, select your first choice, hold down the Shift key and select the last choice. The block will highlight.
•Click and Drag, you may click and drag to select multiple items. Select your first choice and drag the mouse up or down to select multiple items.
•To pick and choose security options, select your first choice, hold down the Ctrl key and make the rest of your selections.
•To Select All Areas, select the Green Checkmark button  . This will select All areas under Access or
No Access.
•Click the List box to unselect All Areas.

Select the Remove Scissors
button  to move the selected security additions to
the No Access column. This user now has no access to the Refresh Attendance
Analysis area.
To remove access to a complete area [User no longer has Access to any of Administrative Utilities]. Highlight the title or the area to remove [under Access, select the title of the area to remove complete access to [Administrative Utilities].
Select the Remove Scissors Button 

User now has No Access to the entire Administrative Utilities area

Note: Hide/View
Columns in Application, Reports or Views Group
To hide a Group from View, select the Hide button  , the section will close.
To view the
Group again, select the + button  , the sections will be available.
Data Restrictions
This allows you to restrict User Access to Student
Data through the Application areas with SQL Restrictions. This is very useful
for restricting teachers to only their students and administrative users to only
their building etc. Look and Browse with L & B Restrictions are available
and only necessary if you need additional or different restrictions in Look and
Browse than in the User’s SQL Restrictions. An example of this would be a
teacher needing to view additional students, or a special restriction for a
counselor to only view their students in Look and Browse. Any User Restrictions
are listed below the selection buttons. 
Select SQL Restrictions or L
& B Restrictions, a new screen will open with Field and Value Filter
Options.
From Field: (Select a Field), you may choose any
field in Demographics.
From Value: You may select any value or
values. 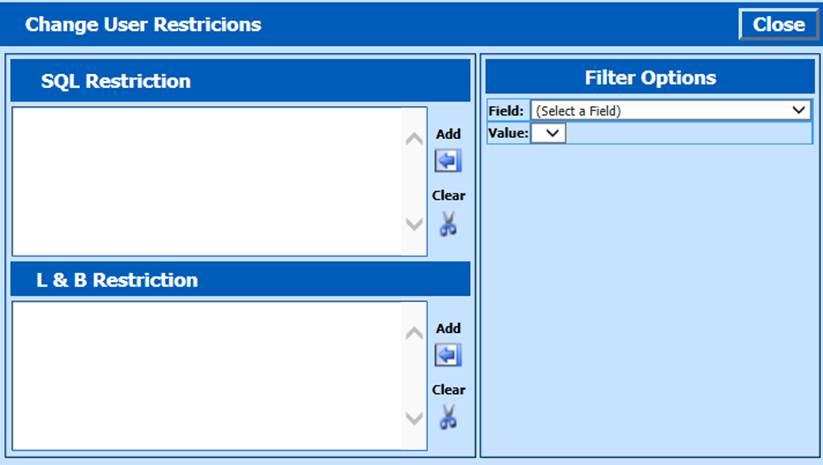
For example, to restrict a
User [Stella Adams] to only her Homeroom 114
Select Field: Home_Room
and Value: 114.
Select Add  to SQL Restriction (Applications, Reports to
only View those in Homeroom 114).
You may have multiple
restrictions. 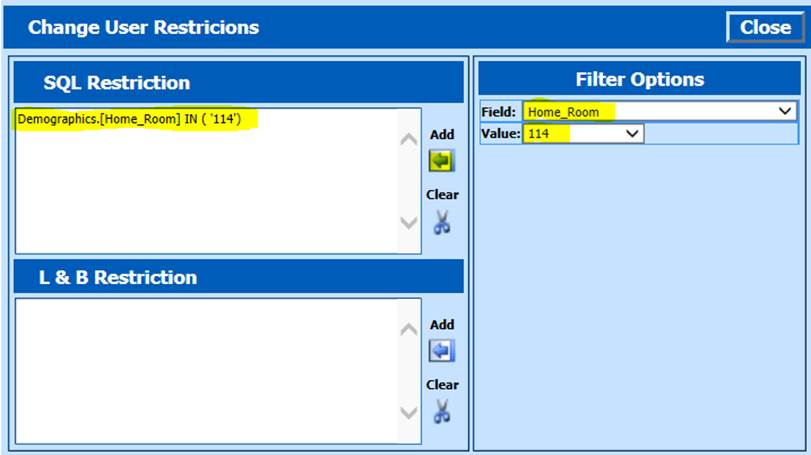
To Clear Selection, select
Clear 
Look & Browse Restriction
To Add a Filter to Look and Browse
From Field:
(Select a Field), you may choose any field in Demographics.
From
Value: You may select any value or values,
For example, to allow
Stella Adams to view additional students in Look and Browse
Select
Field: Student_Last_Name and Value: Adams.
Select
Add  to SQL Restriction.
Select
Additional Students IE: Harris and Miller, Add after each
selection.
You may have multiple restrictions. 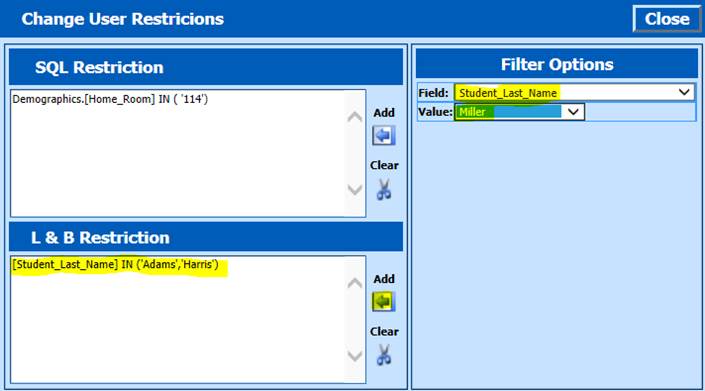
To Clear Selection, select Clear  .
.
To Exit, select Close 
The restrictions listed for the
selected User will update. 